
These carrot reverse canvas ideas are super cute and incredibly easy to make – PLUS they won’t break the bank. I have two tutorials waiting for you!

Crafting with a reverse canvas has made some pretty unique decor pieces and these are no different.
This post contains some affiliate links for your convenience. Click here to read my full disclosure policy.
KEEP READING TO SEE HOW EASY IT IS TO MAKE YOUR OWN CARROT REVERSE CANVAS.
I became obsessed with reverse canvas crafts after making my first Christmas-themed reverse canvas.
Since then, I’ve been able to create more for each season and I am just excited about these spring-themed ones as any before. Not to mention, the majority of the supplies come from Dollar Tree making it a design on a dime. Follow the easy tutorials below to make not one, but two, carrot reverse canvas crafts.
UPDATE: More spring reverse canvas inspiration! Make this faux window with botanical prints (FREE printable is included).
Crafting with Dollar Store Twine Carrots
I’m no stranger to crafting with these foam and twine carrots. Here are a few other crafts I’ve made with them:
HOW TO MAKE A CARROT PATCH REVERSE CANVAS
SUPPLIES NEEDED
- canvas – (1) 8×10 size
- 2 packs of twine-wrapped carrots (Dollar Tree, they come in a 4-pack)
- razor blade – I like this fingertip blade for projects like this
- scissors

- wood stain (Americana Gel Stain in Oak)
- flat paint brushes
- hot glue gun and hot glue

TUTORIAL: HOW TO MAKE CARROT PATCH REVERSE CANVAS
Follow this quick video, or read the step-by-step directions below.
- Use a razor blade to remove the canvas fabric from the wooden frame. Carefully work around the staples. If you want a smooth back to the project, remove the staples as well. This can be a bit tricky, so it’s really a matter of personal preference. For this project, I left the staples in.

- Stain the wooden frames and letters. Brush on an even coat of gel stain. Wipe away excess stain with a paper towel. Set aside to dry.
- Trim the canvas pieces down to size. Make sure that the canvas is cut just a bit smaller than the outside edge of the wooden frame.

- Using black heat transfer vinyl and any script you like, cut out the words “Carrot Patch,” center it onto the canvas and apply a heat press according to the instructions. Peel away acrylic backing.
- Reassemble the wood frame onto the canvas by applying hot glue to the back of the wood. Work quickly and be sure to get a fair amount in each corner and the center of each frame side. Set the canvas in place on the frame back and press to secure. Trim away any excess canvas that hangs over the edges.
- To assemble the carrot patch: grab the 2 packs of carrots and cut them down to different sizes (they are foam inside and easy to cut using craft scissors).

- Hot glue the carrots to the canvas in any order of preference.
- To cover the exposed foam: use the twine from the cut bottom pieces and make little wrapped discs. Apply them to the exposed foam using hot glue.


OPTIONAL: To give your carrot patch a “fresh from the ground” look, add raffia (straw-like material) and hot glue pieces between the carrots.

How cute did this turn out?! It’s the perfect size for hanging on the wall or even using for a small door hanger.

Carrot Patch Reverse Canvas
Easily create a carrot patch reverse canvas to add to your spring decor!
Materials
- canvas – (1) 8×10 size
- 2 packs of twine-wrapped carrots (Dollar Tree, they come in a 4-pack)
- razor blade – I like this fingertip blade for projects like this
- scissors
- wood stain (Americana Gel Stain in Oak)
- flat paint brushes
- hot glue gun and hot glue
Instructions
- Use a razor blade to remove the canvas fabric from the wooden frame. Carefully work around the staples. If you want a smooth back to the project, remove the staples as well. This can be a bit tricky, so it’s really a matter of personal preference. For this project, I left the staples in.
- Stain the wooden frames and letters. Brush on an even coat of gel stain. Wipe away excess stain with a paper towel. Set aside to dry.
- Trim the canvas pieces down to size. Make sure that the canvas is cut just a bit smaller than the outside edge of the wooden frame.
- Using black heat transfer vinyl and any script you like, cut out the words "Carrot Patch," center it onto the canvas and apply a heat press according to the instructions. Peel away acrylic backing.
- Reassemble the wood border onto the canvas by applying hot glue to the back of the wooden frame. Work quickly and be sure to get a fair amount in each corner and the center of each frame side. Set the canvas in place on the frame back and press to secure. Trim away any excess canvas that hangs over the edges.
- To assemble the carrot patch: grab the 2 packs of carrots and cut them down to different sizes (they are foam inside and easy to cut using craft scissors).
- Hot glue the carrots to the canvas in any order of preference.
- To cover the exposed foam: use the twine from the cut bottom pieces and make little wrapped discs. Apply them to the exposed foam using hot glue.
OPTIONAL: To give your carrot patch a "ground" look, add raffia (straw-like material) and hot glue pieces between the carrots.
HOW TO MAKE A FAUX SHIPLAP CARROT BUNCH REVERSE CANVAS
SUPPLIES NEEDED
- canvas – (1) 8×10 size
- 3 twine-wrapped carrots (Dollar Tree, they come in a 4-pack)
- razor blade – I like this fingertip blade for projects like this
- scissors (heavy duty craft shears)
- chalk paint (Waverly chalk paint in white) and wood stain (Americana Gel Stain in Oak)
- flat paint brushes
- hot glue gun and hot glue
- large craft sticks
- Buffalo check ribbon

HOW TO MAKE A FAUX SHIPLAP CARROT BUNCH REVERSE CANVAS
Follow this quick video, or read the step-by-step directions below.
- Use a razor blade to remove the canvas fabric from the wooden frame. Carefully work around the staples. If you want a smooth back to the project, remove the staples as well. This can be a bit tricky, so it’s really a matter of personal preference. For this project, I left the staples in.
- Stain the wooden frames and letters. Brush on an even coat of gel stain. Wipe away excess stain with a paper towel. Set aside to dry.
- Trim the canvas pieces down to size. Make sure that the canvas is cut just a bit smaller than the outside edge of the wooden frame.
- Reassemble the wood border onto the canvas by applying hot glue to the back of the wooden frame. Work quickly and be sure to get a fair amount in each corner and the center of each frame side. Set the canvas in place on the frame back and press to secure. Trim away any excess canvas that hangs over the edges.
- To create the faux shiplap background: using your craft shears, cut off the rounded ends of the craft sticks and begin laying them in a plank/shiplap-type pattern. It does not have to equal or identical. Do not hot glue them to the canvas yet.
- Remove them from the canvas in the order that you laid them and place them onto a paint-safe surface. (I used an open manilla folder). Paint the sticks using white chalk paint (or any type of white paint of your choice).
- Once the craft sticks are dry, hot glue them to the reverse canvas.

- Take 3 carrots and position them centered onto the shiplap background and hot glue them into place.
- Make a simple bow with the check ribbon and hot glue it to the top of the center carrot.


I love how this turned out. The shiplap really added a farmhouse theme, which is a theme I love having in my home.

Faux Shiplap Carrot Bunch Reverse Canvas
Create a faux shiplap carrot bunch reverse canvas in just a few easy steps!
Materials
- canvas – (1) 8×10 size
- 3 twine-wrapped carrots (Dollar Tree, they come in a 4-pack)
- razor blade – I like this fingertip blade for projects like this
- scissors (heavy duty craft shears)
- chalk paint (Waverly chalk paint in white) and wood stain (Americana Gel Stain in Oak)
- flat paint brushes
- hot glue gun and hot glue
- large craft sticks
- Buffalo check ribbon
Instructions
- Use a razor blade to remove the canvas fabric from the wooden frame. Carefully work around the staples. If you want a smooth back to the project, remove the staples as well. This can be a bit tricky, so it’s really a matter of personal preference. For this project, I left the staples in.
- Stain the wooden frames and letters. Brush on an even coat of gel stain. Wipe away excess stain with a paper towel. Set aside to dry.
- Trim the canvas pieces down to size. Make sure that the canvas is cut just a bit smaller than the outside edge of the wooden frame.
- Reassemble the wood border onto the canvas by applying hot glue to the back of the wooden frame. Work quickly and be sure to get a fair amount in each corner and the center of each frame side. Set the canvas in place on the frame back and press to secure. Trim away any excess canvas that hangs over the edges.
- To create the faux shiplap background: using your craft shears, cut off the rounded ends of the craft sticks and begin laying them in a plank/shiplap-type pattern. It does not have to equal or identical. Do not hot glue them to the canvas yet.
- Remove them from the canvas in the order that you laid them and place them onto a paint-safe surface. (I used an open manilla folder). Paint the sticks using white chalk paint (or any type of white paint of your choice).
- Once the craft sticks are dry, hot glue them to the reverse canvas.
- Take 3 carrots and position them centered onto the shiplap background and hot glue them into place.
- Make a simple bow with the check ribbon and hot glue it to the top of the center carrot.
DON’T FORGET TO PIN THESE REVERSE CARROT CANVAS IDEAS FOR LATER:

Craft Ideas from the Blog Archives
More Spring and Easter Crafts and Decor:
- Dollar Store Easter Craft: DIY Foam Dice Bunny
- Make a Book Page Pennant Banner for Spring
- Dollar Tree Hanging Spring Flower Bucket
- Easter Egg Art {A Dollar Store Craft}
- Faux Stone Bunny Craft – An Easy Easter DIY
- Bunny Mason Jar Terrarium
- Dollar Store Mini Wooden Block Bunny Craft
- FREE Printable Easter Treat Labels – For Jars and Bags
- Pretty Floral Easter Eggs, 2 Different Ways
- DIY Spring Carrot Button Art – on a Dollar Store Mini Easel
Roundup Posts FULL of Spring Crafting Inspiration
- 15 Beautiful Spring Dollar Store Crafts
- Spring Wreath Inspiration from the Dollar Store – 25 GORGEOUS Crafts
- Spring is Here! Celebrate with Cute Easter Mason Jar Crafts
- So Pretty! Mason Jar Crafts and Tutorials for Spring
- Beautiful Easter Eggs You’ve Got to See
- A “Bunch” of Creative Spring Carrot Crafts
Spring and Easter Wreath Ideas:
Dollar Store Twine Carrot Crafts
Here are my favorite crafts made with Dollar Tree twine-wrapped foam carrots.

Faux Shiplap Carrot Bunch Reverse Canvas
Create a faux shiplap carrot bunch reverse canvas in just a few easy steps!

Dollar Store Carrot Wreath
Grab a few dollar store supplies and transform an Easter egg wreath form into a fun Easter carrot wreath to decorate this spring.

Spring Dollar Store Carrot Garland with Mini Flower Pots
Grab a sew spring craft supplies from Dollar Tree – we’re making a Dollar Store Carrot Garland with Mini Flower Pots added in.

Dollar Store Cloche Carrot Terrarium
Grab a plastic cloche dome from Dollar Tree and make a cute little carrot terrarium to decorate for Easter.

Dollar Store Carrot Burlap Bag
Decorate your door with this DIY Dollar Store Carrot Burlap Bag Door Hanger this spring – it’s a great way to add a bit of Easter charm with farmhouse style.

Dollar Store Twine Carrot Centerpiece
Grab some twine carrots and a plastic barrel planter to make this quick and easy DIY Dollar Store Twine Carrot Centerpiece to decorate for spring and Easter.
Reverse Canvas Projects
Here are all of the crafts and DIY decor projects that I've made using the "reverse canvas" technique.
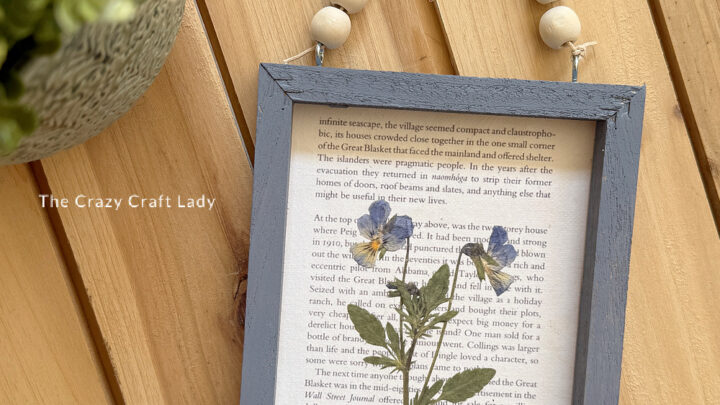
Book Page Reverse Canvas
Create a beautiful reverse canvas wall hanging with this step-by-step tutorial using Dollar Tree supplies and beginner-friendly techniques.
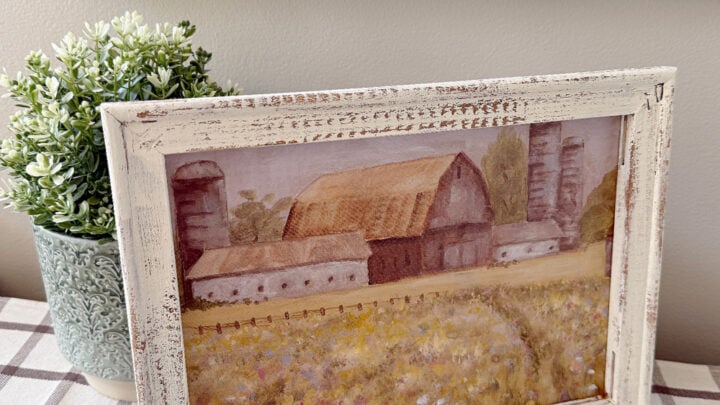
Spring Calendar Page Reverse Canvas Craft
Create budget-friendly farmhouse wall decor with this busted canvas craft using Mod Podge, paint, and a calendar page.

Dollar Store Wall Decal Reverse Canvas Craft
Use dollar store supplies to make a custom framed wall decal reverse canvas craft to decorate your walls in a new unique way.

Reverse Canvas American Flag
Add a touch of red, white, and blue to your summer decor with this dollar store reverse canvas American flag craft.

Reverse Canvas Window
Have you tried making a "reverse canvas" craft yet? Grab 4 small canvasses (from the dollar store or the craft store) and a string of mini lights to make this winter window scene to decorate your home.
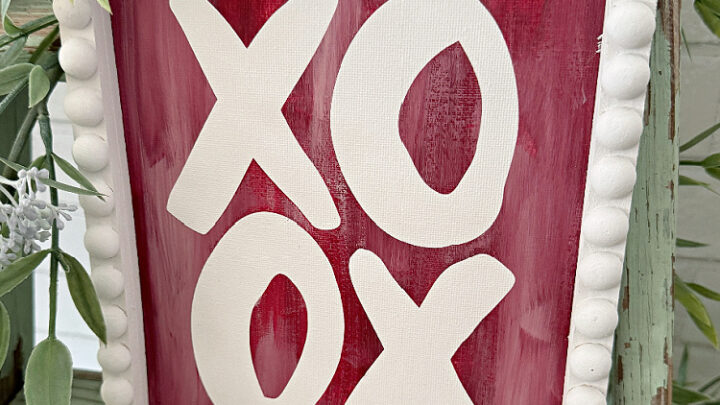
XOXO Canvas
Grab a canvas from Dollar Tree and turn it into an XOXO Canvas, the perfect way to decorate on a dime this Valentine season.
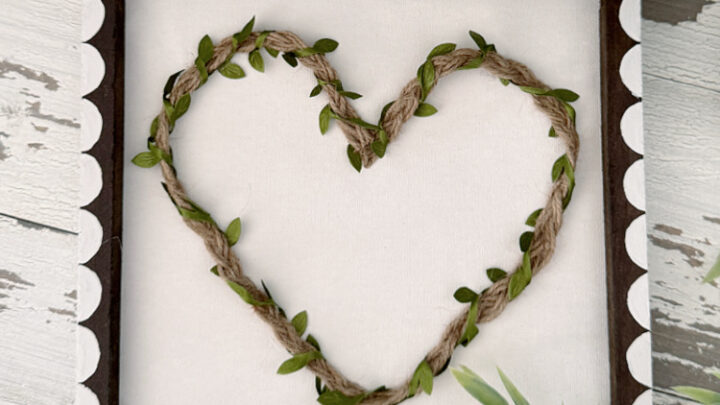
Reverse Canvas Valentine Heart
If you're looking for an inexpensive way to decorate this Valentine's Day, then you'll love this Reverse Canvas Valentine Heart craft.

Christmas Reverse Canvas - 2 Ways
Use a stretched canvas to make a unique piece of framed DIY wall decor, with this Christmas reverse canvas tutorial. Make a custom piece of Christmas wall decor in no time.

Dollar Tree Fall Reverse Canvas - 2 Ways
Grab some dollar store supplies and make these two cute Dollar Tree Fall Reverse Canvas crafts to decorate this autumn.

Tassel Tree Craft
This tassel tree craft is the perfect Christmas craft and is made using Dollar Store supplies!

Reverse Canvas Christmas Ornaments
Give your tree a new look with reverse canvas Christmas ornaments.
Faux Shiplap Carrot Bunch Reverse Canvas
Create a faux shiplap carrot bunch reverse canvas in just a few easy steps!

Faux Shiplap JOY Christmas Sign
Let’s make a Christmas craft filled with tons of farmhouse style. Use some basic unfinished wood supplies and paint to make this faux shiplap Christmas sign.

DIY Botanical Prints Reverse Canvas
Grab a pack of stretched canvases to make this DIY Faux Window Picture Frame Project using a FREE botanical printable.

Reverse Canvas Lantern
Use stretched canvases and a plastic cutting mat to make a cute lantern to decorate for fall and winter.

Tin Tile Reverse Canvas
Making this Tin Tile Reverse Canvas takes just a few Dollar Tree supplies and is an easy way to add a festive touch to your home decor.