Learn how to make an easy Dollar Tree reverse canvas craft using a book page printable, Mod Podge, and a simple wood bead hanger. Perfect for spring decor.

This post contains some affiliate links for your convenience. Click here to read my full disclosure policy.
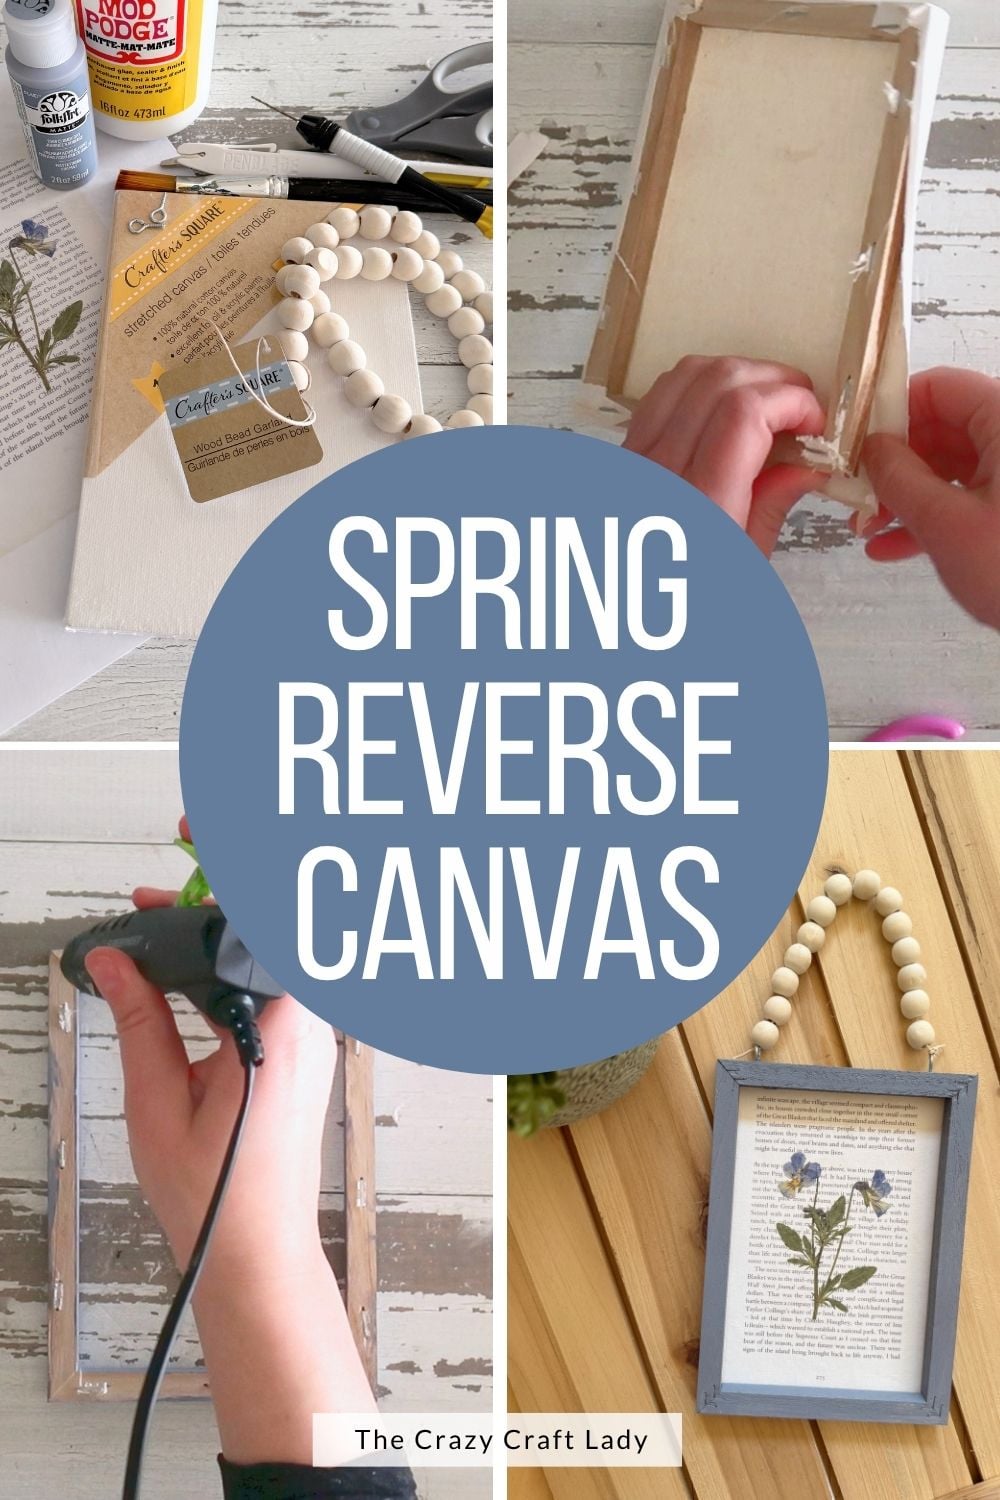
If you’ve never tried making a reverse canvas before, this is your sign, because it might be one of the easiest (and cutest!) Dollar Tree crafts out there. We’re taking a simple 5×7 stretched canvas and flipping it into a sweet little framed piece of art, complete with a printable and a beaded hanger. This one is perfect for spring, but honestly? Just swap out the printable and you can use this idea year-round.
Video Tutorial: Book Page Reverse Canvas
Watch this quick video to see how this craft came together:

Book Page Reverse Canvas
Create a beautiful reverse canvas wall hanging with this step-by-step tutorial using Dollar Tree supplies and beginner-friendly techniques.
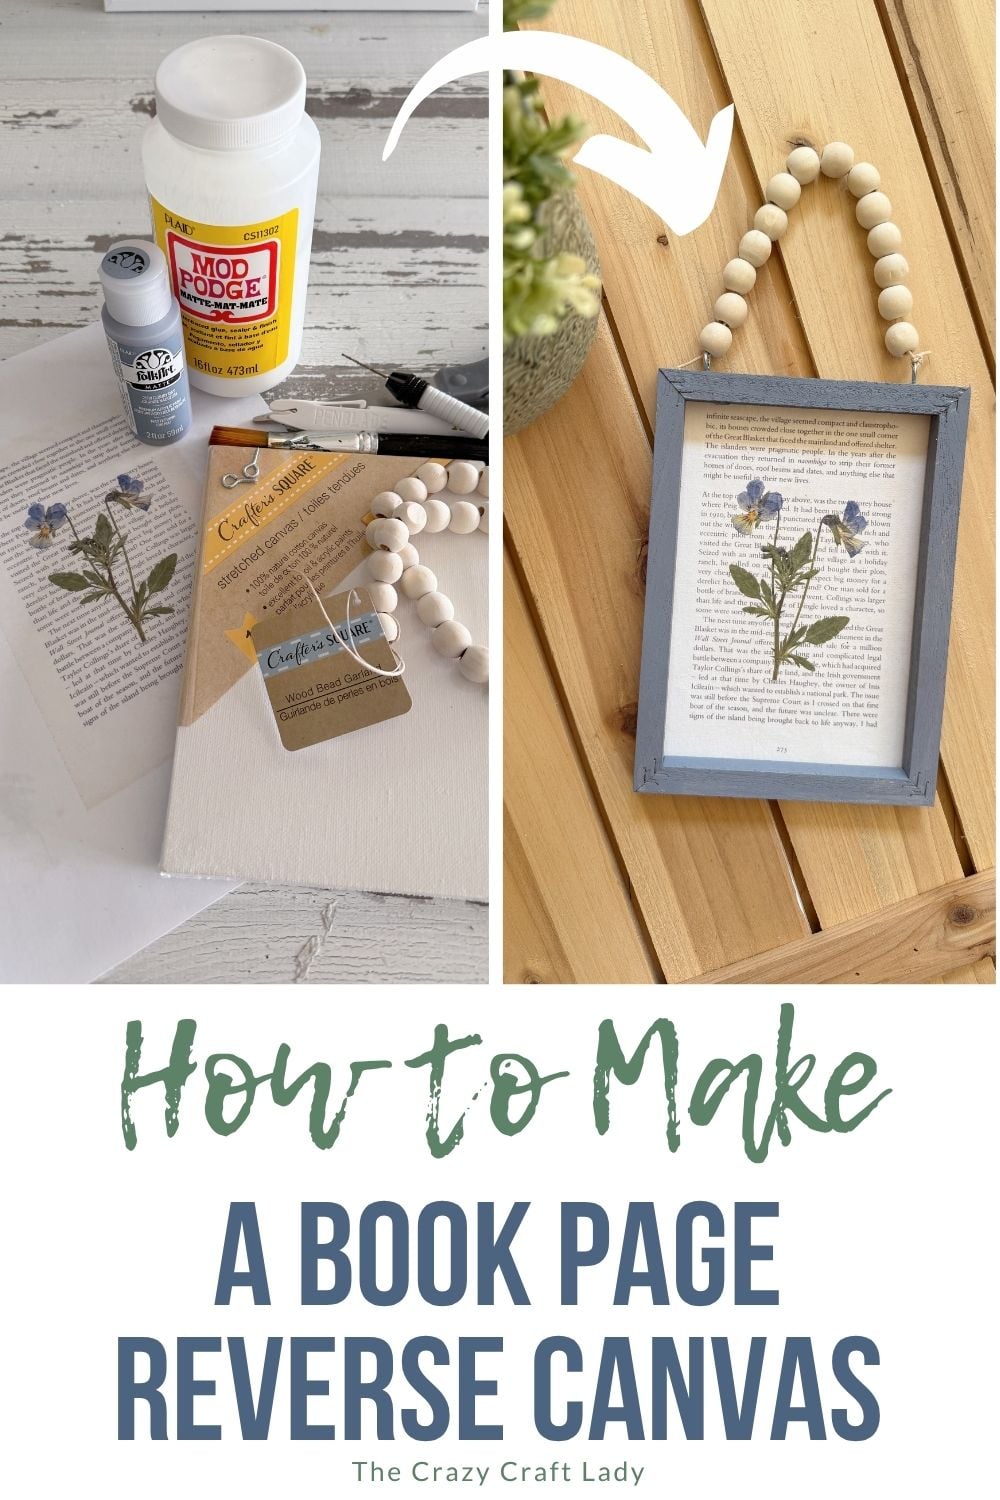
Materials
- 5x7 stretched canvas (Dollar Tree)
- Printed image or printable
- Mod Podge (matte or satin)
- Acrylic or chalk paint (I used FolkArt Matte in “Cloudy Day”)
- Small wood bead garland (Dollar Tree) or wood beads and twine
- 2 small screw eye hooks
- optional: brayer or smoothing tool
Tools
- Pen blade or craft knife
- Scissors
- Paintbrush (1-inch flat works great)
- Hot glue gun
- Pin vise (or small hand drill)
- Pencil or marker
Instructions
- Watch the video. Follow along with the video tutorial for a step-by-step walkthrough of how to make your own book page reverse canvas craft.
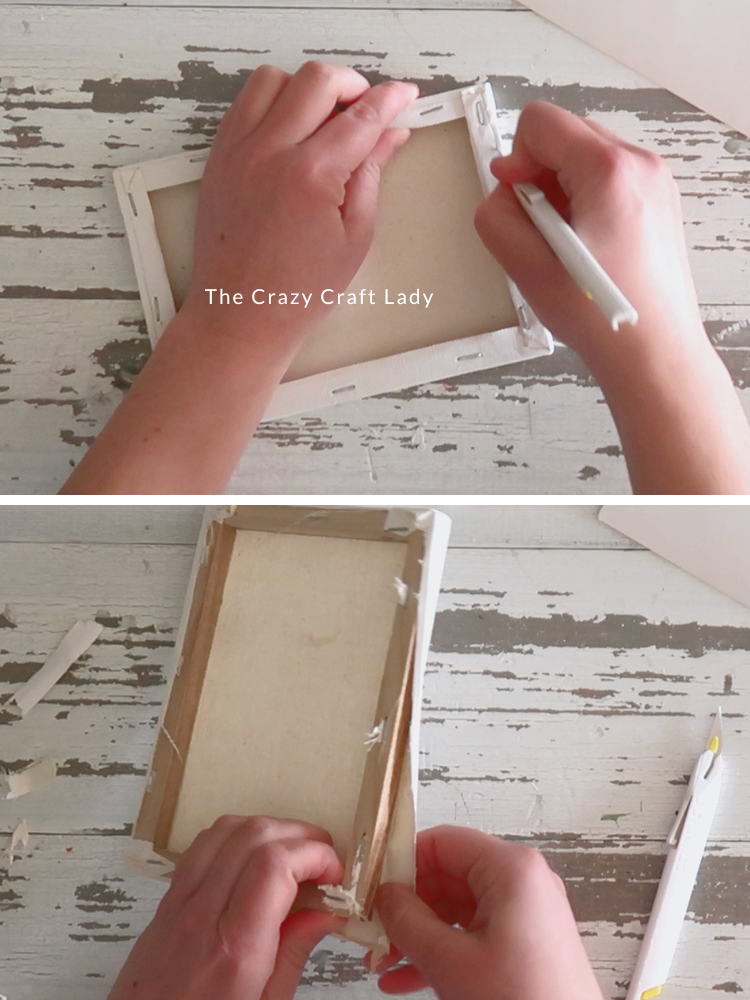
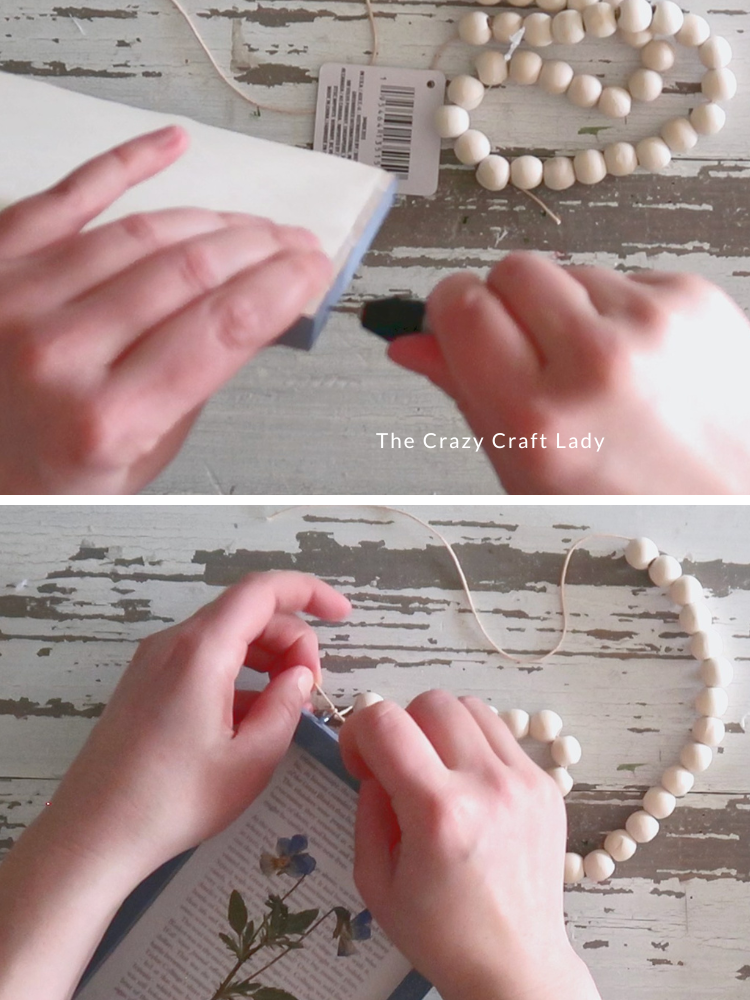
- Remove the Canvas. Start by flipping your canvas over and using a pen blade to carefully cut around the back edge. You’ll need to go over the corners a few extra times since there are multiple layers. Once it’s cut, peel the canvas off the frame. If it’s a little messy (some are!), just use pliers to remove any leftover threads or loose staples.

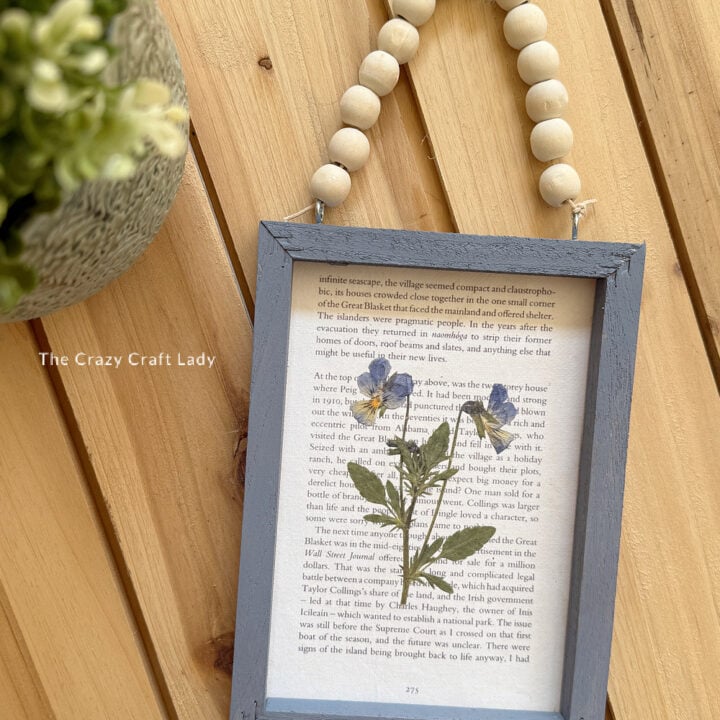
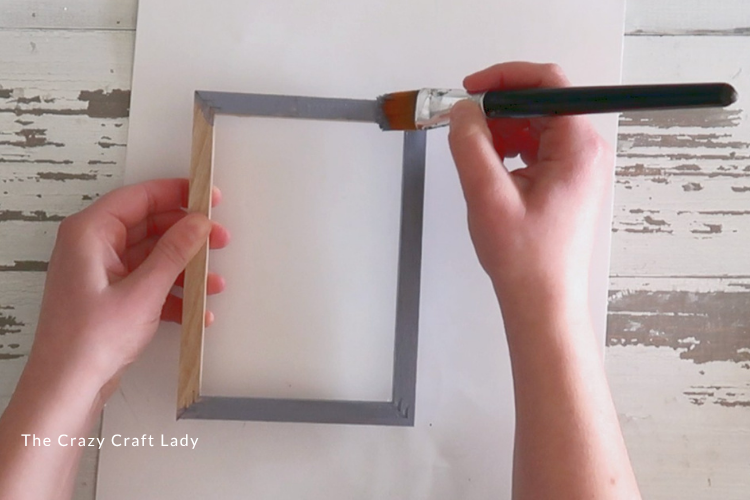
- Paint the Frame. Paint the wooden frame in your color of choice. I used a soft gray (Cloudy Day) to coordinate with my printable. Paint the front, inside edges, and outer sides, but skip the back since it’ll be covered later. Let dry completely.

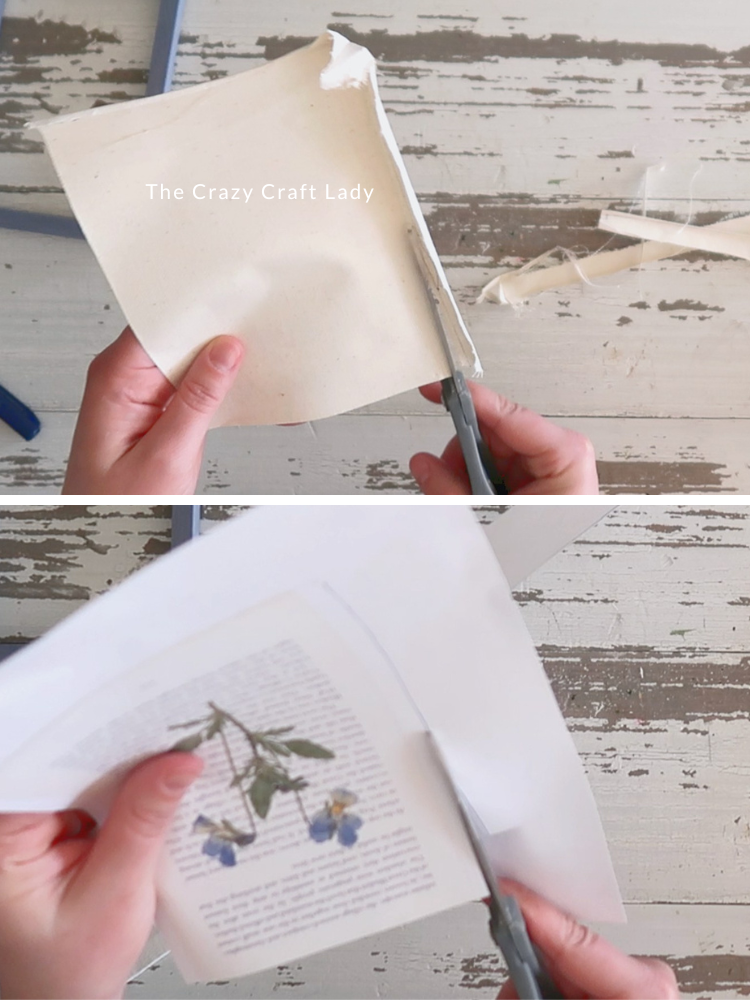
- Trim the Canvas. Trace the frame onto your removed canvas piece. Then cut just inside that line (about 1/8 inch smaller). Test fit it, and trim a little more if needed so it won’t stick out when attached.
- Prep Your Printable. Print your design, then trace your trimmed canvas onto the paper. Cut the paper just inside that line so it’s the same size, or slightly smaller, than your canvas.
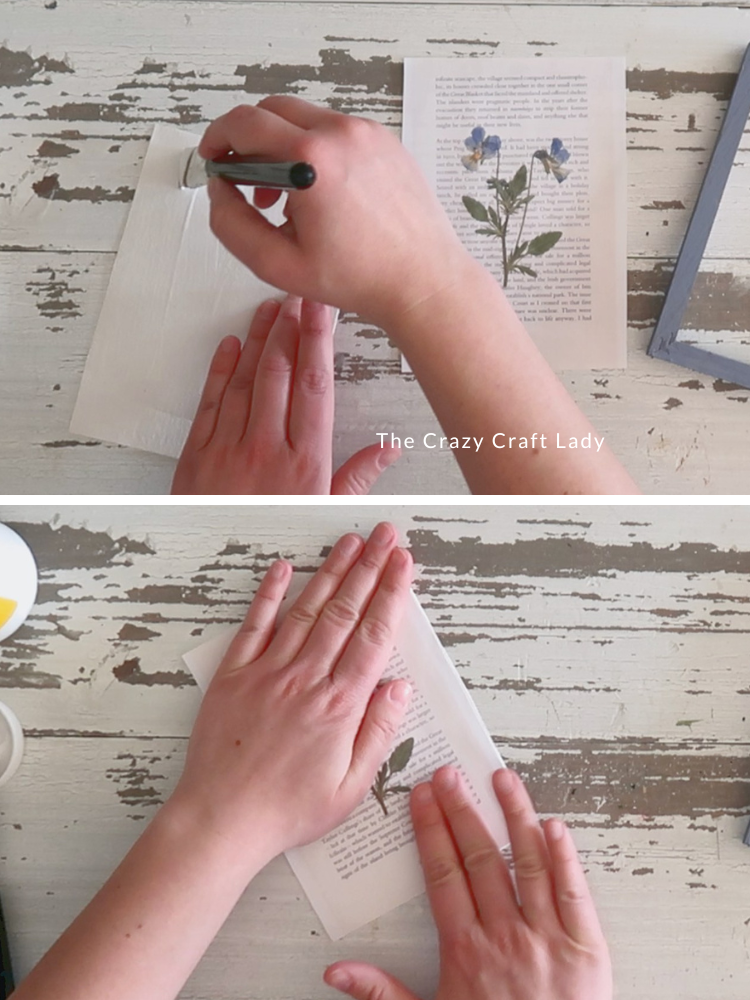
- Mod Podge the Image. Apply a thin, even coat of Mod Podge to the canvas piece. Lay your printed image on top and smooth it out. Use your fingers (or a brayer if you have one) to push bubbles from the center outward. Pro tip: Place the piece inside a book while drying to prevent curling.
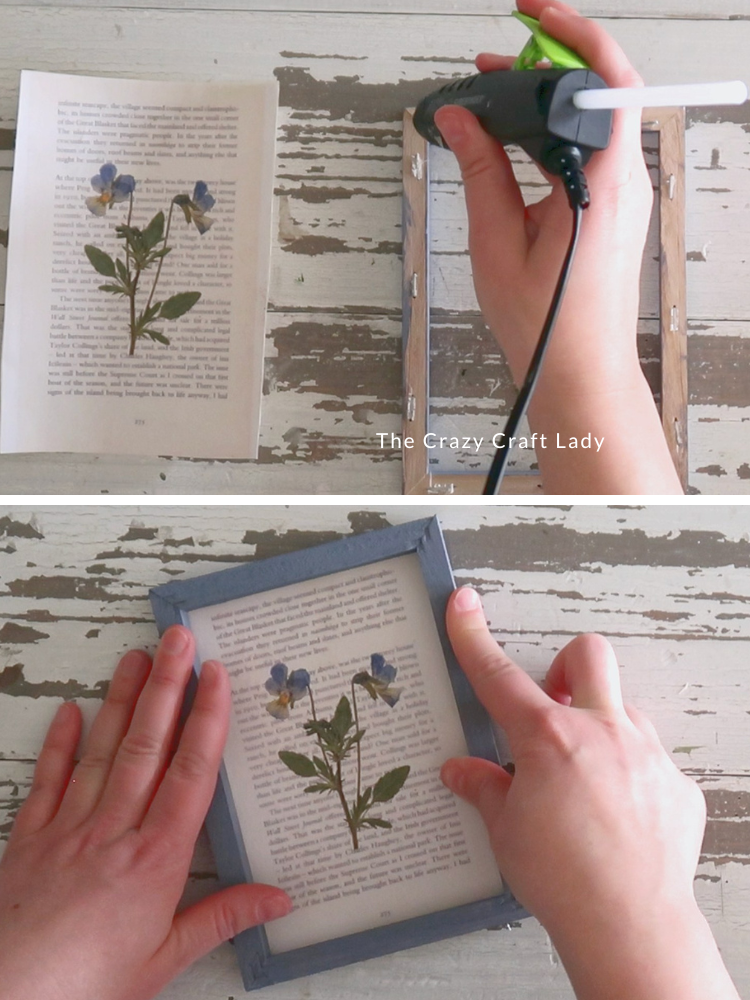
- Attach the Frame. Flip your frame over to the back side. Run a line of hot glue around the edges, then press it onto your canvas + image piece. Now your image is secured neatly inside the frame opening.
- Add a Hanger. Mark two spots about an inch in from each top corner. Use a pin vise to create small pilot holes. Twist in your screw eye hooks. Thread twine (or your wood bead garland) through each side and tie simple knots. Adjust the length to your liking and trim the ends.
The Finished Reverse Canvas Craft
This reverse canvas craft is one of those projects that looks way more high-end than it actually is, and I’m always here for that.
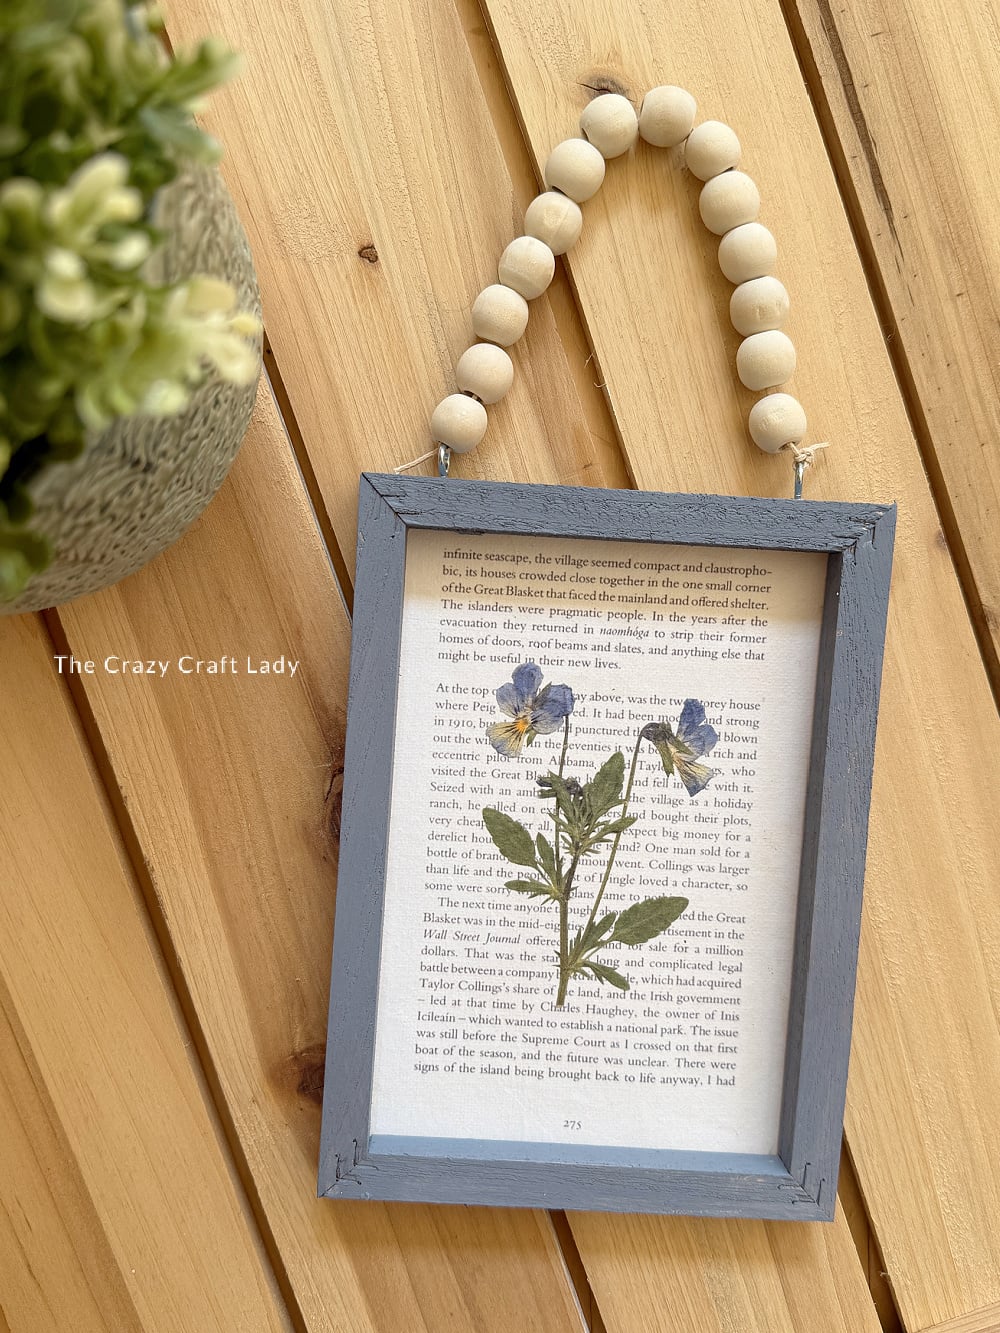
You can switch up the paint color, use seasonal printables, or even add embellishments like greenery or mini bows. It’s such an easy way to create custom decor on a budget.
Honestly, once you make one… you’re going to want to make ten more!
PIN this craft for later: