
Learn step-by-step how to make a reverse canvas – with or without a Cricut cutting machine. This technique makes a great background for photos, artwork and more.

Learn everything you need to know about reverse canvases here!
This post contains some affiliate links for your convenience. Click here to read my full disclosure policy.
I’m pretty obsessed with a recent craft trend: The Reverse Canvas. This craft seems to have started with Cricut crafters who wanted to make cute wall decor pieces – without having to go through the hassle of building their own wood frames. The reverse canvas method seemed like a perfect solution.
What is a reverse canvas?
This one is pretty self-explanatory. It’s a canvas…. In reverse.
Think about stretched canvasses that you can purchase at any art supply store. There meant to be painted on. BUT, if you remove the fabric canvas, you will expose an unfinished wood frame. And from there the design possibilities are endless.
Just remove the canvas, decorate, and than re-attach the canvas to the back of the frame. This creates the illusion of a piece of framed wall decor.
Reverse Canvas 101 – Everything You Need to Know (VIDEO Tutorial)
I made this video walking you through the whole process, and I made THREE new canvas crafts in the process.
Helpful timestamps:
- 1:25 – What is a reverse canvas?
- 2:18 – Where to buy canvases
- 4:06 – Step 1 – remove the canvas from the frame
- 10:10 – Step 2 – prep the frame
- 12:55 – Step 3 – add design elements to your canvas
- 13:19 – printables/photos
- 19:06 – stencils
- 23:56 – Cricut
- 26:07 – Step 4 – reattach canvas to wood frame
- 29:26 Step 5 – (optional) embellish the frame
- 31:15 – Step 6 – hang your reverse canvas on the wall
Reverse Canvas Supplies
**Scroll to the end of this blog post and look for the pink box to see a comprehensive list of links to ALL supplies and tutorials mentioned in this post and in the YouTube video**
First and foremost, you will need a canvas. Here are a couple of helpful considerations when choosing your canvas.
What kind of canvas should I use?
dollar store canvas
Dollar Tree stores carry a pretty respectable selection of craft supplies, and I have purchased many canvases there. However, if your local store doesn’t carry canvases, don’t worry. You can order them online!
I have seen canvases in 8×10-inch and 5×7-inch size options in Dollar Tree stores. I’ve even seen an 8×8-inch option on their website.

craft store canvas
Most craft stores – Michaels, Hobby Lobby, Blick, JoAnn, etc. – sell stretched artist canvases. They come in ALL sorts of sizes, making this a great choice if you want to make a variety of size reverse canvases.
I like to buy multi-packs of canvases and then stack a coupon or sale on top of it. By doing this, you won’t pay much more than $1 per 8×10-inch canvas.
What size canvas should I select?
In this tutorial, I used all 8×10 canvases. If you’re just starting out, this is a very manageable size to work with. Feel free to choose whatever size you like.
What other supplies will I need?
After you read (or watch) this tutorial, you will see there are a TON of ways to decorate your reverse canvas. With that being said, the supply list will really vary depending on your selection.
Here are some basic supplies that you will need for ALL reverse canvas crafts:
- canvas
- Penblade or razor blade
- scissors
- hot glue gun and hot glue sticks
- paint or stain (for the frame)
- embellishments for the canvas
- hanging hardware for the back of your project
Reverse Canvas Step-by-Step Tutorial (the basic technique that you can customize any way you like)
Here’s a step-by-step process for making a reverse canvas of your own, with plenty of customization options along the way.
Step 1: Remove the Canvas from the Frame

Use a razor blade or x-acto knife to remove the canvas fabric from the wooden frame. Trim all the way around the back of the frame, carefully working around the staples. If you want a smooth back to the project, remove the staples as well. This can be a bit tricky, so it’s really a matter of personal preference. Most of the time, I leave the staples in.
Cut the Canvas Down to Size
Use fabric scissors to cut the canvas down to size – so that you have a canvas rectangle that is just a bit smaller than the outer edge of the frame. You can just throw away the excess canvas pieces.

TIP: When trimming your canvas, leave a little extra around the edges. You can always trim more off, but you can’t add more on.
Step 2: Prep the Frame
OPTION 1 – LEAVE UNFINISHED
This is the easiest option. If you like the look of unfinished wood, why mess with it? Just leave it as-is.

OPTION 2 – PAINT
Acrylic paint or chalky finish paints work great. Paint a solid coat for full coverage, or use a dry brush technique to let a bit of wood grain show though for a more weathered finish.
OPTION 3 – WOOD STAIN
Waverly or Folk Art wax or gel stains are my go-to choices for staining small wood projects. They don’t have all the nasty fumes that regular wood stains do. Just brush on and wipe off excess with a paper towel.
OPTION 4 – GET FANCY WITH STAIN AND PAINT
If you’re up to try something a bit different, give my chippy chalk paint finish a try.
Step 3: Add Design Element(s) to Canvas
If you’re NOT using a Cricut, don’t worry. There are plenty of options for Cricut and non-Cricut crafters alike.
How to Make a Reverse Canvas with your Cricut (or Silhouette)

Log into Cricut Design Space and let your creativity get to work.
For this project, I used the an image included with my Cricut Access subscription – the code in design space #M2738FBD6. You can also browse Pinterest for FREE .svg or cut files that you can upload to Cricut Design Space.
Feel free to get creative with different layers and colors of vinyl. I just used this design as a basic example to get you started.
What type of vinyl should I use?
Heat Transfer Vinyl (or iron-on vinyl) is my vinyl of choice for these types of projects. HTV (heat transfer vinyl) transfers well to canvas, and I’ve used it TONS on these projects. Since you’re not making clothing that needs to withstand wear and washing, use whatever brand you like. I typically order whatever is cheapest on Amazon or on sale at the craft store.
Once you’ve selected your design, don’t forget to mirror your image, and then cut it on your HTV.
Weed your design. Flip the acrylic sheet over, and center on the canvas. Use your Cricut EasyPress or iron to apply HTV. Be sure to follow the time and temperature guide on the instructions of your brand of HTV.


What Else Can I Put Inside a Reverse Canvas?
pictures & printables
This is a really straight-forward method, not unlike my DIY Photo Canvases from years back, using a print out and Mod Podge.

- Print off your photo or printable. If this tutorial, I printed off my Spring Favorites printable on plain printer paper. Trim the paper down to size – so it’s just a tad smaller than your canvas.
- Apply a coat of Mod Podge (any kind works, but I used matte) to the canvas. Then let the Mod Podge dry.
- Protect your work surface with a heat mat or else work on an ironing board. Lay a piece of cardboard down as a hard, flat surface. Lay the canvas on top of the cardboard.
- Lay the paper over the canvas. Protect the surface with a thin towel or heat press transfer sheet. Iron over the surface (NO steam!!) to reactivate the adhesive in the Mod Podge and bind the paper to the canvas.
- Let cool. If any bubbles remain, go over that spot again with the iron.
PS – Don’t feel like you’re constrained to making just wall decor. I used my set of Winter Home Decor Printables to make these Reverse Canvas Christmas Ornaments:

paintings
Obviously, you can use the canvas for its original use – painting! If you’re not artistically inclined, give paint-by-number a try. There are a TON of digital designs that you can download and print to size.
stencils
Take a stroll down the paint and stencil aisle at any craft store, and you’ll find plenty of inspiration for decorating your canvas.

For this tutorial, I tried my hand at using a Silk Screen Mesh Stencil. It’s a re-usable stencil that works with a special acrylic stencil paste. You’re supposed to apply it with a squeegie, but you can also use a regular stencil pouncer brush.
3-D objects – tassels, pom poms, flowers, and more!
There wasn’t time in this video tutorial to share ALL of the design options for reverse canvas projects. In the past, I have added e-dimensional design elements – like yarn, wood letters, and even a foam pumpkin!


Step 4: Reattach the Canvas to the Frame
How do you attach a canvas to the back of the frame?
You have a couple of options here:
Hot glue
Work quickly – run a line of hot glue all the way around the back of the frame. Flip the frame over, center it on the canvas, and press down. Then flip the frame over and smooth the canvas down onto the frame.

If I’m making a seasonal reverse canvas that will only be on the wall for a short amount of time, this is often all I do.
But… If you want to further reinforce the back of your project, use:
Heavy duty staples
If you have a heavy duty stapler (think upholstery projects), this is a great option.
Thumb Tacks
Grab some flat push pins and press them around the edges of the canvas, into the back of the frame.
(optional) Step 5: Apply Additional Embellishments to the Reverse Canvas Frame
This is totally optional, but a fun addition to any reverse canvas. Add some faux greenery and/or a bow to the frame. Just attach with hot glue.

Step 6: Hang your Reverse Canvas
OPTION 1 – 3M adhesive strips
Command strips are a great option for seasonal or holiday wall decor. Hang your reverse canvas using Velcro picture hanging strips, and then easily remove them (damage-free) when it’s time to change your holiday decor.
OPTION 2 – soda pop tab
This is my absolute favorite craft hack for hanging any small/lightweight DIY wall decor craft. Flip your project over and hot glue a pop tab to the back. Then just hang like normal on your wall with a nail. Too easy!

OPTION 3 – picture hanging hardware
Head to your local home improvement store and hit up the picture hanging section in the hardware aisle. You should pretty easily find a variety of sawtooth hangers in different sizes. You just need the small ones. Attach a sawtooth hanger with two small nails (included in the packet), and you’re in business.
The Finished Product – a Reverse Canvas Sign!
Here are the three reverse canvas samples that I whipped up in the video tutorial. As you can see, there are countless ways to customize this craft. Make a few to decorate your walls, or whip up some to give as gifts. This is also a great craft for craft nights to make with friends.

Where can I find everything?
Helpful Links for Craft Supplies and Other Craft Tutorials:
Craft Supplies:
- Dollar Tree *Crafters Square* 8×10-inch Stretched Canvas
- Dollar Tree *Crafters Square* 8×8-inch Stretched Canvas
- 10-pack of canvases from the craft store
- PenBlade – I LOVE using these to cut the canvas off the wood frame
- Teal Paint – used with my Spring Favorites printable
- Gel Stain – great if you want to stain a small wood project without all the nasty fumes!
- Mod Podge – for adding printables to your canvas
- heat press transfer sheet – to protect your printable when ironing
- Silk Screen Mesh Stencil – for making the “Farm to Table” project
- Acrylic Stencil Paste (I used the darkest green in this set)
- Cricut Cut File – Image is free with a Cricut Access Subscription, the code in Design Space is #M2738FBD6
- Sawtooth Picture Hangers – for hanging your wall decor
Other Craft Tutorials Mentioned in This Post:
Reverse Canvas Projects
Here are all of the crafts and DIY decor projects that I've made using the "reverse canvas" technique.
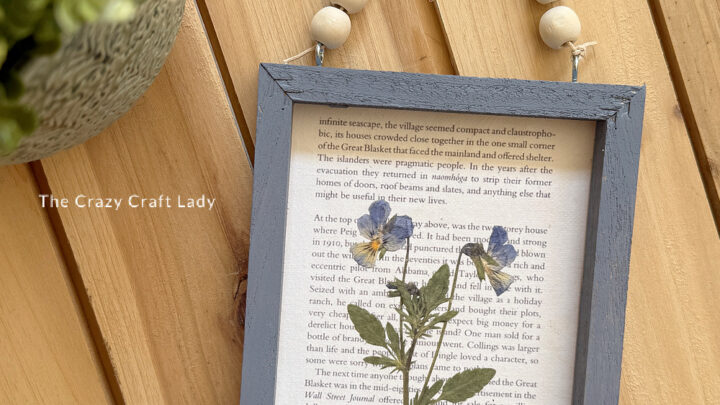
Book Page Reverse Canvas
Create a beautiful reverse canvas wall hanging with this step-by-step tutorial using Dollar Tree supplies and beginner-friendly techniques.
Spring Calendar Page Reverse Canvas Craft
Create budget-friendly farmhouse wall decor with this busted canvas craft using Mod Podge, paint, and a calendar page.

Dollar Store Wall Decal Reverse Canvas Craft
Use dollar store supplies to make a custom framed wall decal reverse canvas craft to decorate your walls in a new unique way.

Reverse Canvas American Flag
Add a touch of red, white, and blue to your summer decor with this dollar store reverse canvas American flag craft.

Reverse Canvas Window
Have you tried making a "reverse canvas" craft yet? Grab 4 small canvasses (from the dollar store or the craft store) and a string of mini lights to make this winter window scene to decorate your home.
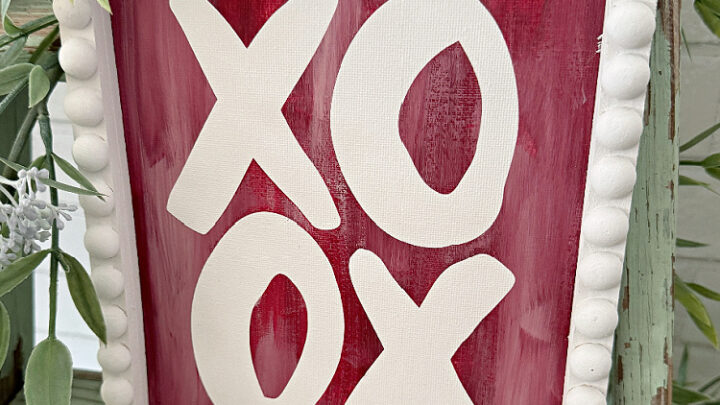
XOXO Canvas
Grab a canvas from Dollar Tree and turn it into an XOXO Canvas, the perfect way to decorate on a dime this Valentine season.
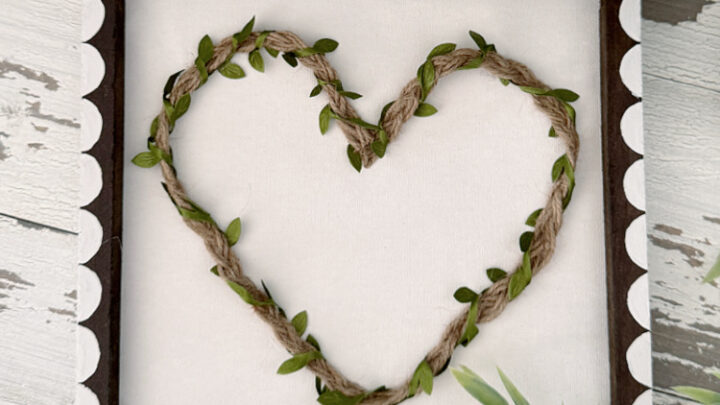
Reverse Canvas Valentine Heart
If you're looking for an inexpensive way to decorate this Valentine's Day, then you'll love this Reverse Canvas Valentine Heart craft.

Christmas Reverse Canvas - 2 Ways
Use a stretched canvas to make a unique piece of framed DIY wall decor, with this Christmas reverse canvas tutorial. Make a custom piece of Christmas wall decor in no time.

Dollar Tree Fall Reverse Canvas - 2 Ways
Grab some dollar store supplies and make these two cute Dollar Tree Fall Reverse Canvas crafts to decorate this autumn.

Tassel Tree Craft
This tassel tree craft is the perfect Christmas craft and is made using Dollar Store supplies!

Reverse Canvas Christmas Ornaments
Give your tree a new look with reverse canvas Christmas ornaments.

Faux Shiplap Carrot Bunch Reverse Canvas
Create a faux shiplap carrot bunch reverse canvas in just a few easy steps!

Faux Shiplap JOY Christmas Sign
Let’s make a Christmas craft filled with tons of farmhouse style. Use some basic unfinished wood supplies and paint to make this faux shiplap Christmas sign.

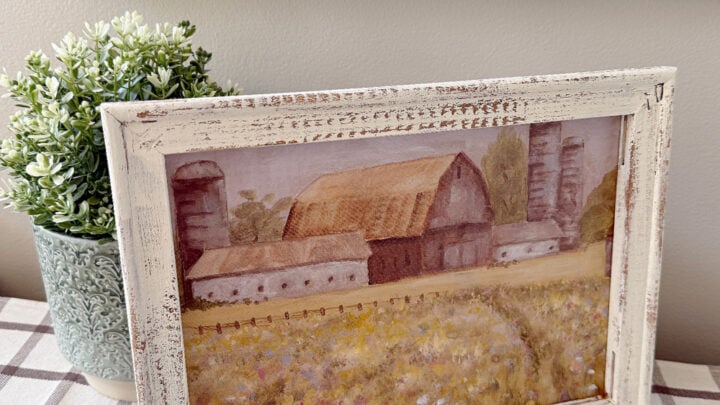
DIY Botanical Prints Reverse Canvas
Grab a pack of stretched canvases to make this DIY Faux Window Picture Frame Project using a FREE botanical printable.

Reverse Canvas Lantern
Use stretched canvases and a plastic cutting mat to make a cute lantern to decorate for fall and winter.

Tin Tile Reverse Canvas
Making this Tin Tile Reverse Canvas takes just a few Dollar Tree supplies and is an easy way to add a festive touch to your home decor.
I loved your tutorial. I had not heard of this. You have inspired me to make these as gifts for Christmas next year!
Yay!! Happy making 🙂
I just love your straight forward approach you have to crafting. You shop keeping the budget reasonable and the projects easy enough for the novice. Thank you! I’ve tried many of your crafts and wonder how you come up with such amazing ideas.
You are my go to crafter. Craft on!!!
That makes me SO happy to hear! Thanks for following along 🙂