
Turn an old canvas into beautiful framed art with this easy reverse canvas tutorial using a Dollar Tree calendar image.

This post contains some affiliate links for your convenience. Click here to read my full disclosure policy.
How to Make a Calendar Page Reverse Canvas
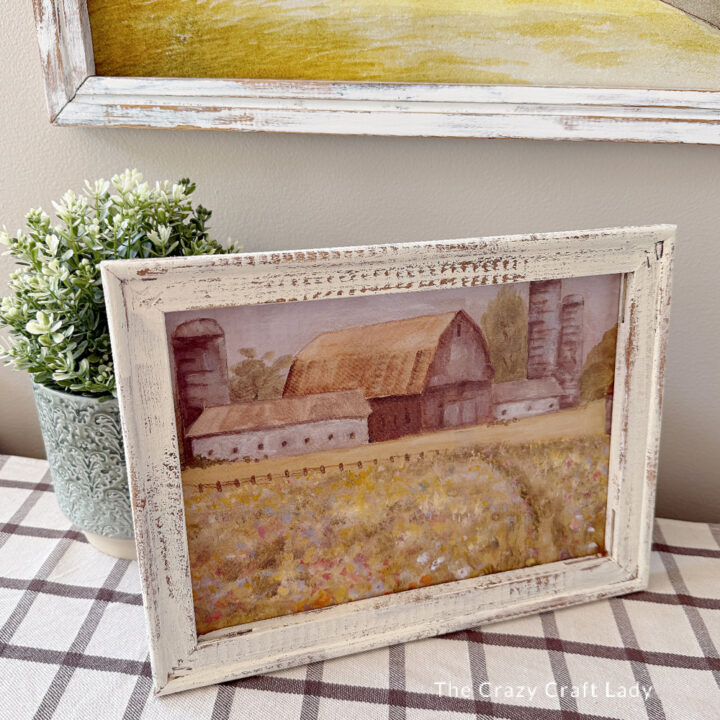
If you love budget-friendly wall art, this DIY reverse canvas project is such a fun one to try! We’re turning an old stretched canvas into a reverse canvas frame and pairing it with a gorgeous Dollar Tree calendar image. The result? A high-end looking piece of seasonal decor for just a few dollars.

Video Tutorial: Calendar Page Reverse Canvas
Watch this quick video to see how this craft came together:

Spring Calendar Page Reverse Canvas Craft
Create budget-friendly farmhouse wall decor with this busted canvas craft using Mod Podge, paint, and a calendar page.
Materials
- Stretched canvas (any size – example uses 8x10)
- Dollar Tree calendar page
- Americana Gel Stain (Oak or similar)
- Candle (for wax resist technique)
- Acrylic or chalk paint (cream/white color)
- Mod Podge (matte or satin)
- Packing tape
- Parchment paper
Tools
- Craft knife (X-Acto)
- Paintbrush (1” flat works great)
- Scissors
- Mini heat press or iron (no steam)
- Hot glue gun + glue sticks
Instructions
- Watch the video. Follow along with the video tutorial for a step-by-step walkthrough of how to make your own reverse canvas craft.
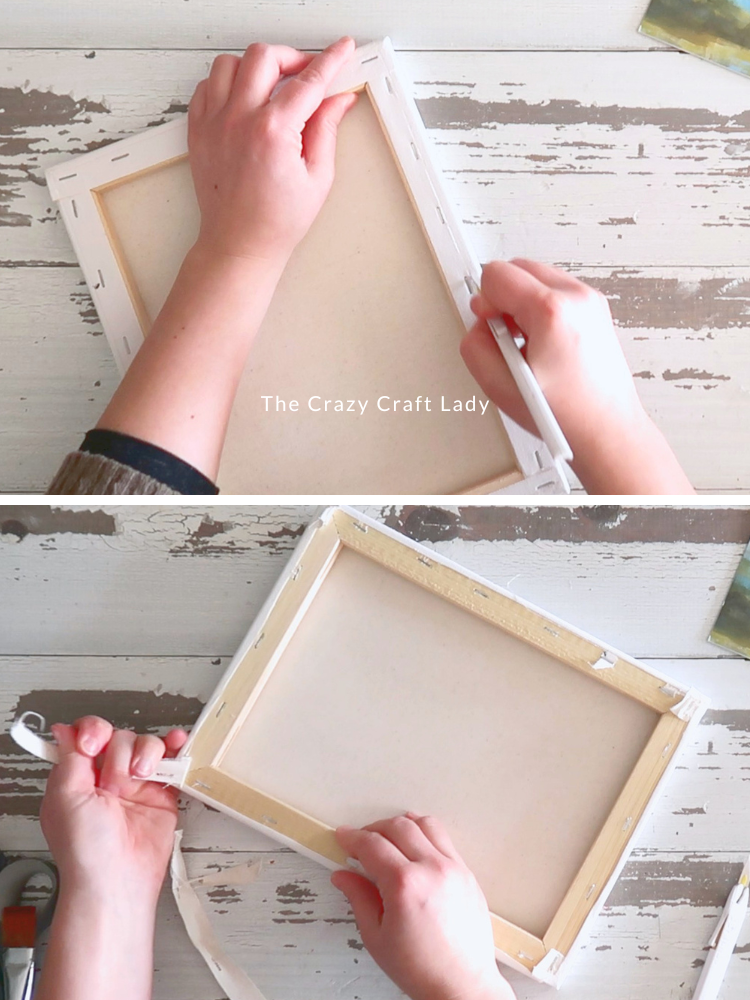
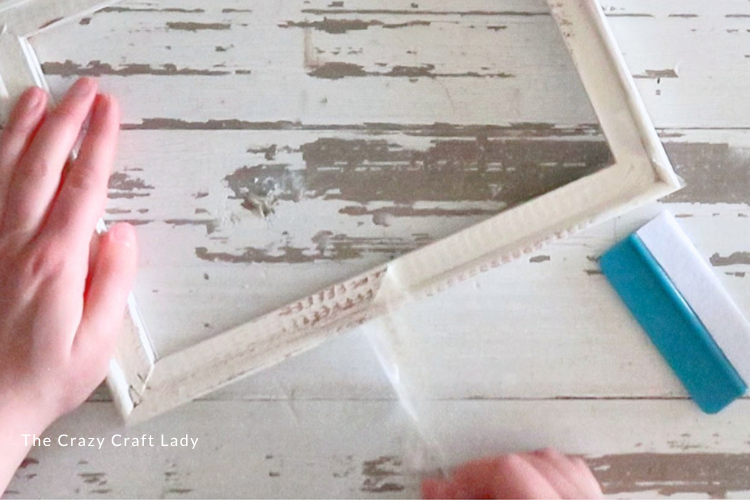
- Remove the Canvas from the Frame. Flip your canvas over and carefully cut along the inner edge of the wooden frame using a craft knife. Remove the canvas completely. You’ll reuse both pieces.

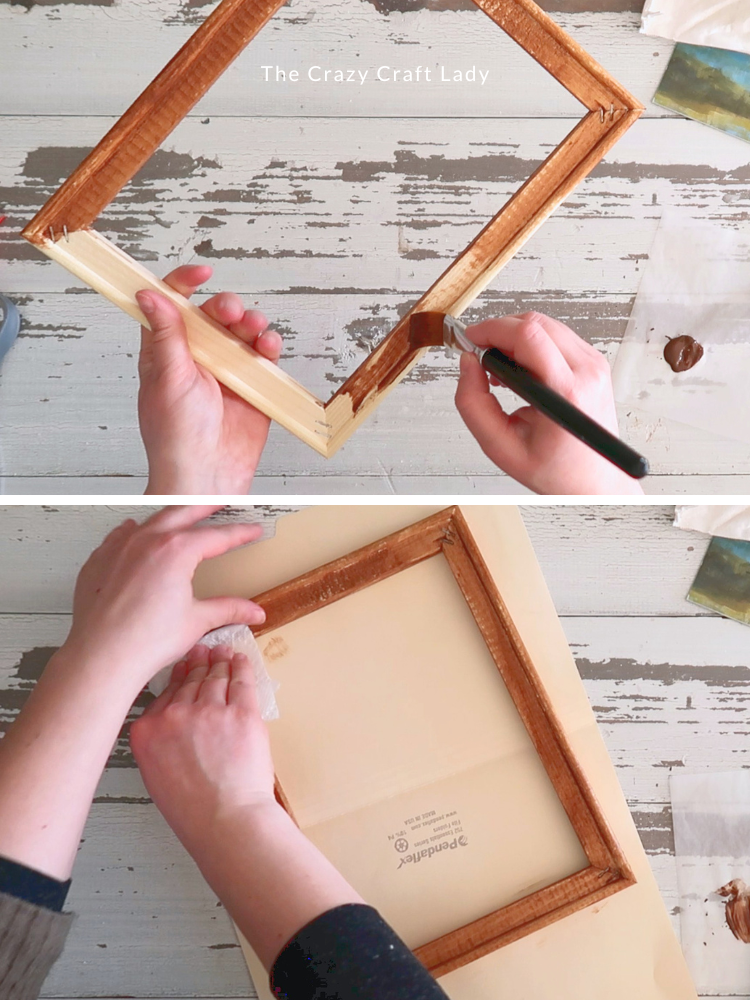
- Stain the Wood Frame. Apply a coat of gel stain to the front, sides, and inner edge of the frame. Wipe off excess with a paper towel and let dry.
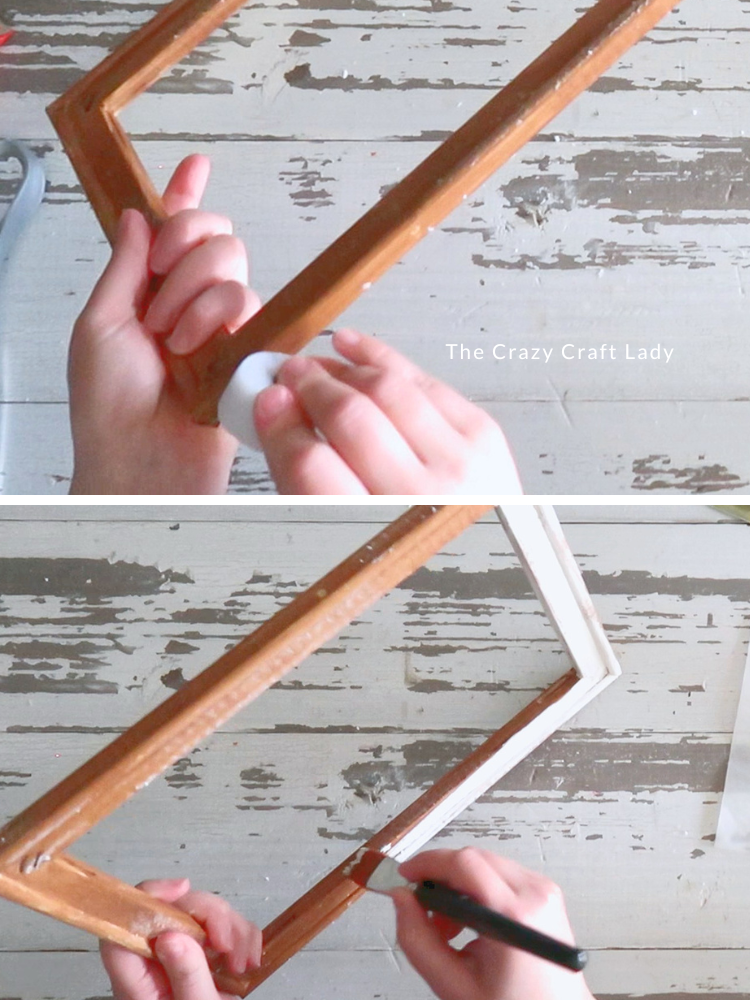
- Add a Wax Resist Finish. Rub a candle over various parts of the frame. This creates that chippy, distressed look later.
- Paint the Frame. Brush on a coat of cream or vintage white paint over the entire frame. Let it dry completely.
Distress with Tape. Press packing tape onto the painted surface and peel it back. The waxed areas will lift slightly, giving you that perfectly imperfect distressed finish.
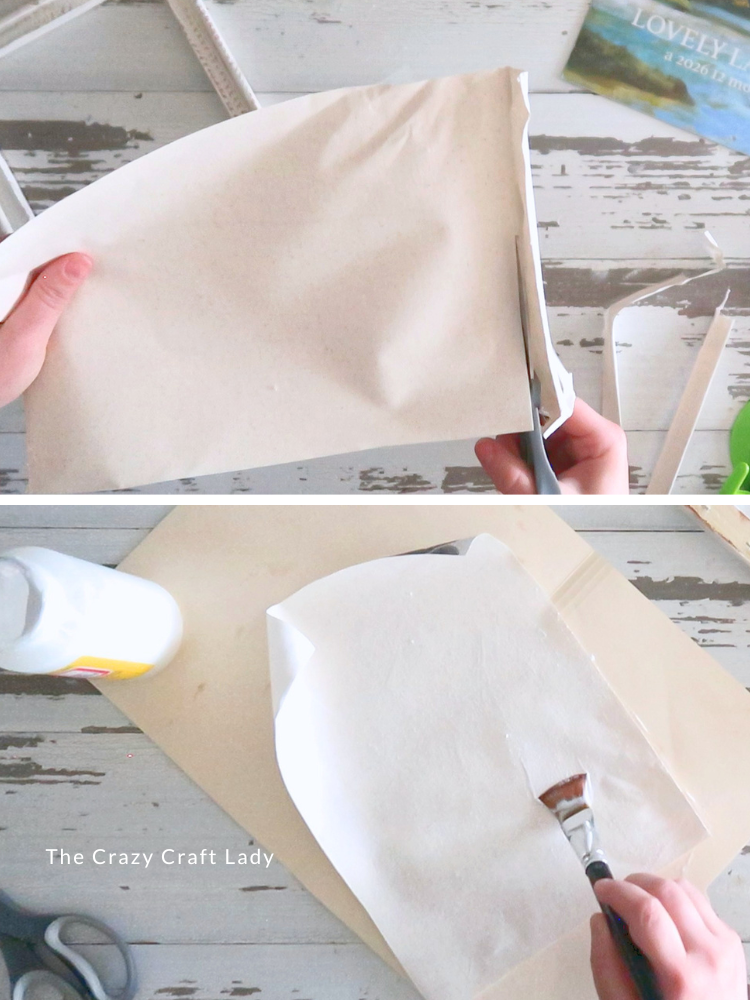
- Trim the Canvas. Cut the canvas down to size, about ⅛ inch smaller than the frame so it won’t peek out from the front.
- Prep with Mod Podge. Apply a generous coat of Mod Podge to one side of the canvas and let it dry completely. Tip: Weights on the corners help prevent curling while it dries.
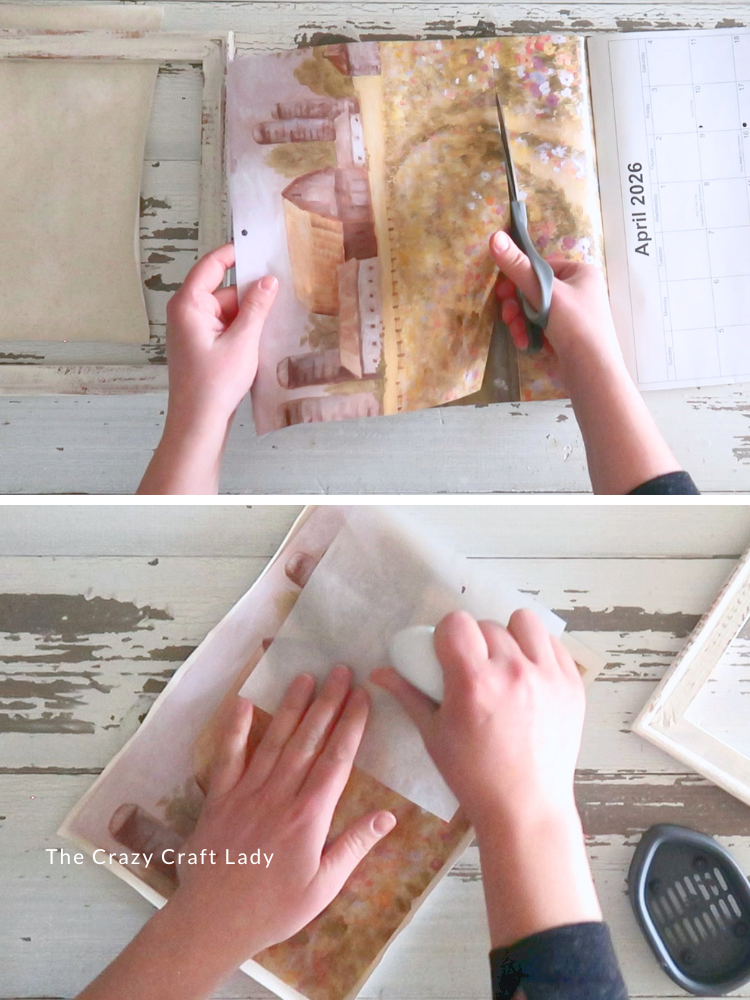
- Add Your Calendar Image. Trace and cut your calendar page slightly smaller than the frame. Place it onto the dried Mod Podge. Cover with parchment paper and use a heat press or iron (no steam) to adhere it. This reactivates the glue and gives a smooth, bubble-free finish.
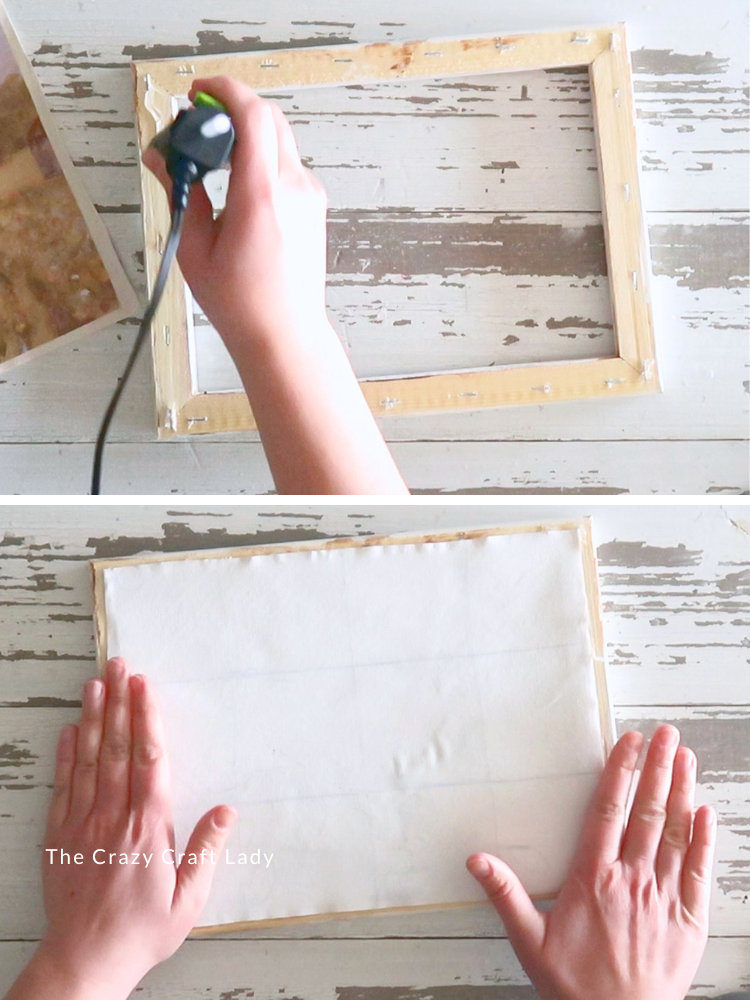
- Attach to Frame. Flip your frame over and run hot glue along the back edges. Quickly place your canvas (image side down) onto the frame and press firmly.
- Finish It Off. Add a sawtooth hanger if you want to hang it, or just lean it on a shelf for easy seasonal decor!
The Finished Craft
This reverse canvas craft is one of my favorite ways to create affordable wall art that looks anything but cheap. The combination of a distressed frame and a beautiful calendar image gives you that cozy, cottage-style vibe with minimal effort.

Don’t forget to PIN this reverse canvas craft for later:
