
Learn how to create a topsy turvy planter sign with Dollar Tree supplies. Perfect for spring decorating on a budget.

This post contains some affiliate links for your convenience. Click here to read my full disclosure policy.
How to make a Dollar Tree Spring Bloom Sign from a Bamboo Cutting Board
If you love a good Dollar Tree craft that looks way more expensive than it is, this one is for you! This DIY spring bloom sign uses a bamboo cutting board and mini seed starter pots to create the cutest little topsy-turvy planter display. It’s simple, customizable, and perfect for using up those leftover faux florals in your stash.

Video Tutorial: Dollar Tree Spring Bloom Sign
Watch this quick video to see how this craft came together:

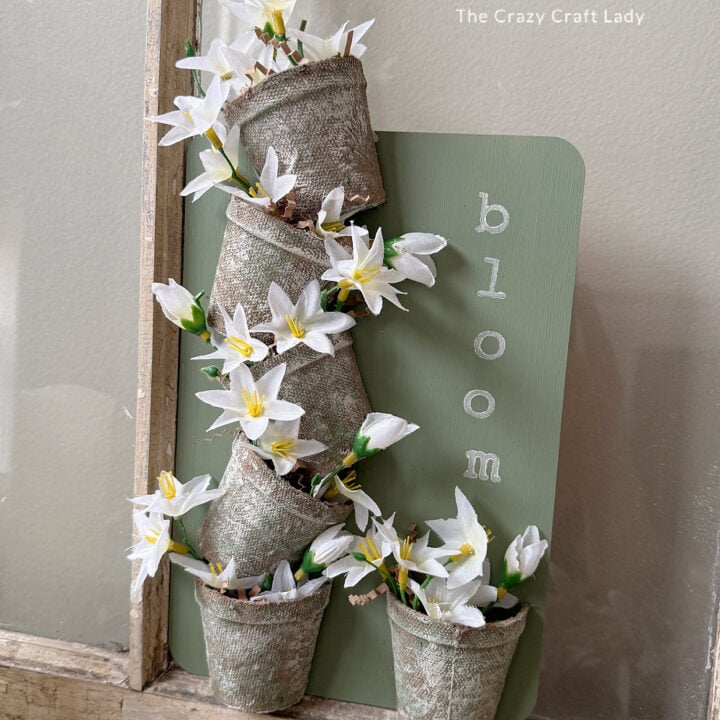
Dollar Tree Spring Bloom Sign with Mini Planter Pots
This DIY spring sign with mini flower pots is a quick and creative Dollar Tree craft you can customize for any season.
Materials
- Dollar Tree bamboo cutting board
- Chalk paint (green + cream/antique white)
- Cardboard peat pots (3 total, cut in half)
- Small unfinished wood cubes
- Decorative filler (crinkle paper, raffia, or moss)
- Faux florals (small/dainty)
- Rubber letter stamps (or stencil/vinyl)
Tools
- Scissors
- 1” flat paint brush
- Hot glue gun + glue sticks
- Sponge (for stamping)
- Baby wipe or damp cloth (for cleaning stamps)
Instructions
- Watch the video. Follow along with the video tutorial for a step-by-step walkthrough of how to make your own dollar store spring sign.
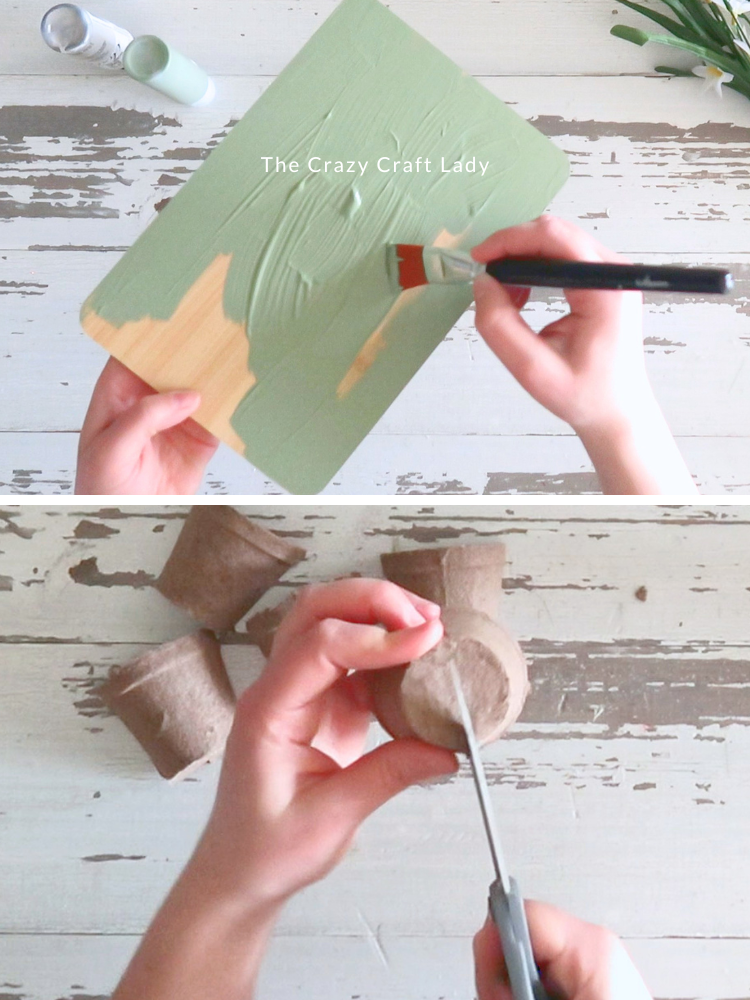
- Paint the Cutting Board. Start by painting the entire front and edges of your bamboo cutting board with green chalk paint. Let it dry completely.

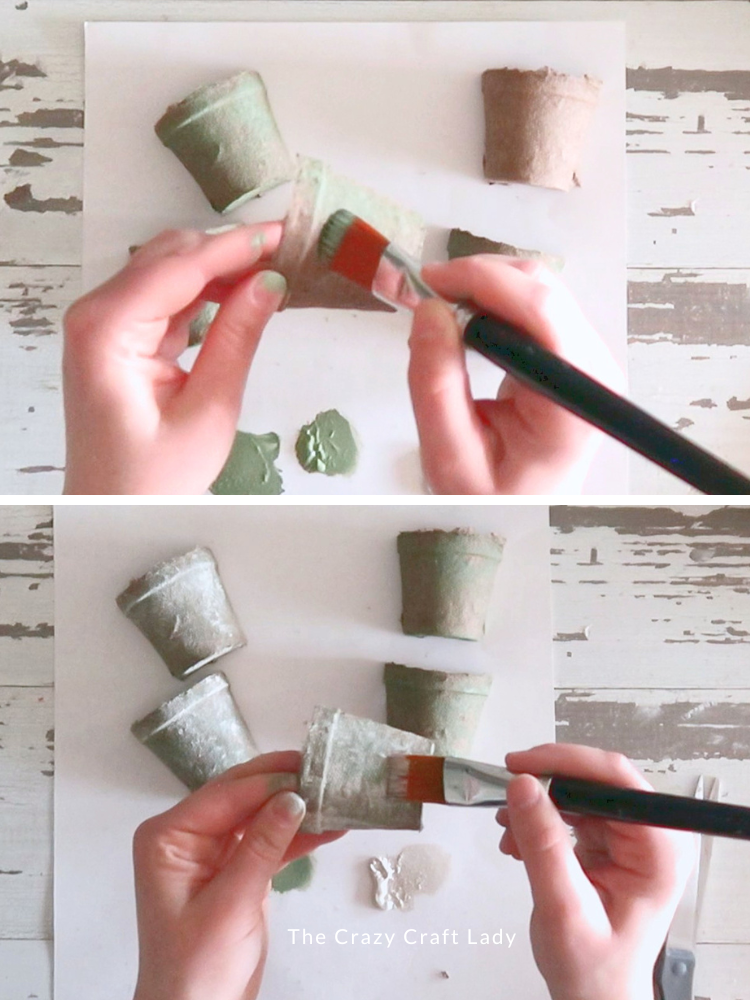
- Prep the Mini Pots. Cut each peat pot in half to create 6 halves total. Using a dry brush technique, lightly pounce green paint onto each pot (don’t fully cover—let brown show through). Then layer a soft cream paint over top for a distressed, mossy look. Let dry.
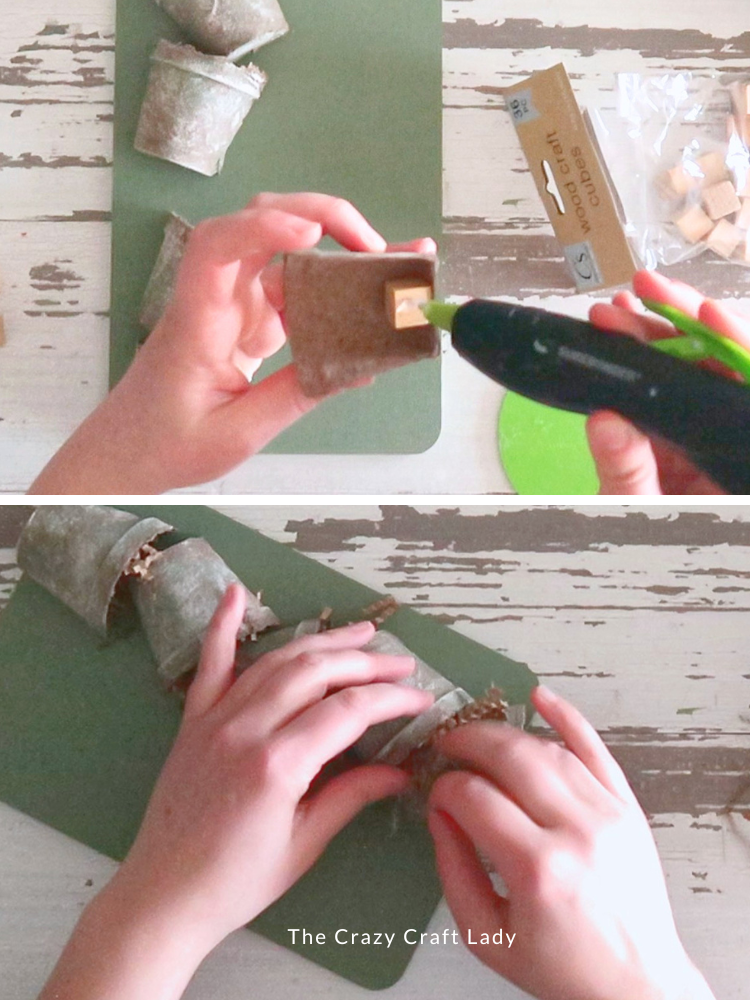
- Attach the Pots. Instead of gluing the thin edges (trust me… messy), do this: Hot glue a small wood cube inside the base of each pot, and then glue the cube to the cutting board. Arrange 5 pots in a topsy-turvy pattern.
- Fill the Pots. Add crinkle paper, raffia, or moss to each pot. Trim faux florals into small pieces and add: 2 stems per pot and 3 stems in the top pot for fullness.
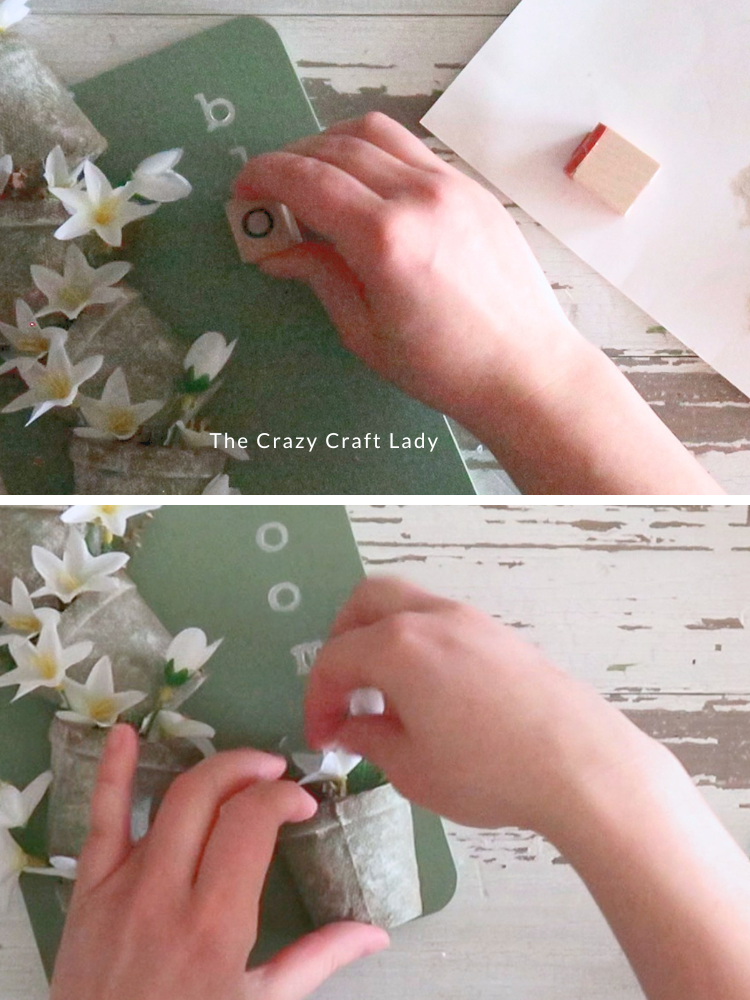
- Add the “Bloom” Text. Using rubber stamps, dab a small amount of cream paint with a sponge. Stamp the word BLOOM vertically or along the side.
- Balance the Design. Add the 6th half pot to the bottom corner for a more balanced look. Fill it the same way as the others.

The Finished Craft
This little spring bloom sign is one of those crafts that looks custom boutique, but costs just a few dollars to make. You can easily switch up colors and florals for any season:
- Spring: soft pastels & florals
- Summer: bright and bold colors
- Patriotic: red, white & blue
- Fall: muted greens & oranges
Once you make one, you’ll want to try a dozen variations!

Don’t forget to PIN this spring sign for later:
