
Grab some dollar store supplies and make these two cute Dollar Tree Fall Reverse Canvas crafts to decorate this autumn.

Make a reverse canvas to decorate your home for fall
Hey there, crafty friends! Have you heard about a recent crafting called reverse canvas? Well, I’m pretty much obsessed with making them!
And the only thing that could get me more excited about a new craft trend, is a craft that I can make with dollar store supplies.
Why I Love This Fall Dollar Store Craft
Today’s craft features two of my favorite Dollar Tree craft supplies: stretched canvas and foam pumpkins.

I’m going to share TWO variations of this project, and I think they look pretty great together. Let’s get making.
This post contains some affiliate links for your convenience. Click here to read my full disclosure policy.
Supplies Needed:
- canvas – in 4×6 and 8×10 sizes
- dollar store foam pumpkin
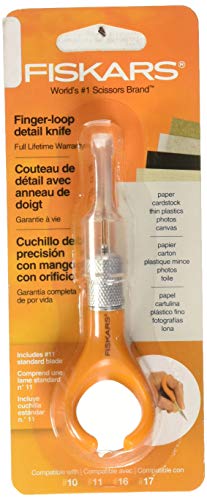
- razor blade – I like this fingertip blade for projects like this
- scissors
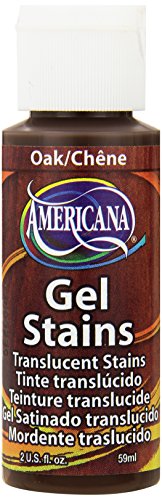
- chalk paint (Waverly chalk paint in moss) and wood stain (Americana Gel Stain in Oak)
- flat paint brushes
- hot glue gun and hot glue
To decorate:
- wooden letters
- ribbon
- twine
- twig (from your yard)
- faux greenery leaves, like lambs ear

Tutorial – Making Dollar Tree Fall Reverse Canvas:
Follow this quick video, or read the step-by-step directions below:
- Use a razor blade to remove the canvas fabric from the wooden frame. Carefully work around the staples. If you want a smooth back to the project, remove the staples as well. This can be a bit tricky, so it’s really a matter of personal preference. For this project, I left the staples in.

- Stain the wooden frames and letters. Brush on an even coat of gel stain. Wipe away excess stain with a paper towel. Set aside to dry.
- Trim the canvas pieces down to size. Make sure that the canvas is cut just a bit smaller than the outside edge of the wooden frame.

- Remove the stem from the foam pumpkin. Use the razor blade to carefully cut the pumpkin in half along the seam. Try to cut the foam so that you have a smooth edge.

- Chalk Paint: Paint the smaller of the two canvas pieces green. Paint one half of the pumpkin green as well. You will likely have to do two coats (let dry between coats) to get full coverage, since the styrofoam soaks in the paint as it dries. Set everything aside to dry.

- Apply hot glue to the back of the wooden frame – work quickly and be sure to get a fair amount in each corner and the center of each frame side. Set the canvas in place on the frame back and press to secure. Repeat for the second frame.

- Decorate the larger canvas: Hot glue the pumpkin half into the center of the canvas. Then hot glue a small piece of a stick to the top as a “stem.” Make a bow with ribbon, and secure in the center with twine. Hot glue the bow to the top of the pumpkin at the base of the stem.
- Decorate the smaller canvas: Hot glue the wood letters to the canvas. Make a small bundle of leaves, tied together with twine and a bow. Secure the leaf bundle to the bottom-right corner of the canvas.


And here’s my finished reverse canvas project:

Other creative ways to craft with these dollar store foam pumpkins:
- Stack ’em up to make a dollar store pumpkin topiary
- Wrap ’em up to make fabric-covered pumpkins
- Cover ’em in tape for these fabric tape pumpkins
- Use a Dollar Tree mop head to make yarn pumpkins
More Reverse Canvas Crafts:
- Grab 4 small canvases and a string of mini lights to make this winter window scene to decorate your home when the days are short.
- Use a stretched canvas to make a unique piece of framed DIY wall decor, with this Christmas reverse canvas tutorial.

Dollar Tree Fall Reverse Canvas - 2 Ways
Grab some dollar store supplies and make these two cute Dollar Tree Fall Reverse Canvas crafts to decorate this autumn.
Materials
- canvas – in 4×6 and 8×10 sizes
- dollar store foam pumpkin
- razor blade
- scissors
- chalk paint (Waverly chalk paint in moss) and wood stain (Americana Gel Stain in Oak)
- flat paint brushes
- hot glue gun and hot glue
- To Decorate:
- wooden letters
- ribbon
- twine
- twig (from your yard)
- faux greenery leaves, like lambs ear
Instructions
- Use a razor blade to remove the canvas fabric from the wooden
frame. Carefully work around the staples. If you want a smooth back to
the project, remove the staples as well. This can be a bit tricky, so
it’s really a matter of personal preference. For this project, I left
the staples in. - Stain the wooden frames and letters. Brush on an
even coat of gel stain. Wipe away excess stain with a paper towel. Set
aside to dry. - Trim the canvas pieces down to size. Make sure
that the canvas is cut just a bit smaller than the outside edge of the
wooden frame. - Remove the stem from the foam pumpkin. Use the
razor blade to carefully cut the pumpkin in half along the seam. Try to
cut the foam so that you have a smooth edge. - Chalk Paint: Paint the smaller of the two canvas pieces green. Paint one half of the pumpkin green as well. You will likely have to do two coats (let dry
between coats) to get full coverage, since the styrofoam soaks in the
paint as it dries. Set everything aside to dry. - Apply hot glue to the back of the wooden frame – work quickly and be sure to get a fair amount in each corner and the center of each frame side. Set the canvas in place on the frame back and press to secure. Repeat for the second frame.
- Decorate the larger canvas: Hot glue the pumpkin half into the center of the
canvas. Then hot glue a small piece of a stick to the top as a “stem.”
Make a bow with ribbon, and secure in the center with twine. Hot glue
the bow to the top of the pumpkin at the base of the stem. - Decorate the smaller canvas: Hot glue the wood letters to the canvas. Make a
small bundle of leaves, tied together with twine and a bow. Secure the
leaf bundle to the bottom-right corner of the canvas.
Recommended Products
As an Amazon Associate and member of other affiliate programs, I earn from qualifying purchases.
-
 FolkArt Acrylic Paint in Assorted Colors (2 oz), 527, Forest Moss
 -
FXforer 8 Pcs Artificial Flocked Rabbit Ear Spray Leaf Stems,14.6 Inch Faux Lambs Ear Stems Foliage,Fake Greenery Branch for Floral Arrangement DIY Craft Home Vase,Frost White
-
DecoArt DS30-3 Americana Gel Stains Paint, 2-Ounce, Oak
-
Fiskars 163050-1001 Fingertip Craft Knife, 7 Inch, Orange


Don’t Forget to PIN this Fall Craft for Later:

cute idea!
I Love your project!! I can’t wait to try it!