
Grab your Mod Podge and turn everyday items into extraordinary treasures with these paper napkin decoupage crafts and ideas.

Craft and DIY decor ideas using decorative paper napkins.
This post contains some affiliate links for your convenience. Click here to read my full disclosure policy.
Why I Love Crafting with Paper Napkins
I started crafting with paper napkins several years ago when attempting to make my own Decoupage Ornaments with Wood Rounds. Not only was this a cost-effective way to make some expensive-looking ornaments, but it was also super easy to do.
The cool thing about using paper napkins is you can find just about any style, color, and theme to match whatever you need. Whether it’s Christmas, Thanksgiving, Easter, or summertime – there’s a napkin for everything!
Must-have Supplies for Paper Napkin Craft Projects
Supplies You’ll Need
When crafting with paper napkins, there are a few supplies I recommend always having on hand:
- Decorative paper napkins
- Mod Podge (matte or gloss)
- Foam brush or soft paintbrush (these are my favorite)
- Scissors
- Your surface (wood, glass, metal, etc.)
- Mini heat press (or a regular household iron with NO steam)
- Parchment paper to protect your napkin when heat pressing
- OPTIONAL: chalk paint or acrylic craft paint. This is for painting your surface before adding the napkin.
How to Decoupage with Paper Napkins – Heat Press Method
If you’ve never tried paper napkin decoupage before, don’t worry. It’s surprisingly easy and super beginner-friendly. Once you get the hang of it, you’ll want to decoupage everything!
Step 1: Prep Your Surface
Start with a clean, dry surface. If you’re working with wood or a dark base, consider painting it white or a light color first. This helps the napkin design really pop.
Step 2: Separate the Napkin Layers
Most decorative napkins have 2–3 layers. Carefully peel away the plain backing layers and keep only the top printed layer. This step is key for a smooth finish!
Step 3: Cut or Tear Your Design
Cut out your design with scissors, or gently tear around it for a softer, more blended edge.
Step 4: Apply a Base Layer of Mod Podge
Using a flat brush, apply an even layer of Mod Podge to your surface. Let dry completely!
Step 5: Place the Napkin
Carefully lay the napkin onto the dried Mod Podge surface. Place a piece of parchment paper over the napkin to protect it. Then gently press the heat press over the surface. The heat re-activates the Mod Podge, giving you a perfectly smooth, bubble-free finish.
Paper Napkin Decoupage Crafts
Some of my favorite seasonal and holiday crafts using paper napkins and Mod Podge.

All you need are just a few Dollar Store supplies to make these super cute (and easy) Bamboo Cutting Board Book Ends.
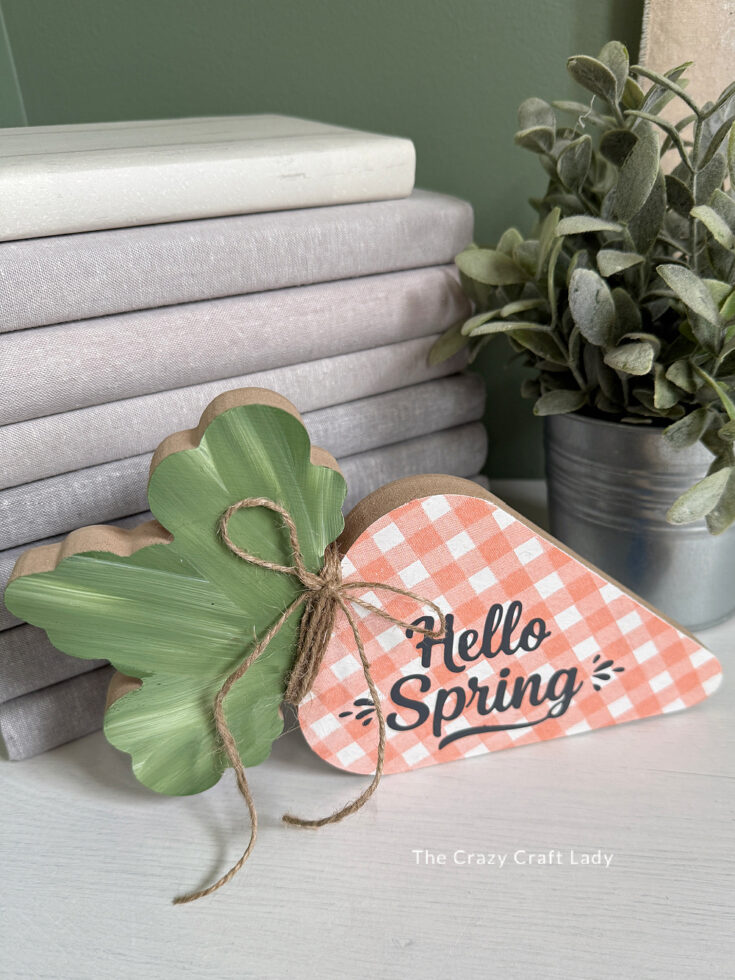
Turn a Dollar Tree jumbo carrot cutout into an adorable spring shelf sitter! This easy DIY uses napkin decoupage, paint, and twine to make a cute spring decoration.

Searching for easy fall pumpkin crafts? Try this Dollar Tree foam pumpkin hack using Mod Podge and patterned napkins for gorgeous autumn home décor.

Make custom washi tape at home with Mod Podge and packing tape! Fun, budget-friendly decorative tape you can use on all your craft projects.
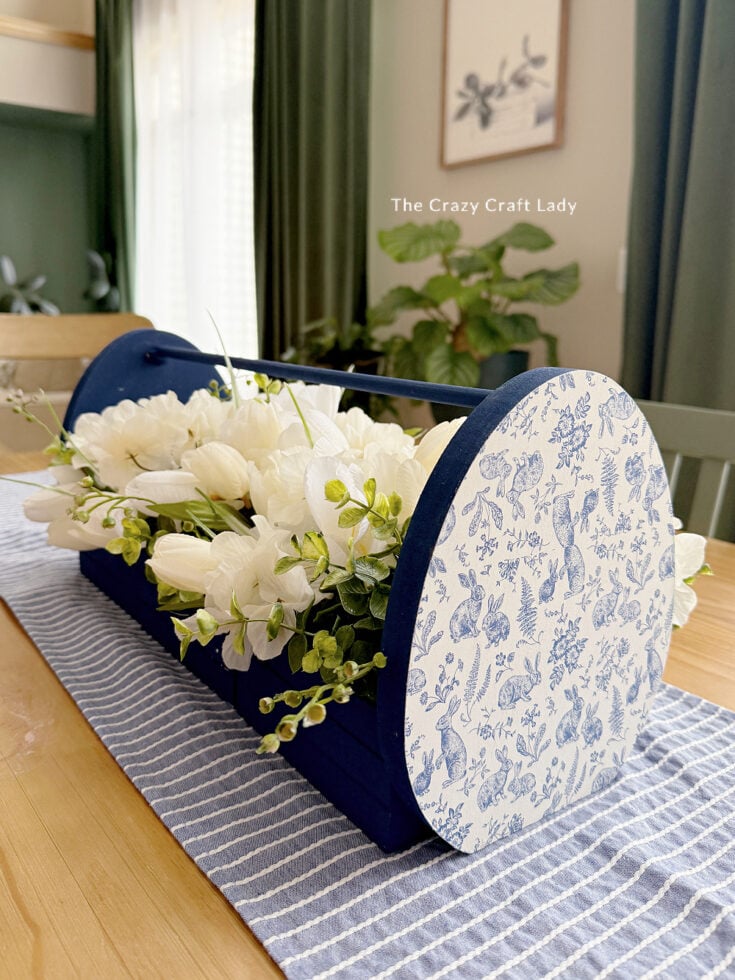
Create a farmhouse-style spring centerpiece using Dollar Tree mini crates, Mod Podge napkins, and faux flowers. Easy and budget friendly!

How to make DIY decoupage ornaments on wood round slices. This is an easy way to your own tree ornaments. Use a paper napkin or tissue paper in any pattern or color to make custom ornaments that match your Christmas decorating style.

Grab some Mod Podge, a cute holiday napkin, and some wooden craft sticks – we’re making a super cute rustic decoupage Christmas sign to decorate for the holidays.

This decoupage Easter sign is made with just 3 Dollar Tree supplies - a wood cutout, Spring-themed napkins, and some greenery.

Use a spring napkin and Mod Podge on a dollar store unfinished wood slat sign to make this spring decoupage mini sign.

Transform a dollar store Easter egg sign with a Corrugated Easter Bunny Cutout to make a cute decoupage sign for spring.

Easily learn how to use a napkin to make a Napkin Decoupage Pumpkin - the perfect fall craft project to boost your autumn decor.

Turn a silver Dollar Tree tray into beautiful table decor with this Fall Decoupage Tray Craft.

Grab three books and some fall-themed napkins and get ready to make this Fall Book Stack Craft!

This Fall Decoupage Mini Canvas is the perfect autumn craft if you're looking for something quick, easy, and inexpensive to make.
Paper Napkin Decoupage FAQs
Can you use any paper napkins for decoupage?
Yes! Most decorative paper napkins will work for decoupage. Just make sure to separate the layers and use only the top printed layer for best results. Shop at places like: Dollar Tree, thrift stores, Amazon, or other big box retailers that sell seasonal napkins.
Do you remove layers from napkins before decoupage?
Yes. You’ll want to peel away the extra backing layers and use only the thin top layer. This helps prevent wrinkles and gives a smoother finish.
What glue is best for paper napkin decoupage?
Mod Podge is the most popular choice because it works as both a glue and a sealer. You can use matte, gloss, or satin depending on the finish you want.
Why does my decoupage wrinkle?
Wrinkles usually happen from using too much glue or pressing too hard. Try applying thin layers of glue and gently smoothing the napkin from the center outward. OR, if you have a flat surface like wood or canvas, consider using the heat press method.
How do you keep napkins from tearing during decoupage?
Paper napkins are delicate, so use a light touch. A helpful trick is to place a piece of plastic wrap or parchment paper over the napkin while smoothing it down.
Can you decoupage napkins on wood?
Yes! Wood is one of the best surfaces for napkin decoupage. For the best results, paint the surface a light color first so the design shows up clearly, and then use the heat press method.
Can you decoupage on glass or metal?
Absolutely. Just make sure the surface is clean and dry. For glass, you may want to use a dishwasher-safe sealer if the item will be used regularly.
How do you seal decoupage napkins?
Apply a thin top coat of Mod Podge over the napkin once it’s in place. Let it dry completely, then add another coat if needed for durability. If bubbles form, you can smooth them gently with your finger to heat press them once the Mod Podge has dried.
How long does decoupage take to dry?
Most projects dry to the touch in about 20–30 minutes, but it’s best to let them fully cure for several hours before heavy use.
More Decoupage Crafts to Try:
- Decoupage Easter Egg Sign Using a Napkin
- Dollar Store Craft: Spring Decoupage Mini Sign
- Rustic Decoupage Christmas Sign – Made from Napkins
- Napkin Decoupage Pumpkin – an Easy Fall Dollar Store Craft
Ma’am, another idea for paper napkins I found on Pinterest was to decorate candles. I have a mini iron I bought for quilting I use to melt a napkin onto the sides of a candle. This way you can have a collection for every holiday or season.