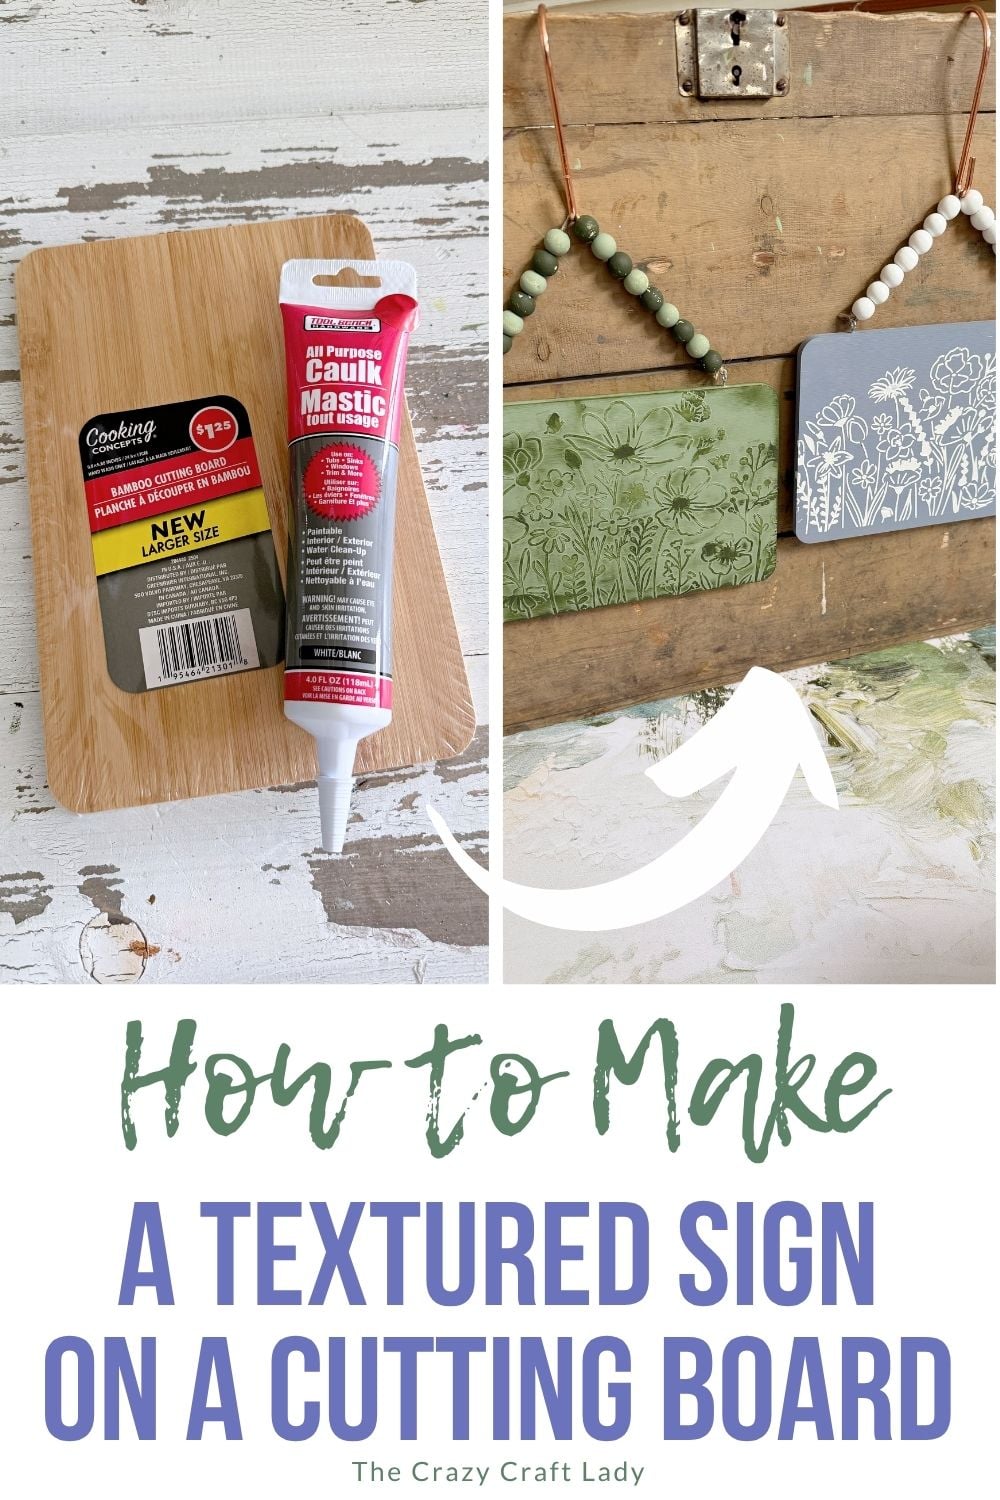
Learn how to create a beautiful raised stencil floral sign using a Dollar Tree cutting board and caulk. The raised white design pops against a painted background.
This post contains some affiliate links for your convenience. Click here to read my full disclosure policy.
How to make a raised stencil cutting board sign using dollar store supplies.
I loved my first textured cutting board craft so much that I had to make a second version. This time I flipped the process and painted the cutting board first, which created a completely different look when the white raised floral design was added.
Video Tutorial: Raised Stencil Cutting Board Sign
Watch this quick video to see how this craft came together:
Raised Stencil Cutting Board Sign
Make high-end looking wall decor on a budget with this textured cutting board sign. Featuring raised stencil details and a simple bead hanger.
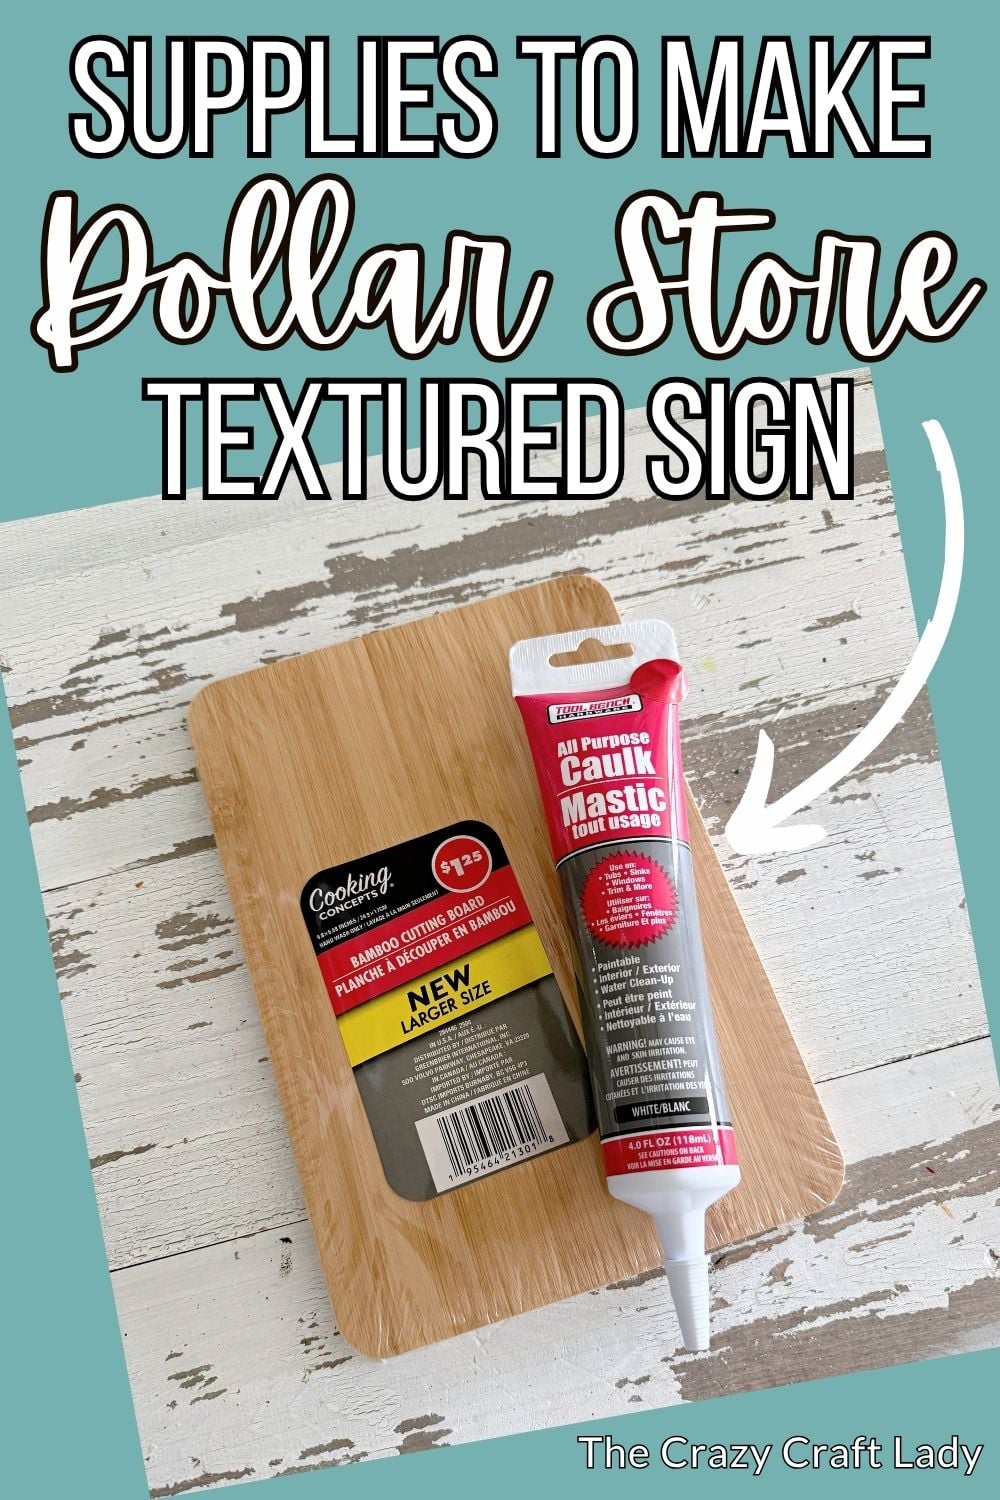
Materials
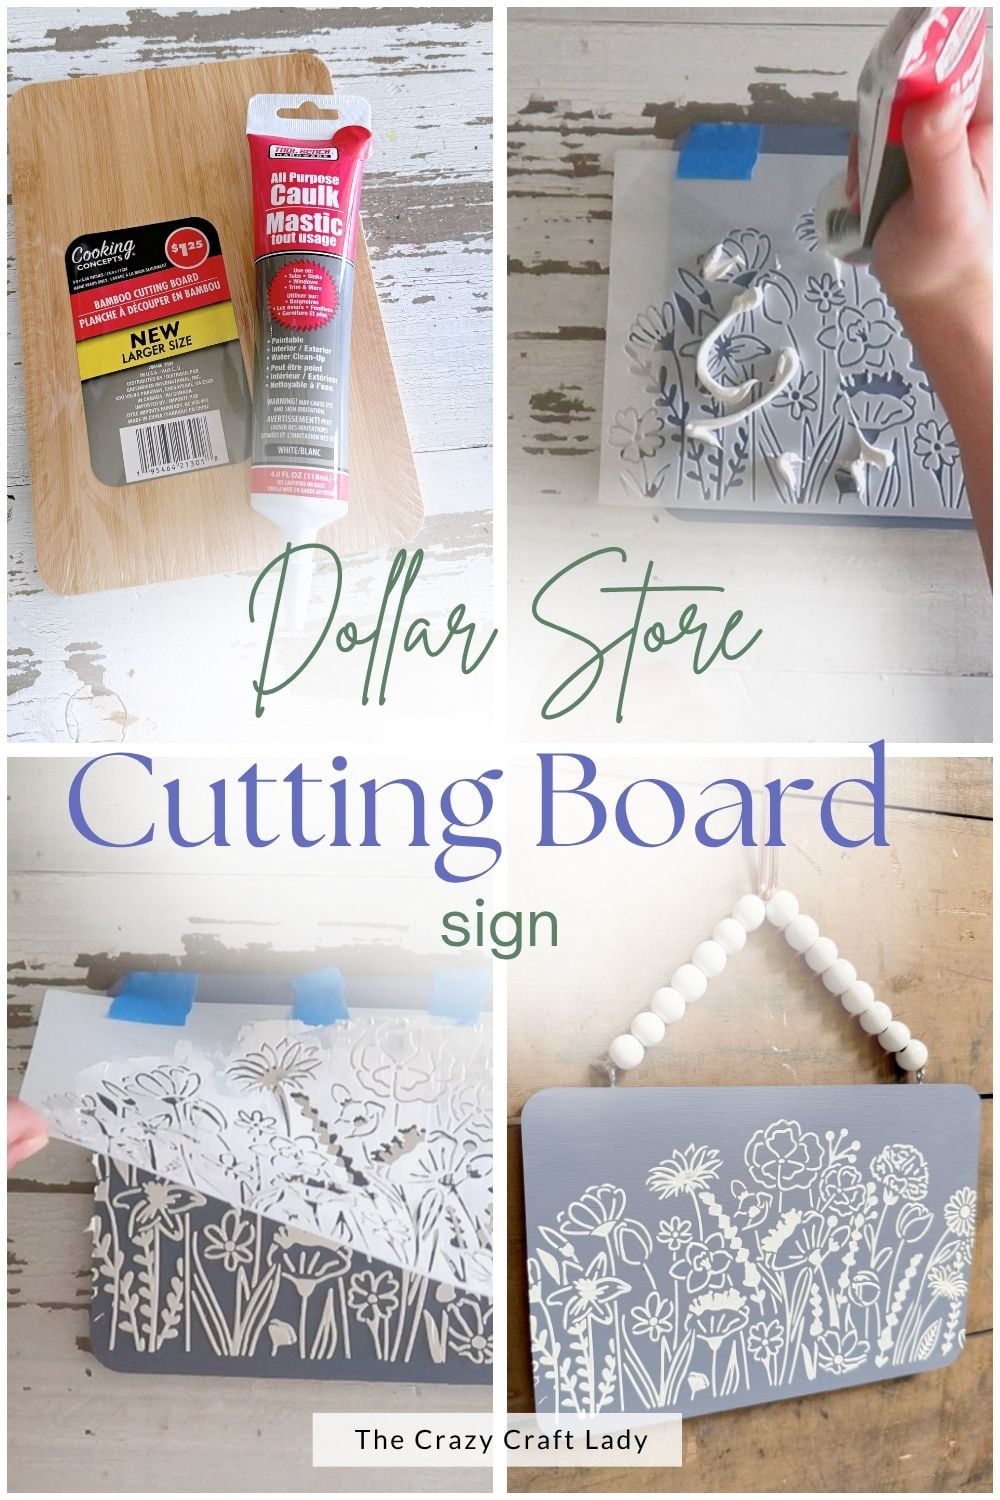
- Dollar Tree bamboo cutting board
- Light blue craft paint
- Floral stencil
- Dollar Tree caulk or lightweight spackle
- Painter’s tape
- Small squeegee, scraper, or old gift card
- Twine
- White wood beads or bead garland
- 2 screw eye hooks
Tools
- Paintbrush
- Pin vise tool or small drill
- Scissors
Instructions
- Watch the video. Follow along with the video tutorial for a step-by-step walkthrough of how to make your own textured stencil cutting board sign.
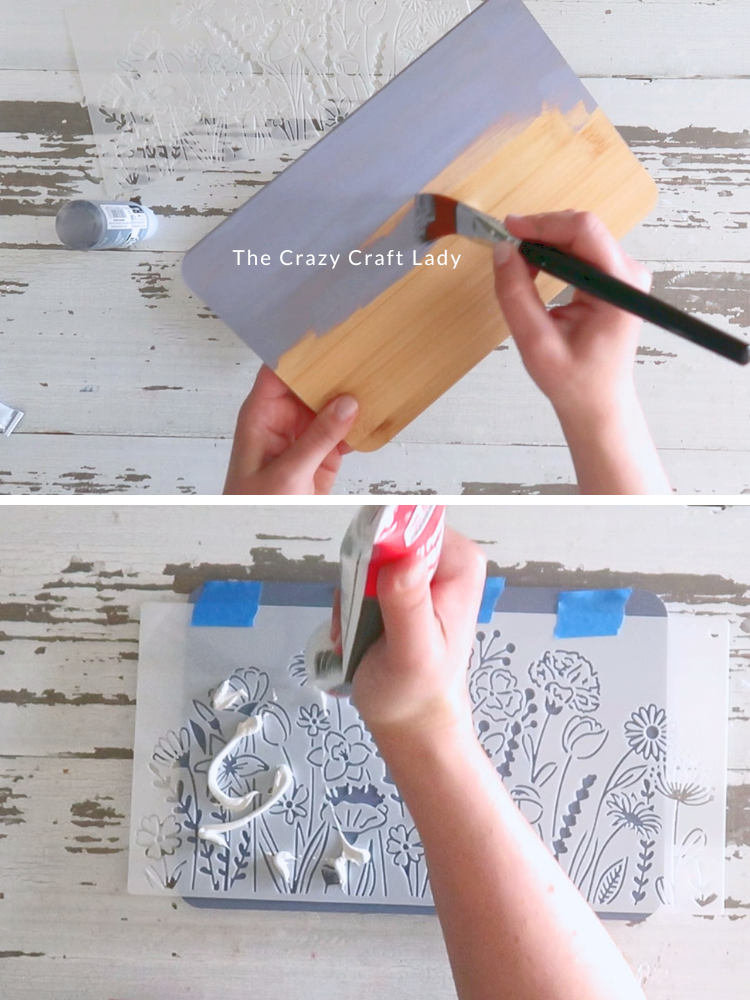
- Paint the Cutting Board. Start with a Dollar Tree bamboo cutting board. Paint the entire front surface with a soft light blue craft paint. Let the paint dry completely before moving on to the stencil.

- Tape Down the Stencil. Place your floral stencil on the front of the painted cutting board. Use painter’s tape to secure the stencil in place so it doesn’t slide around while you’re adding the texture.
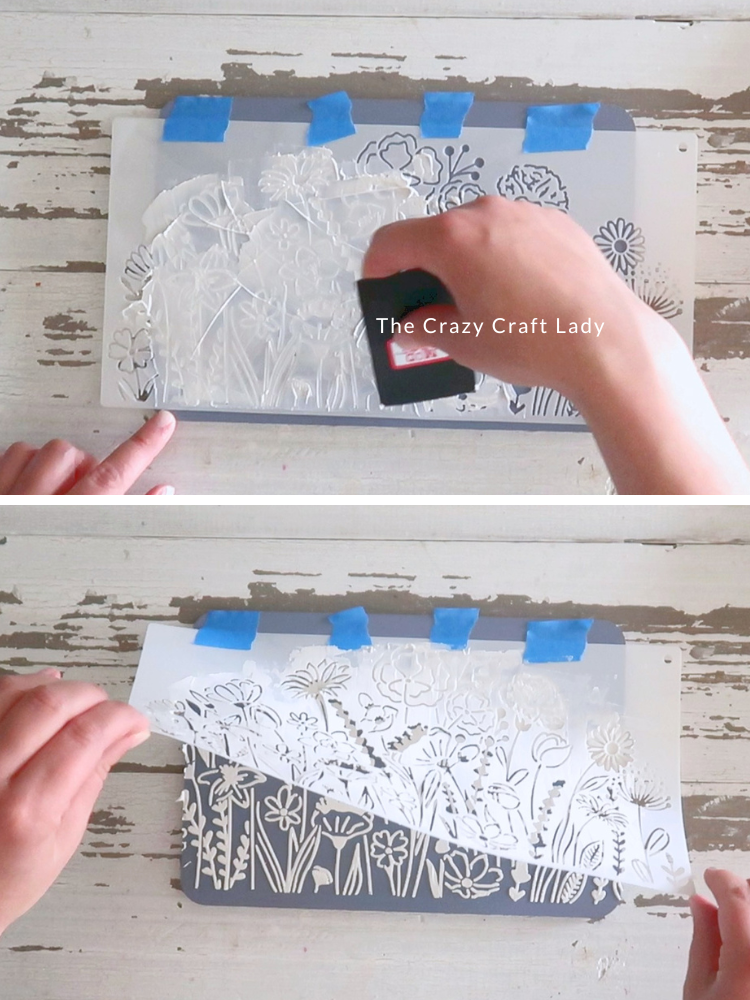
- Apply the Caulk. Add Dollar Tree caulk over the stencil. Use a small squeegee, scraper, or old gift card to smooth the caulk across the stencil. Press it into all the openings so the floral design is completely filled in.
- Remove the Stencil. While the caulk is still wet, carefully peel the stencil away from the cutting board. Go slowly so you don’t smear the design. Set the cutting board aside and let the raised floral texture dry completely.
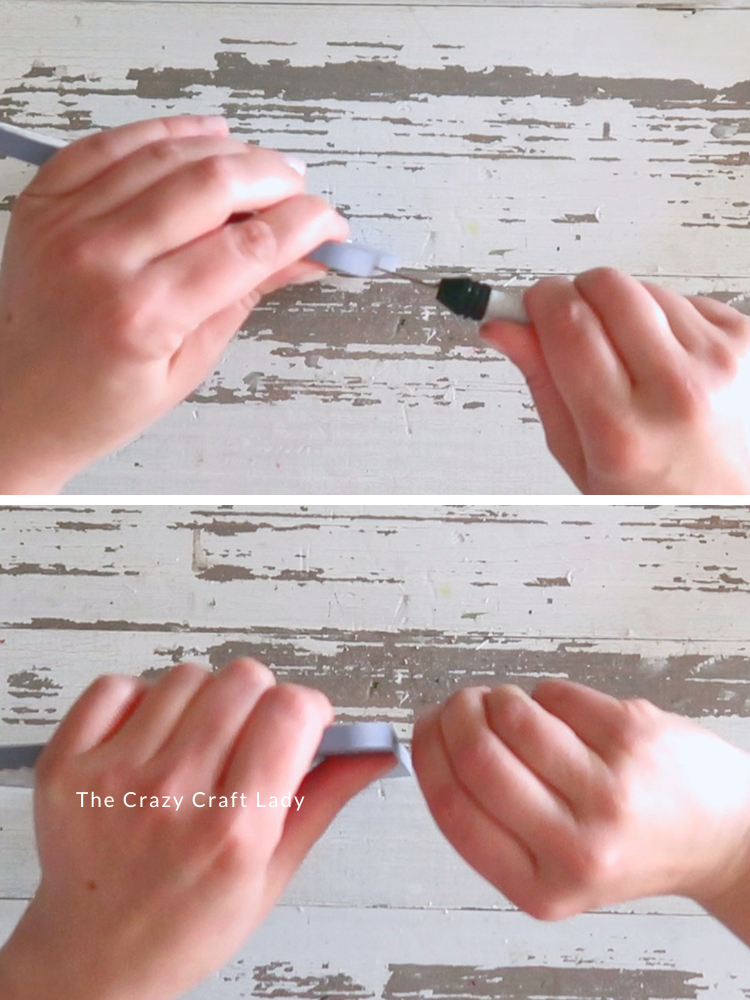
- Mark the Hanger Holes. Once everything is dry, measure 1½ inches in from the left side along the top edge of the cutting board. Mark that spot with a pen or marker. Repeat on the right side.
- Drill Pilot Holes. Use a pin vise tool or small drill to make a pilot hole at each mark. This makes it much easier to screw in the eye hooks without splitting the wood.
- Add Screw Eye Hooks. Twist one screw eye hook into each pilot hole. Make sure both hooks are secure and facing the same direction.
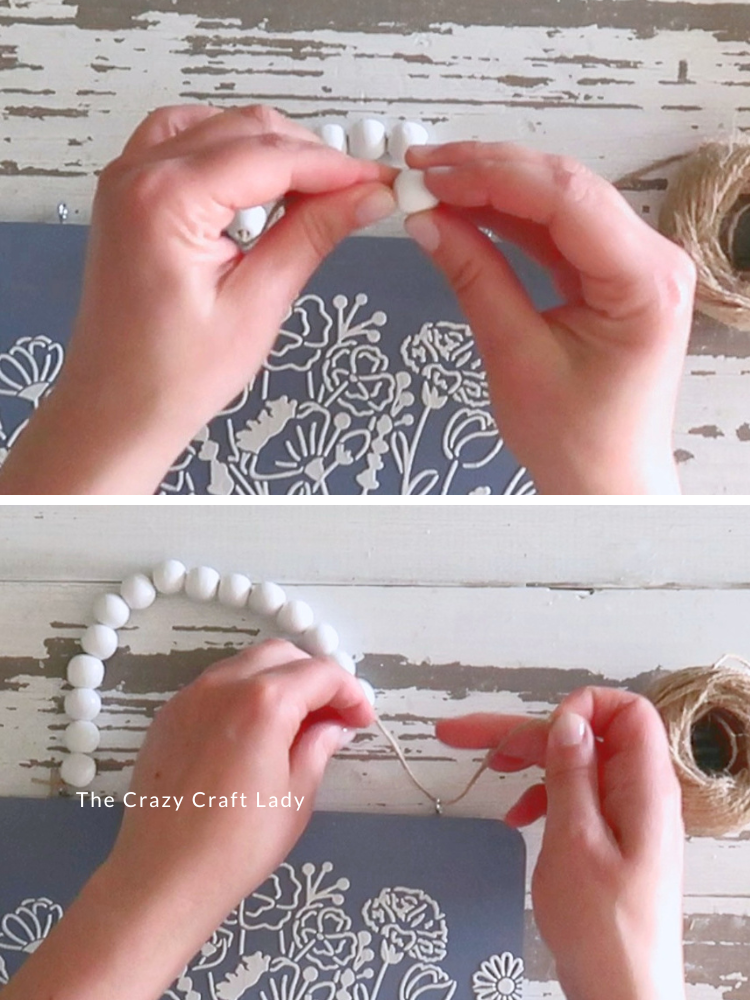
- Make the Wood Bead Hanger. For this version, I used white wood beads from a Dollar Tree bead garland. Remove the beads from the garland and restring them onto a fresh piece of twine. If you don’t have a garland, regular white wood beads work too.Attach the Hanger. Thread one end of the twine through one screw eye hook. Thread the other end through the second screw eye hook. Tie each end securely with a double knot. Trim away any extra twine if needed.
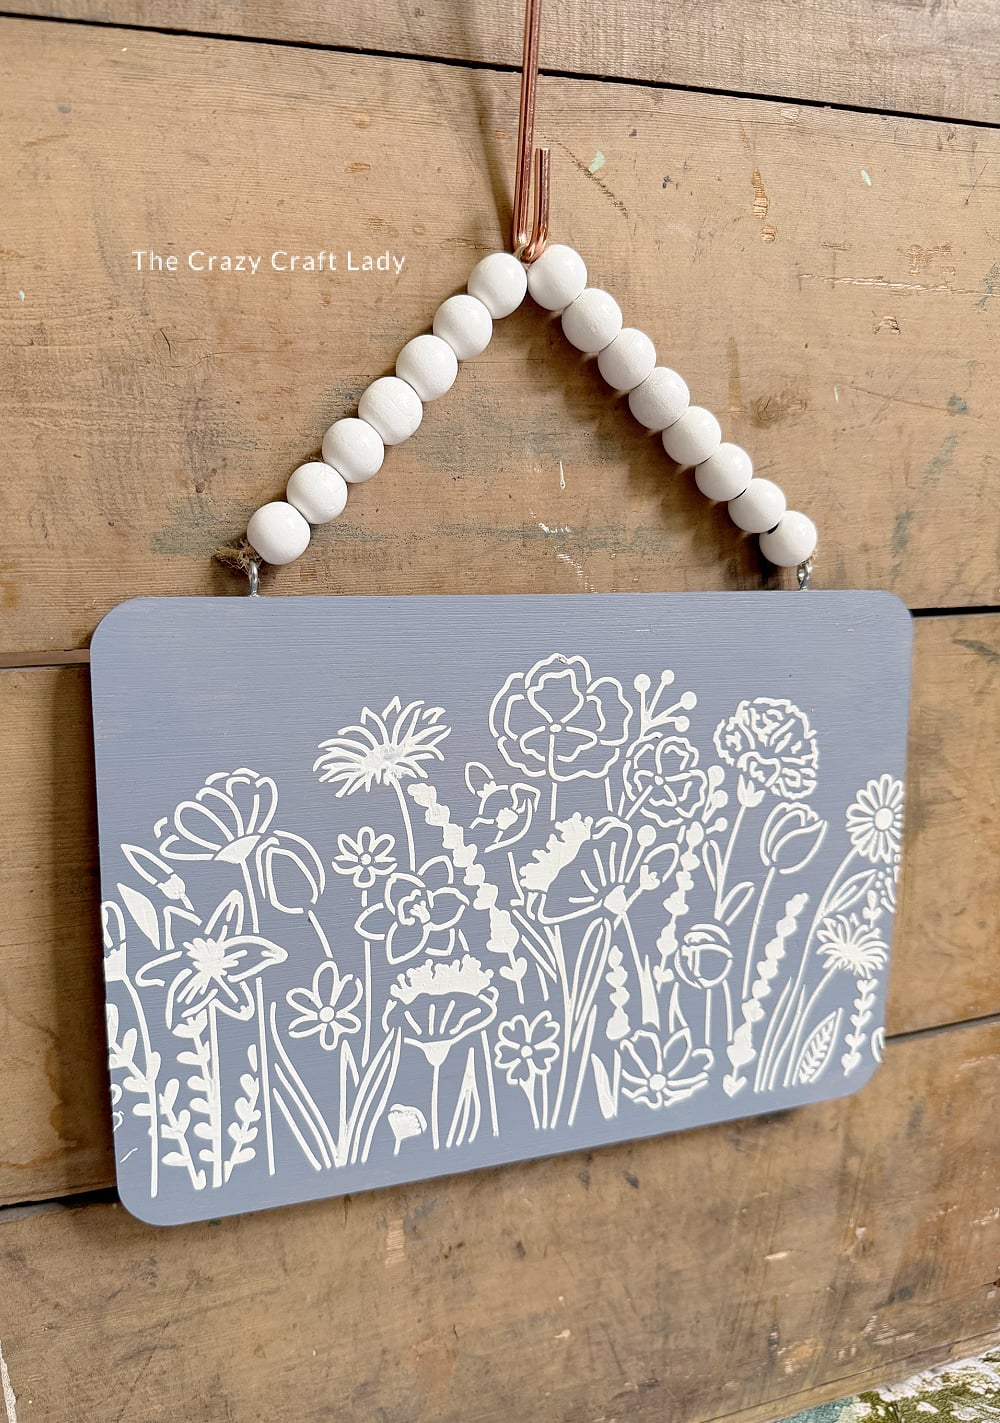
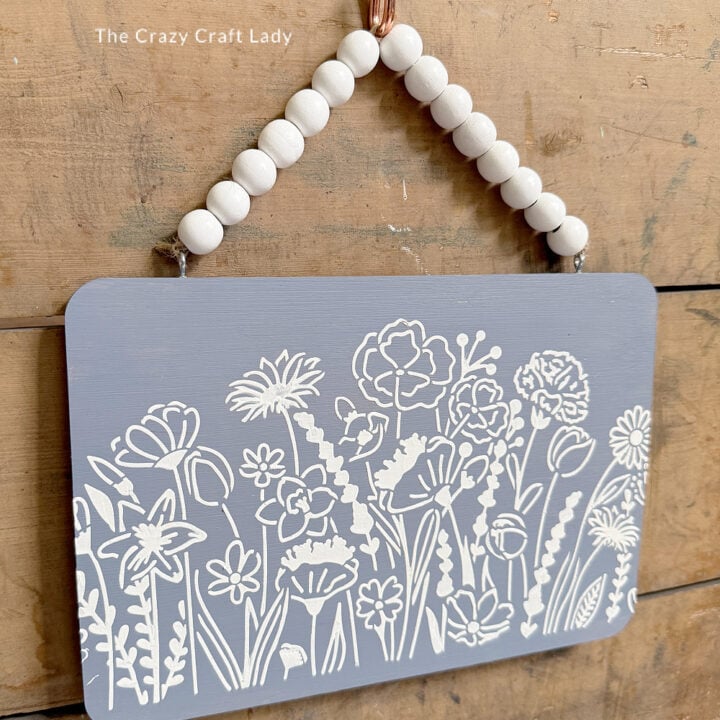
The finished craft
And that’s it, a sweet little textured floral wall hanging made from a Dollar Tree cutting board.
The raised white design really pops against the painted background, and the wood bead hanger gives it that finished boutique-style look.
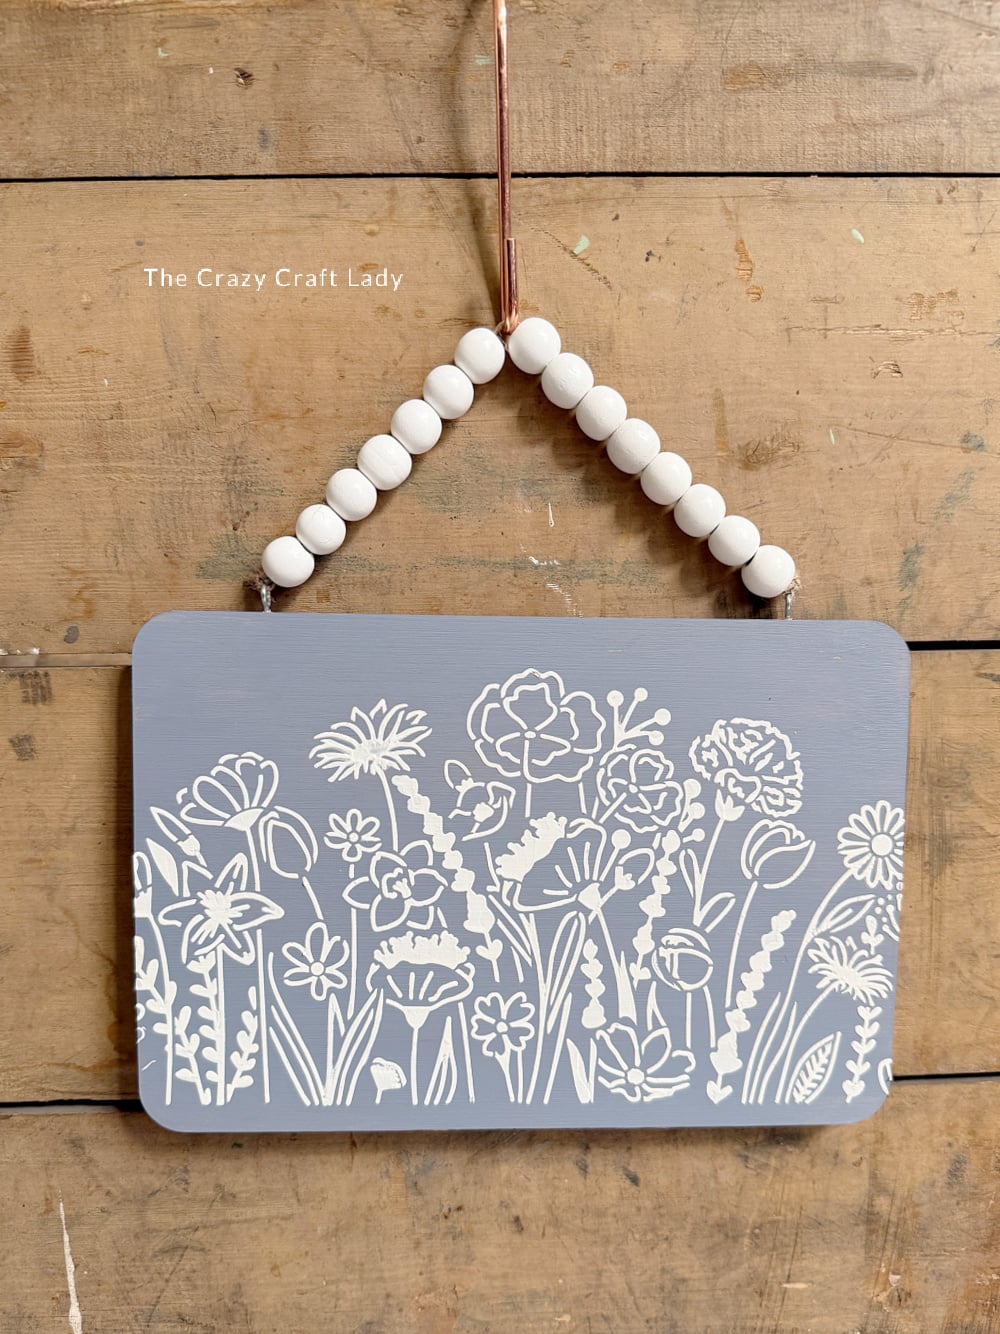
This would be so pretty for spring decor, cottagecore wall decor, a gallery wall, or even a handmade gift.
PIN this cutting board craft for later: