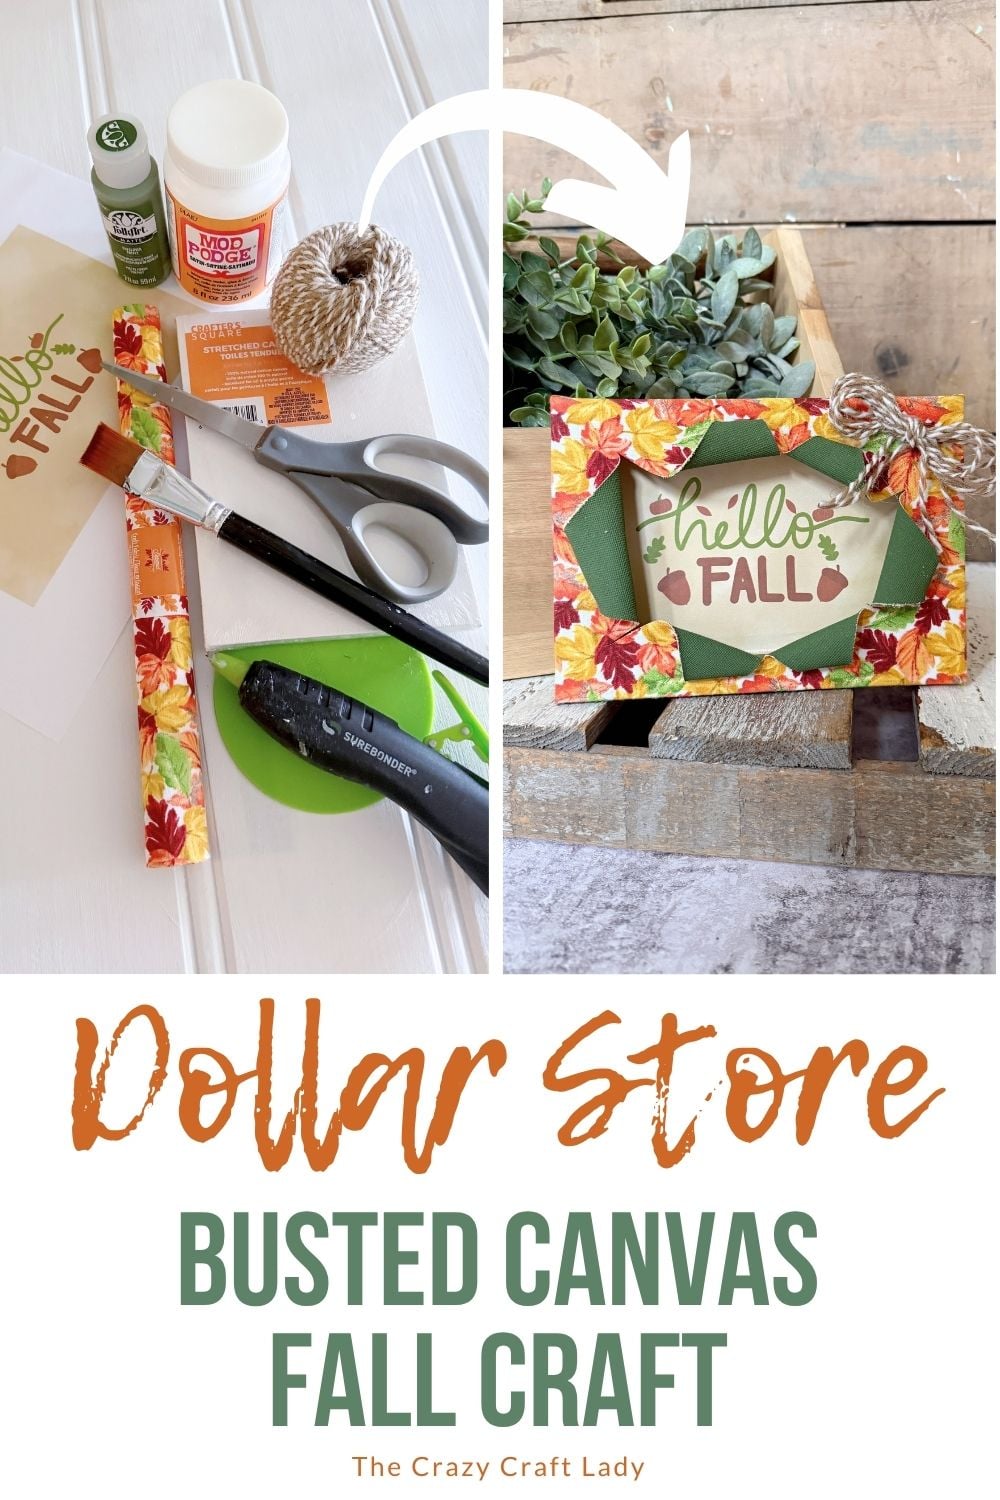
Make a Fall Fabric Busted Canvas using dollar store fabric, a stretched canvas, and a printable for an easy and inexpensive autumn craft.
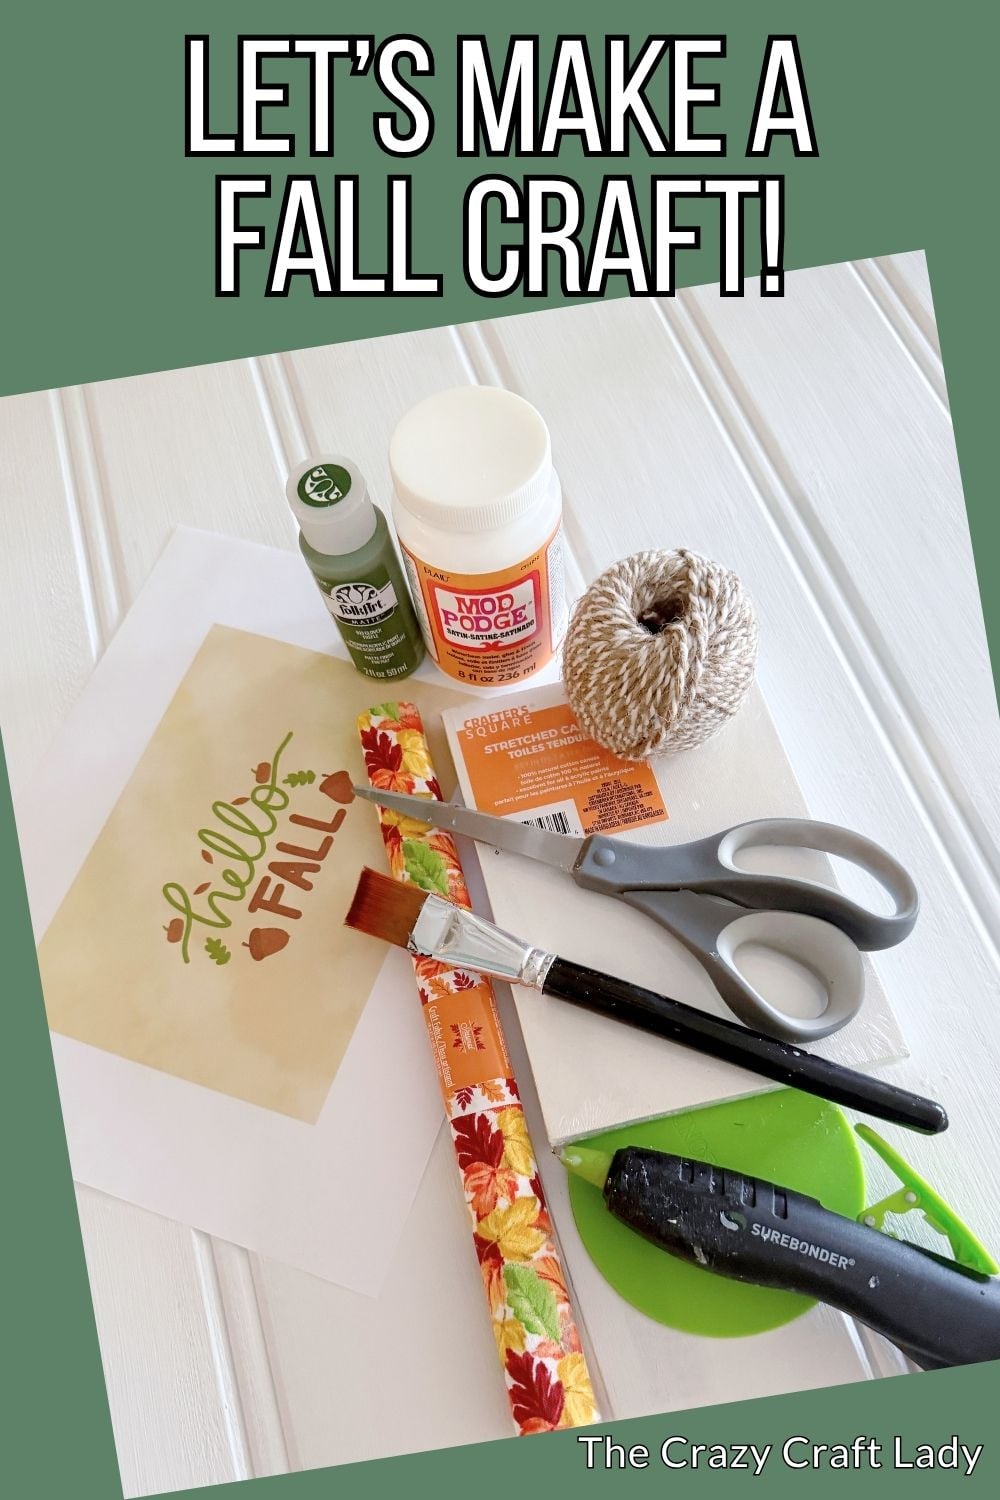
How to make a fall fabric busted canvas craft from simple dollar store supplies.
This post contains some affiliate links for your convenience. Click here to read my full disclosure policy.
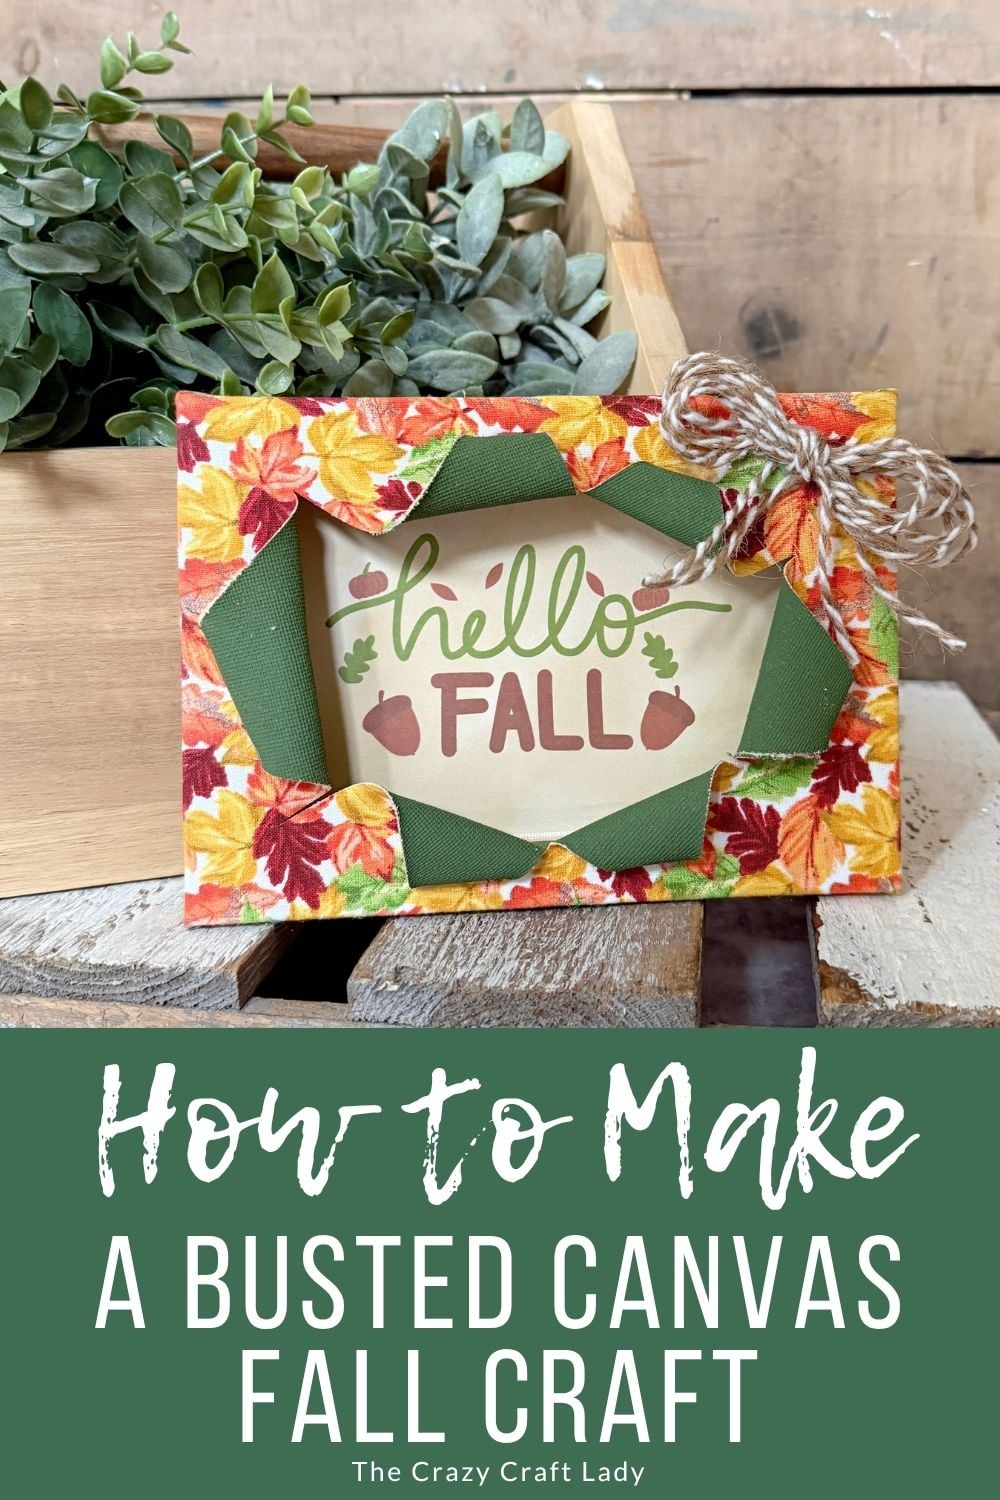
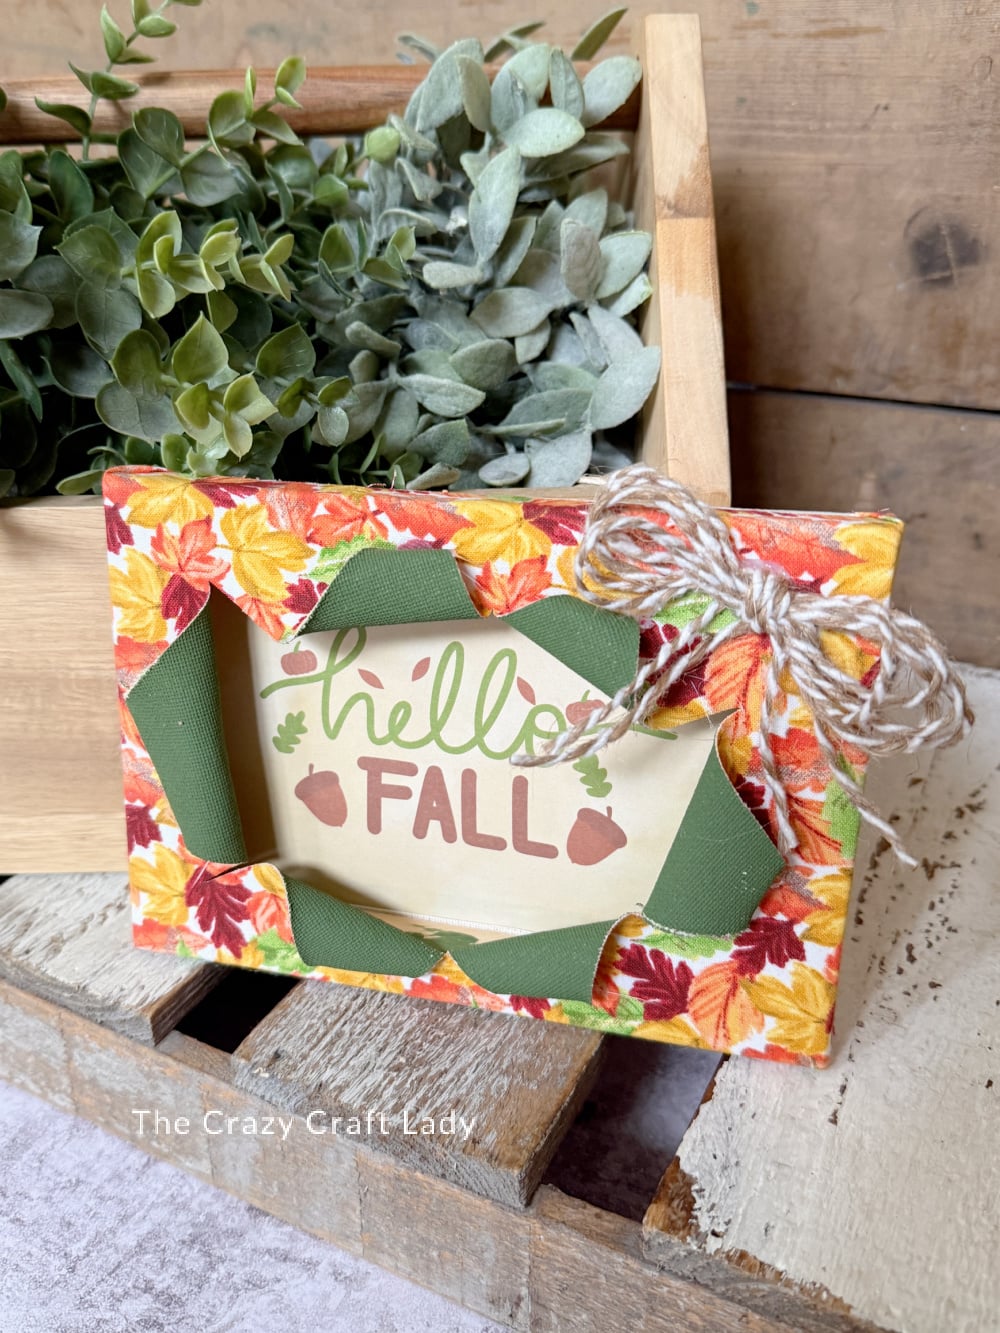
If you love the busted canvas trend, this Fall Fabric Busted Canvas is such a fun way to give it an autumn twist! Instead of using scrapbook paper or a napkin, this version uses pretty fall fabric from Dollar Tree to add color, pattern, and a little extra texture.
I started with a simple stretched canvas from the dollar store, covered it with leaf-patterned fabric, and added a “Hello Fall” printable behind the busted opening. Finish it off with a scrappy twine bow, and you have an inexpensive piece of fall decor that’s perfect for a shelf, mantel, or tabletop display.
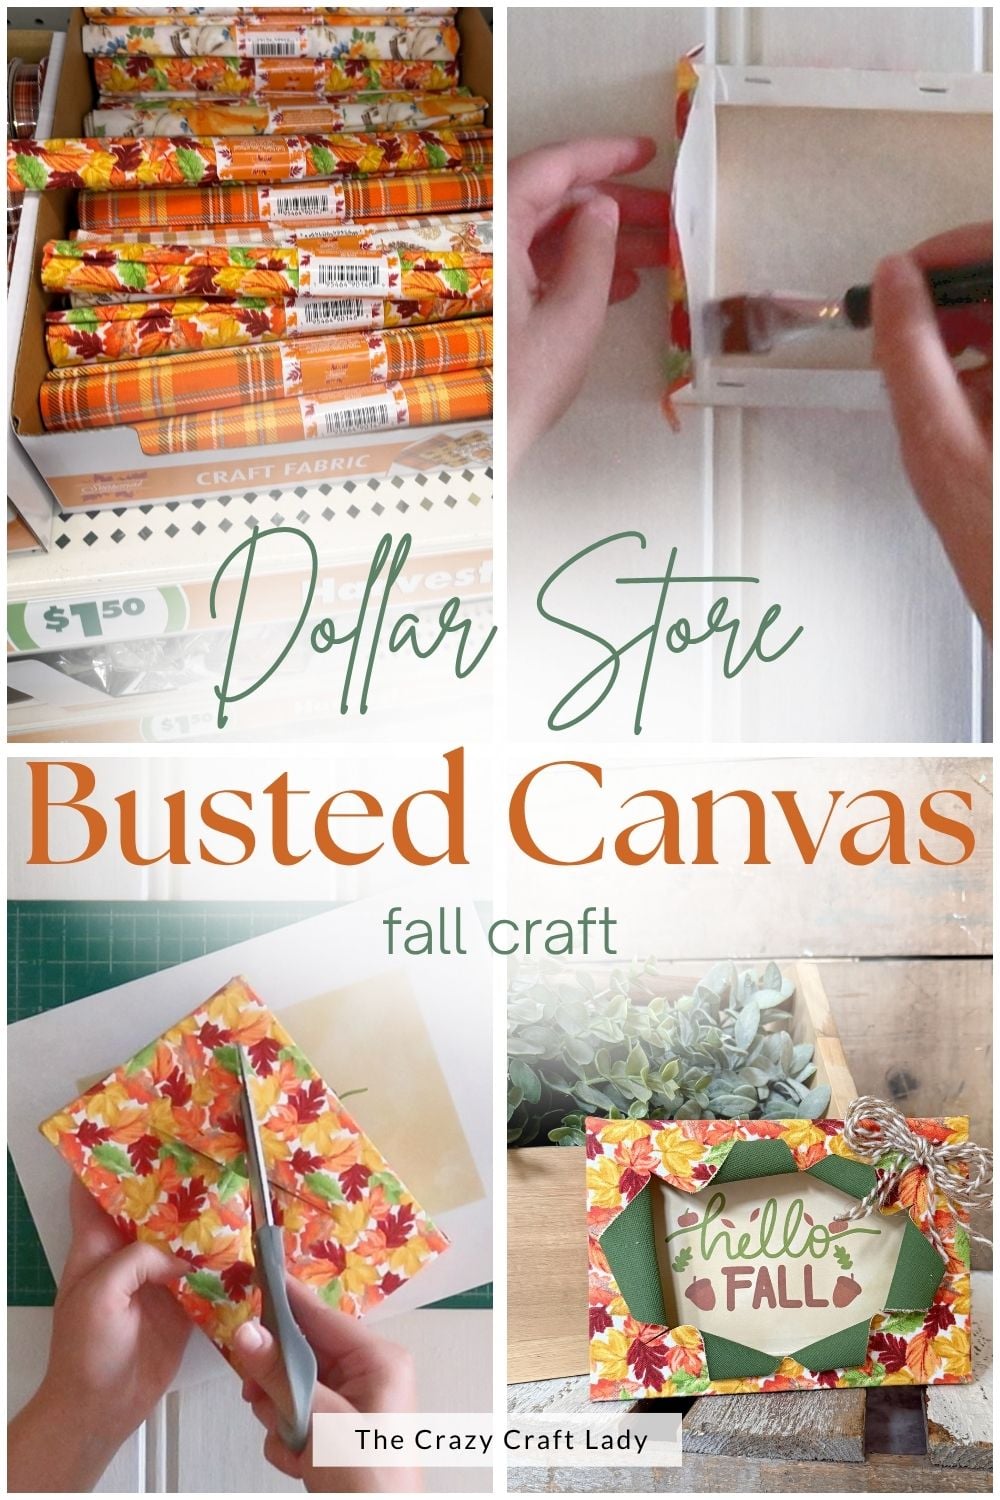
And if you’ve never made a busted canvas with fabric before, don’t worry. The technique is surprisingly easy!
Video Tutorial: Fall Fabric Busted Canvas
Before you get started, watch the video tutorial below to see exactly how I made this Fall Fabric Busted Canvas from start to finish.
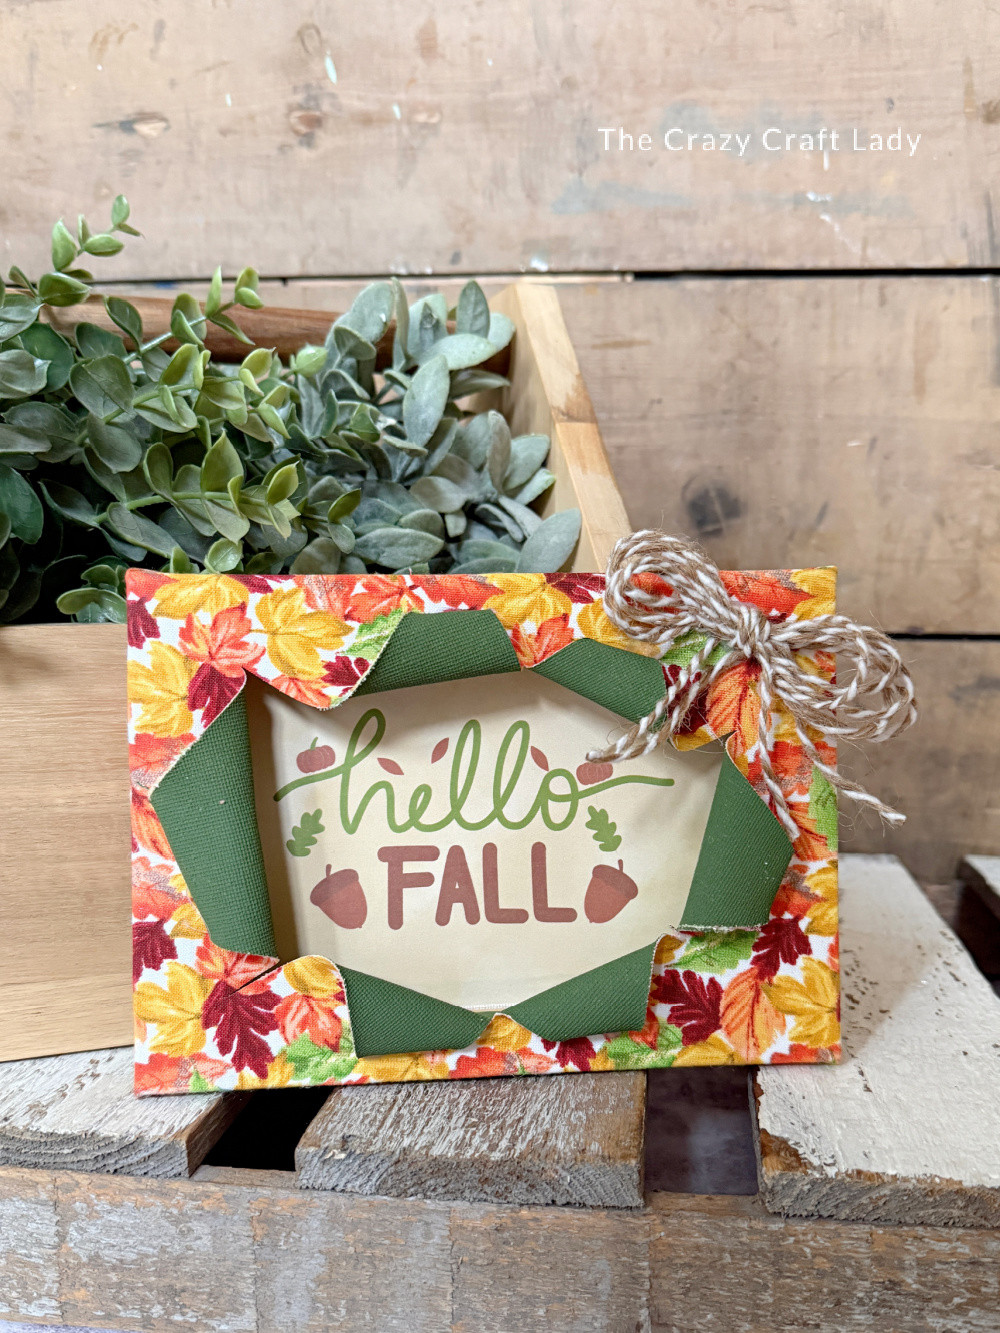
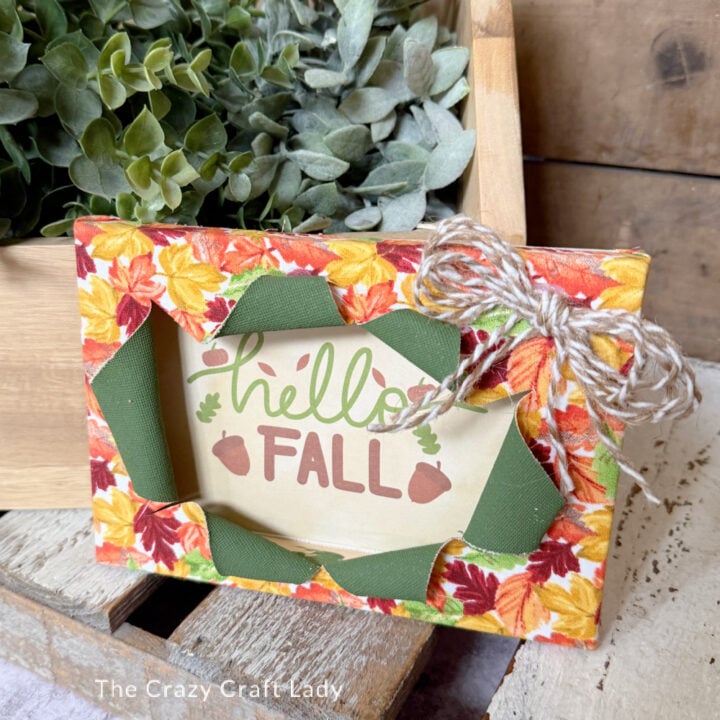
Fall Fabric Busted Canvas
This easy Fall Fabric Busted Canvas combines dollar store supplies, fall fabric, and a printable to create cute, budget-friendly autumn decor.
Materials
- 5x7 stretched canvas
- Fall fabric
- Mod Podge
- Coordinating acrylic craft paint
- “Hello Fall” printable
- Manila folder, cardstock, thin cardboard, or flat canvas panel
- School glue stick
- Twine
Tools
- 1-inch flat paintbrush
- Craft knife
- Cutting mat
- Scissors
- Hot glue gun and glue sticks
Instructions
- Watch the Video Tutorial. Start by watching the video tutorial above. Seeing how the fabric and canvas are cut and rolled back makes the busted canvas technique much easier to understand.
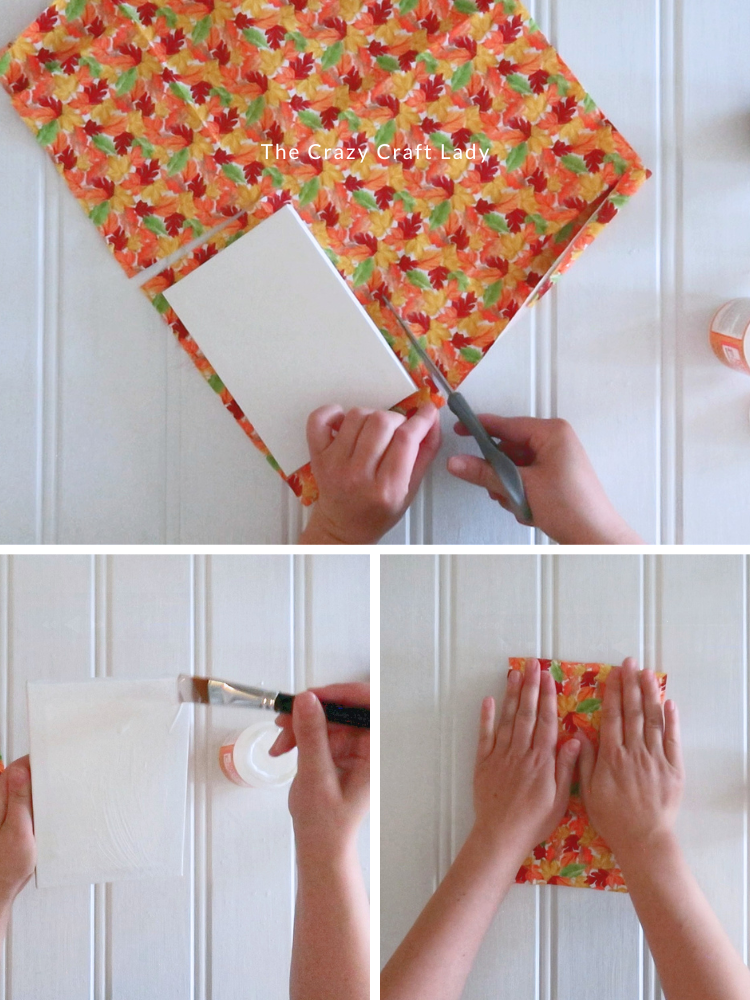
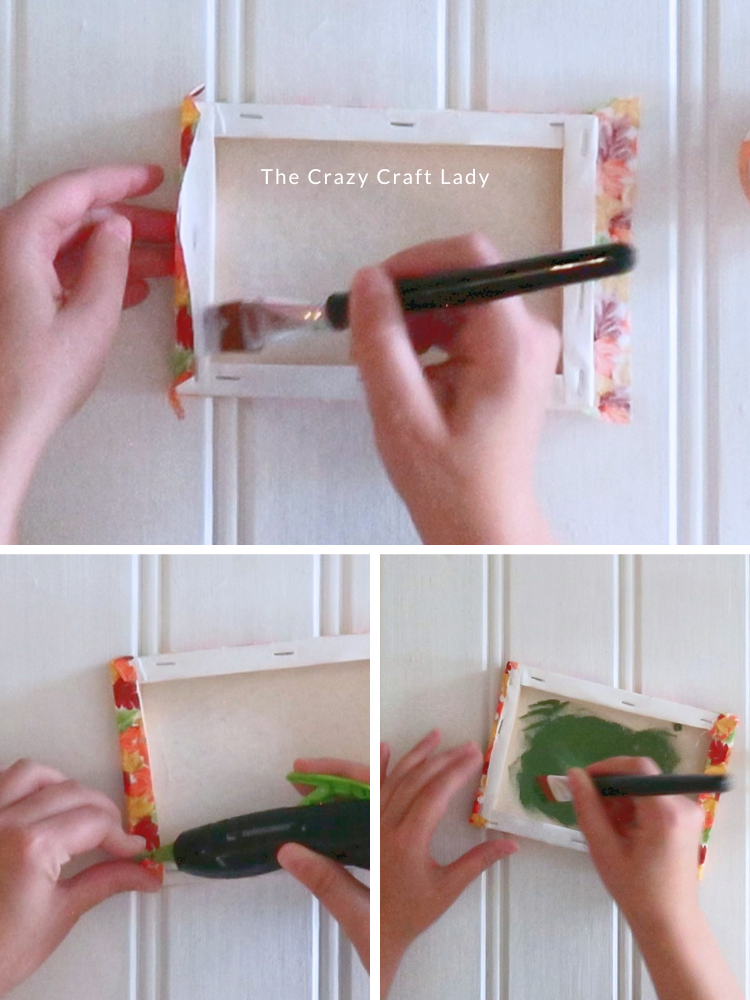
- Cover the Canvas with Fall Fabric. Cut your fall fabric approximately ½ inch larger than the canvas in every direction. Brush a generous layer of Mod Podge over the front and all four sides of your stretched canvas. Center the canvas on the fabric and smooth the fabric over the front and sides. Wrap the excess fabric around to the back. Pinch the corners to create neat folds, then secure everything with additional Mod Podge. I also added a tiny dab of hot glue to the corners to help hold them in place.

- Paint the Back of the Canvas. Paint the exposed portion on the back of the canvas with a color that coordinates with your fabric. I chose green to complement the leaves in my fall fabric. The unfinished canvas will absorb quite a bit of paint, so don't be surprised if you need a generous coat. Set the canvas aside until everything is completely dry.
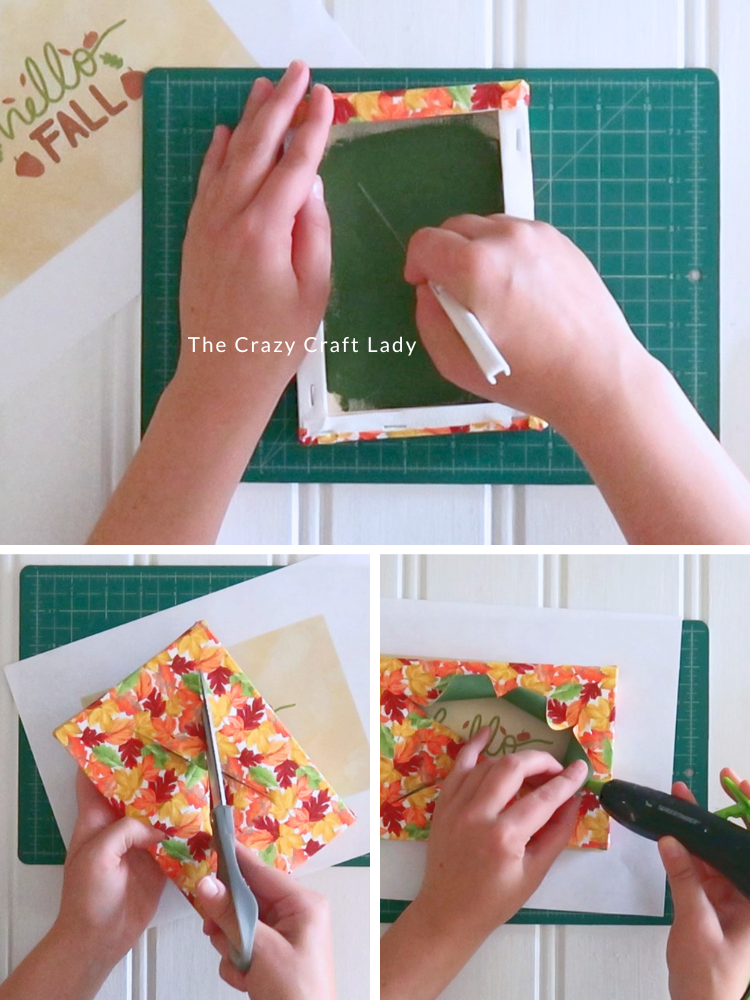
- Cut the Busted Canvas Opening. Set the canvas on cutting mat, and use a craft knife to carefully score a diagonal line through the center of the canvas. Because you're cutting through both the fabric and canvas, you may need to go over the line several times. Once you have the first cut started, use scissors to create two more intersecting cuts. You should end up with six little triangular sections—basically six tiny pizza slices.
- Create the Busted Effect. Roll each of the six sections back toward the outside of the canvas. Add a small amount of hot glue underneath each roll to hold it in place. If you're worried about your fingertips getting too close to the hot glue, use the end of a pencil or paintbrush to hold the canvas down until the glue sets. Continue until all six sections are rolled back and you're happy with the shape of your opening.
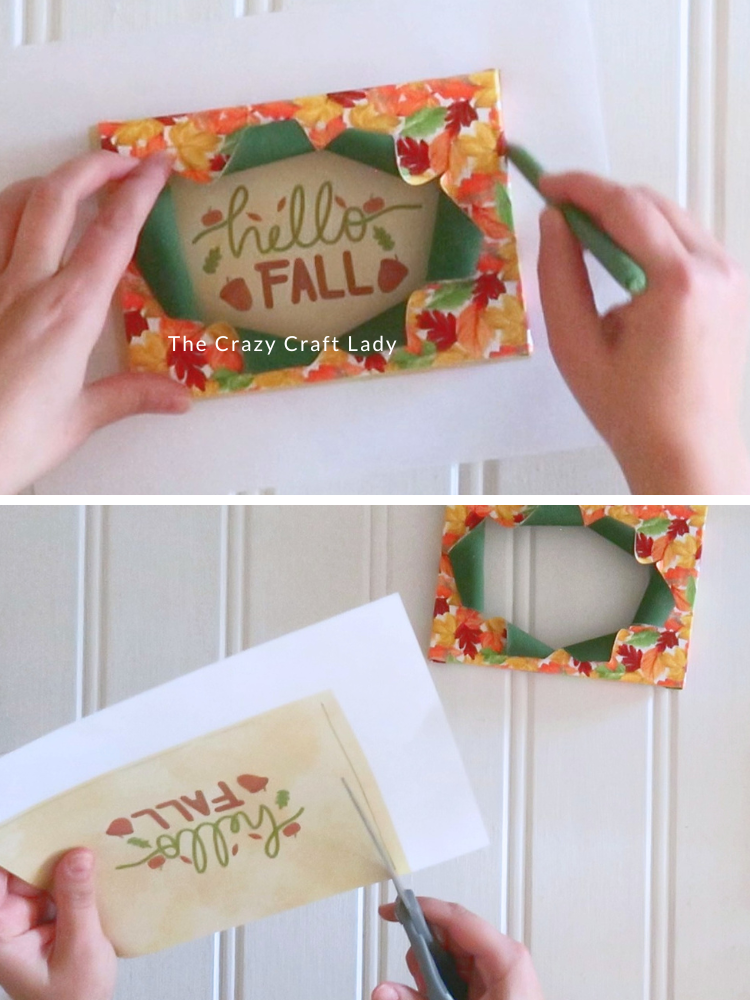
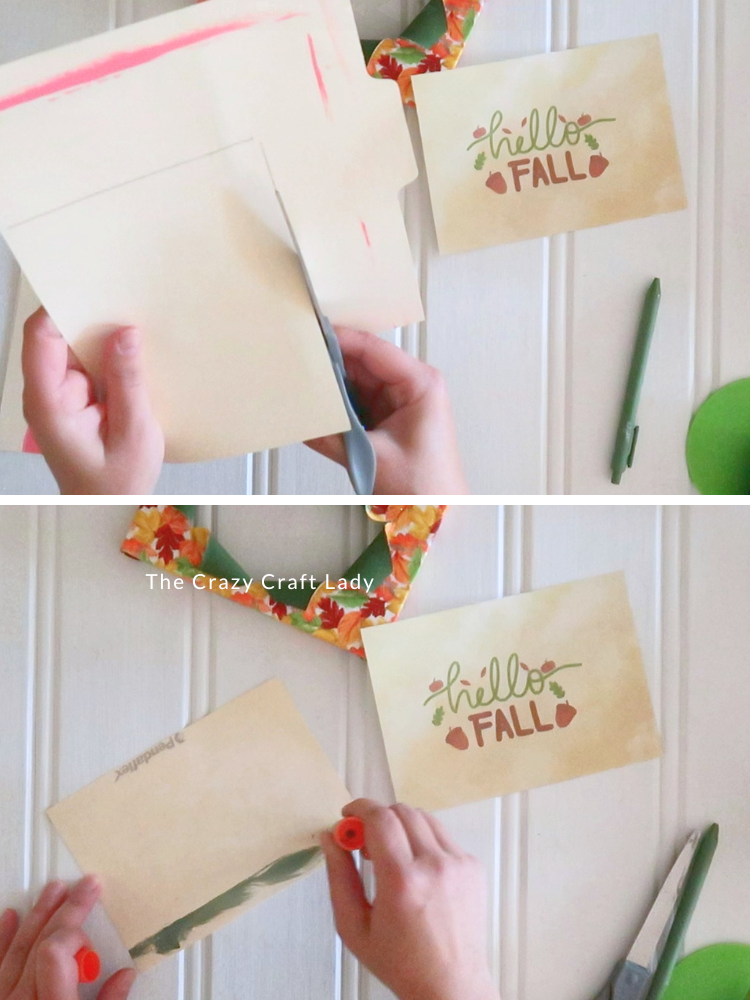
- Cut the Printable. Position your “Hello Fall” printable behind the opening until the design is centered exactly where you want it. Trace around the outside of the canvas onto the printable and cut just inside the traced line. You want the paper to be slightly smaller than the back of your canvas.
- Make the Printable Backer. To make the printable sturdier, trace it onto a scrap of manila folder, cardstock, cereal box cardboard, or another piece of thin cardboard. Cut out the backing and attach the printable to it with a school glue stick.
- Attach the Printable. Run a line of hot glue around the back of the stretched canvas and quickly press your printable backer into place. Flip it over, and your fall design should peek perfectly through the center of your busted canvas.
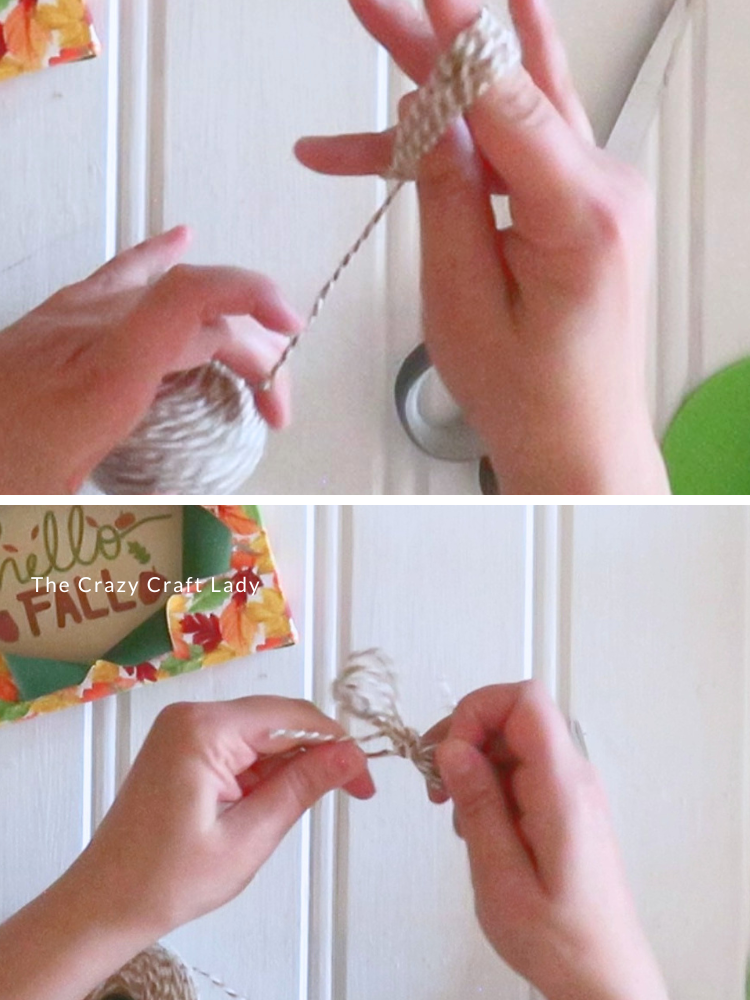
- Add a Twine Bow. For one final little embellishment, make a simple scrappy twine bow. Wrap twine around your fingers four or five times, pinch the loops together in the center, and wrap another piece of twine around the middle. Tie it securely and trim the four tails to approximately the same length. Hot glue the finished bow onto one corner of your canvas.
Can You Make a Busted Canvas with Fabric?
Yes! Fabric works beautifully for busted canvas crafts.
I’ve made busted canvases with scrapbook paper, napkins, paint, other decoupage materials, burlap, and even dollar store peel-and-stick wallpaper before, but using fabric gives the project a completely different texture. Just remember that fabric is thicker than paper, so you’ll need a sharp craft knife and may have to score your cuts several times.
More Ideas for Your Fall Fabric Busted Canvas
You can easily customize this project with whatever fall fabric you find.
Try pumpkins, sunflowers, plaid, leaves, buffalo check, or even a pretty vintage floral. Then coordinate the paint and printable with the colors in your fabric.
You could also skip the printable altogether and place a favorite fall photograph, greeting card, or piece of seasonal artwork behind the opening.
Once you know the basic busted canvas technique, there are so many ways to make it your own.
Final Thoughts
I wasn’t quite sure how my first Fall Fabric Busted Canvas would turn out, but I love the extra texture that the fabric adds to this project. And because the basic supplies are inexpensive, it’s an easy way to experiment with the busted canvas trend without spending much money.
Grab a stretched canvas, pick your favorite fall fabric, and start cutting those little pizza slices. You’ll have a cute piece of handmade fall decor before you know it!
PIN this fall busted canvas craft for later: