
Transform a Dollar Tree foam pumpkin into a gorgeous DIY pumpkin vase with paint and faux florals. Get step-by-step instructions in this easy fall craft tutorial!

DIY Painted Foam Pumpkin Vase (Dollar Tree Craft)
This post contains some affiliate links for your convenience. Click here to read my full disclosure policy.
Why I love this craft
If you’ve ever stared at those bright orange Dollar Tree foam pumpkins and thought, “This color just isn’t my vibe,” you’re not alone.
In this tutorial, I’ll walk you through how to transform a basic foam pumpkin into a muted, custom-painted pumpkin vase that’s perfect for fall decorating. With just a little paint, a few faux florals, and some patience, you’ll have a cute, budget-friendly centerpiece ready to display.
Crafting with Foam Pumpkins
When it comes to Dollar Tree foam pumpkins, the possibilities really are endless. They’re lightweight, easy to carve or paint, and the perfect blank canvas for seasonal DIYs. For this project, we’re turning one into a vase, making it a budget-friendly yet stylish way to display fall florals.
The best part? They’re just $1.25, so you can grab a few and experiment without worrying about breaking the bank. It’s a quick, affordable craft supply that instantly elevates your fall décor.
The inspiration for this craft:
I have tons of pumpkin crafts, but one of my favorites using foam pumpkins is my Rag Fabric Pumpkin. I’ve tagged many more crafts at the bottom of this post so don’t forget to continue scrolling and choose a few to make this autumn season.

Video Tutorial: Dollar Tree Foam Pumpkin Vase
Watch this quick video to see how this craft came together:


Dollar Tree Foam Pumpkin Vase
Learn how to paint Dollar Tree foam pumpkins and turn them into budget-friendly fall centerpieces. This DIY pumpkin vase idea is perfect for autumn decorating.
Materials
- 1 foam pumpkin (Dollar Tree)
- Faux florals and greenery of your choice
- Rust-Oleum chalk paint in White
- Waverly chalk paint in Pumpkin (or your preferred orange)
- A touch of pink acrylic or chalk paint (for toning down the orange)
Tools
- Sharpie marker
- Pen blade or craft knife
- Paintbrushes
- Mixing tray or palette (optional)
- Parchment paper (for drying surface)
Instructions
- Watch video. Follow the tutorial for a step by step walkthrough on how to make your own foam pumpkin vase.
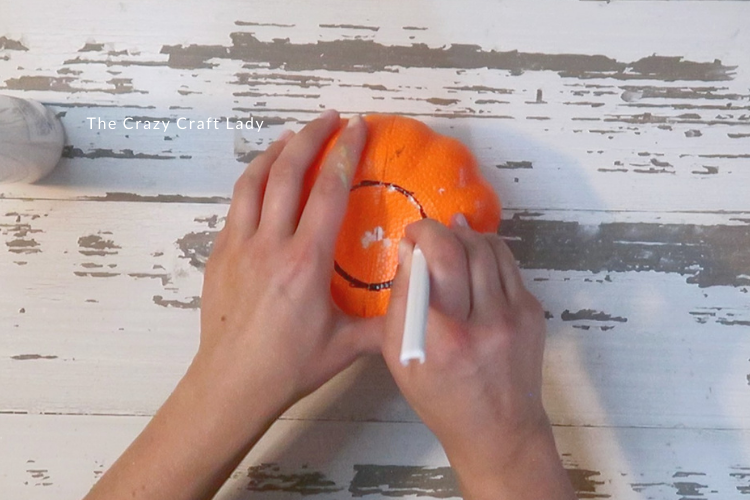
- Cut an opening. Use a Sharpie to trace a circle around the top of your foam pumpkin. With a pen blade or craft knife, carefully cut out the circle to create an opening.

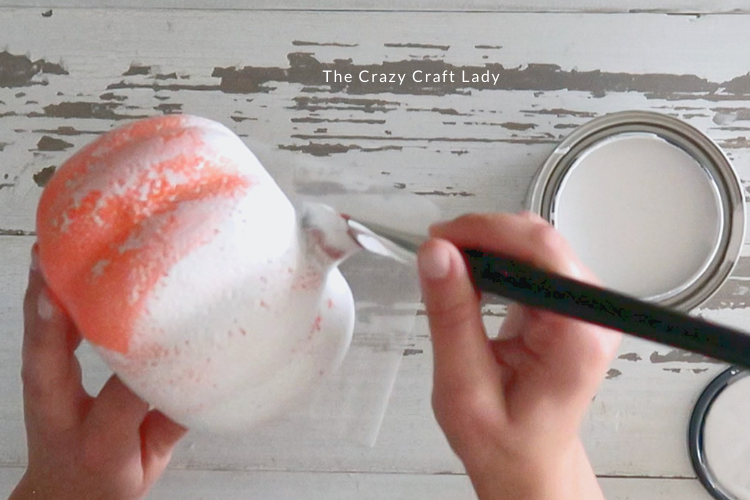
- Prime the pumpkin. Apply a coat of Rust-Oleum chalk paint in white to prime the surface. Let it dry completely before moving on.
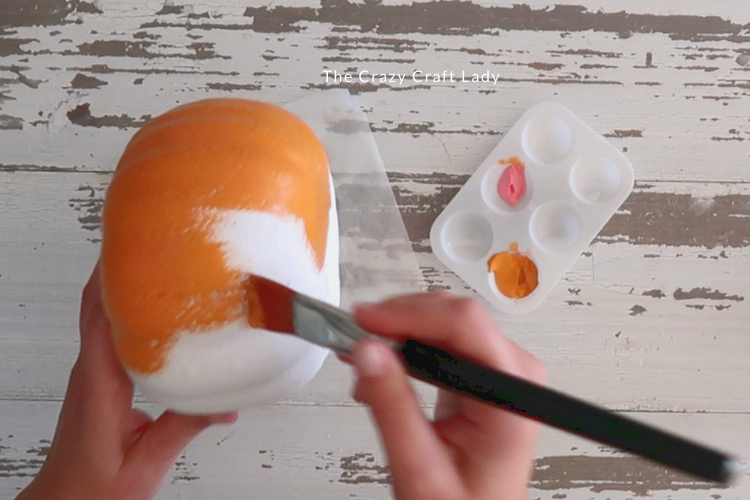
- Add color. Paint the pumpkin with Waverly chalk paint in Pumpkin. To tone down the brightness, mix in a little pink paint.
- Work the texture. Use varied brush strokes—up, down, side to side, and circular motions—to cover every nook and cranny. Reload your paintbrush as needed until the entire pumpkin is evenly coated.
- Let it dry. Set the pumpkin on a piece of parchment paper and allow it to dry completely.
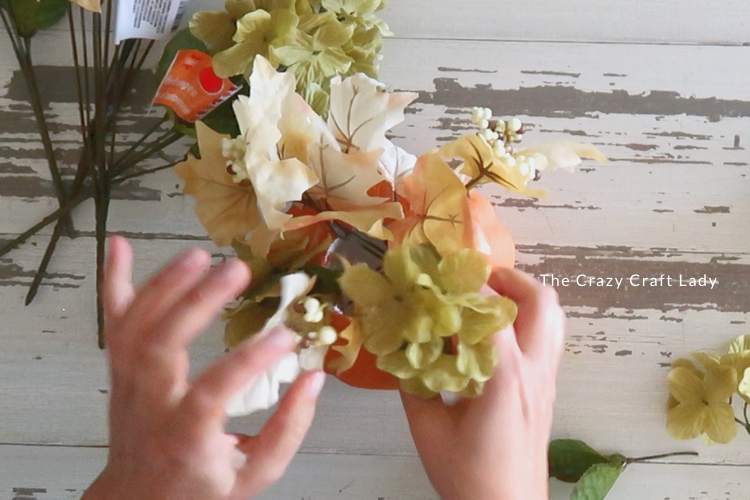
- Fill with florals. Once dry, arrange faux florals and greenery inside the opening you cut earlier. Play around with height, color, and fullness until you get a look you love.
The Finished Craft

Don’t forget to PIN this craft for later:

More Crafts Using Foam Pumpkins:
- Dollar Tree Mop Pumpkins, an inexpensive yarn pumpkin craft
- Burlap Pumpkin Craft
- Fall Pumpkin Signs
- Embroidery Hoop Pumpkin Sign