
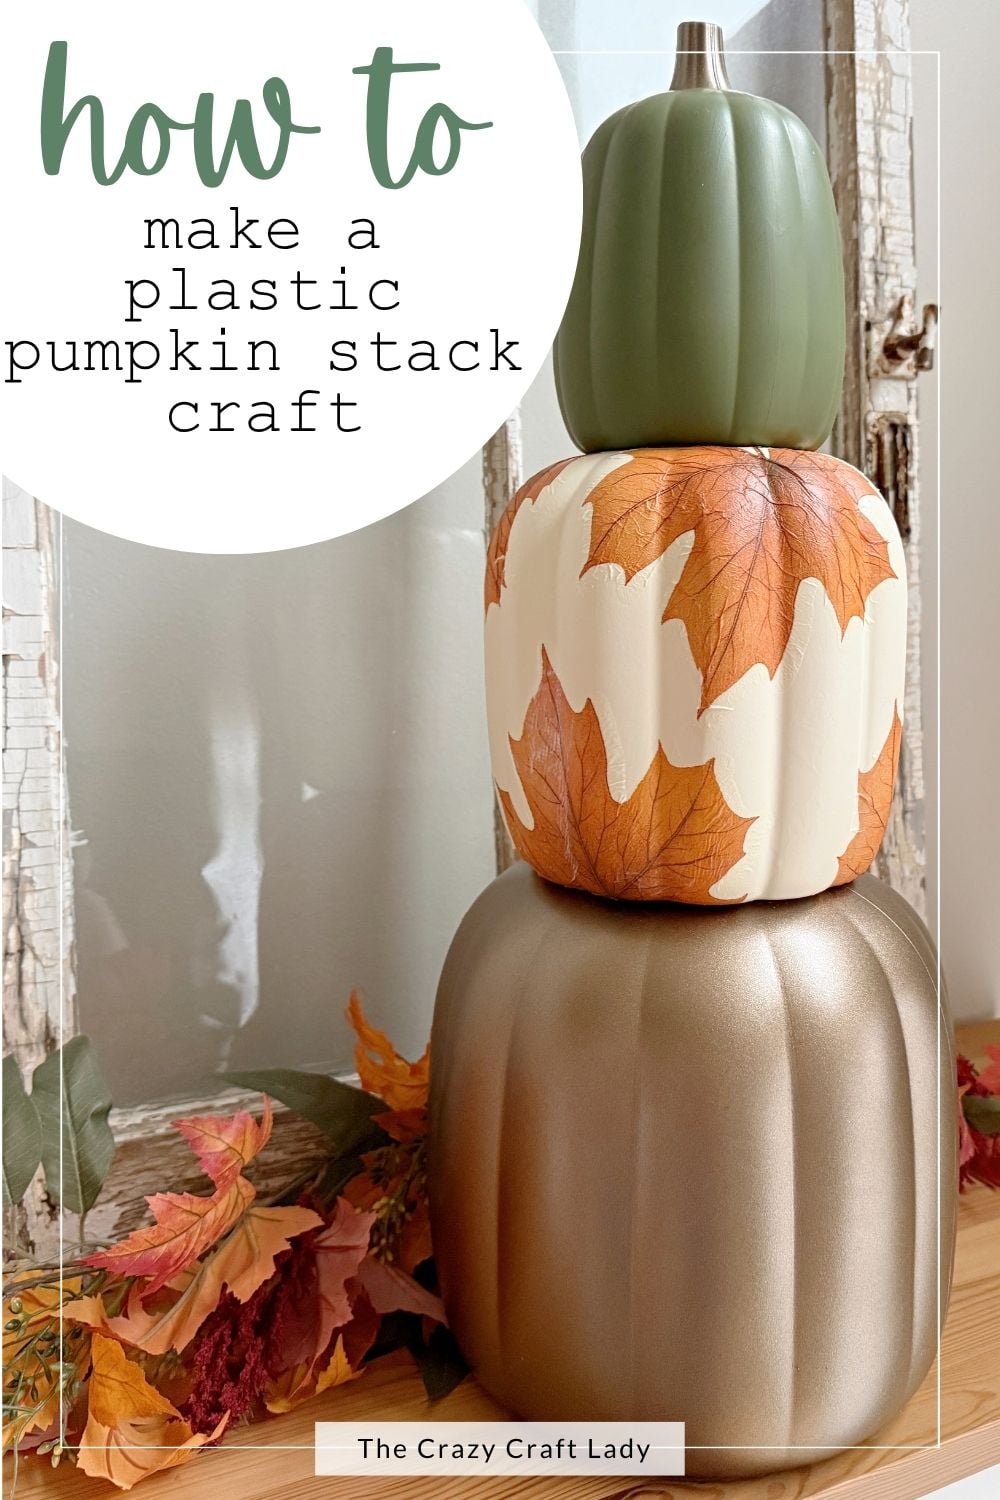
This Dollar Tree paint and decoupage jumbo pumpkin stack combines metallic brass, creamy white, and decoupaged fall leaves for an easy seasonal decor makeover.
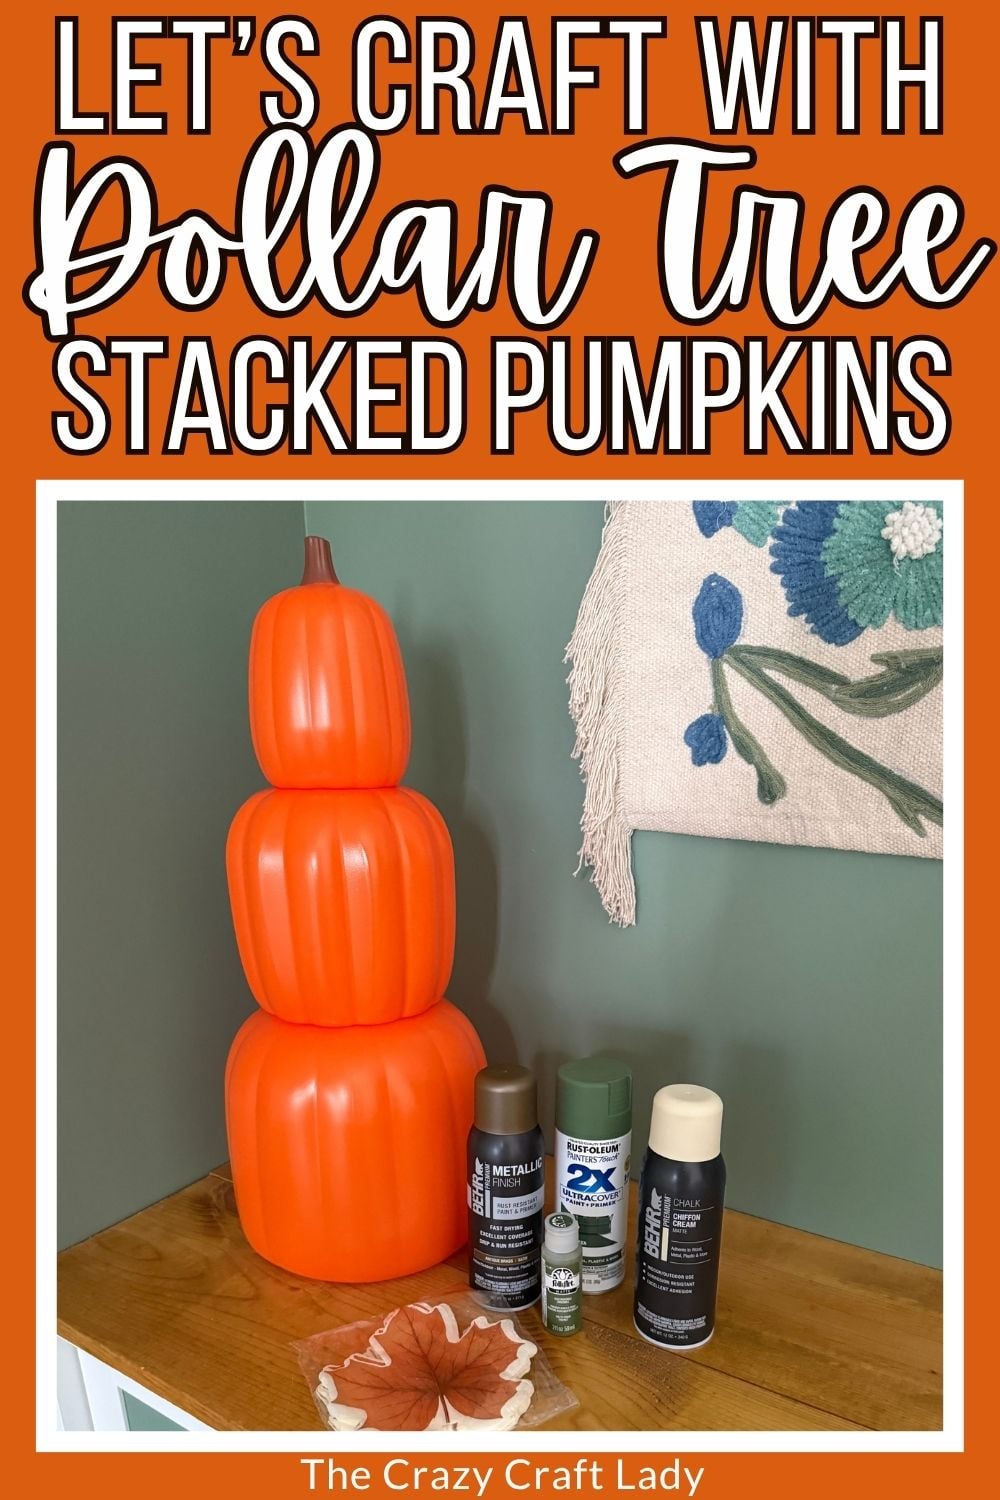
Transform a jumbo plastic pumpkin stack with paint and napkin decoupage. Try this Dollar Tree stacked pumpkin craft for budget-friendly fall decor.
This post contains some affiliate links for your convenience. Click here to read my full disclosure policy.
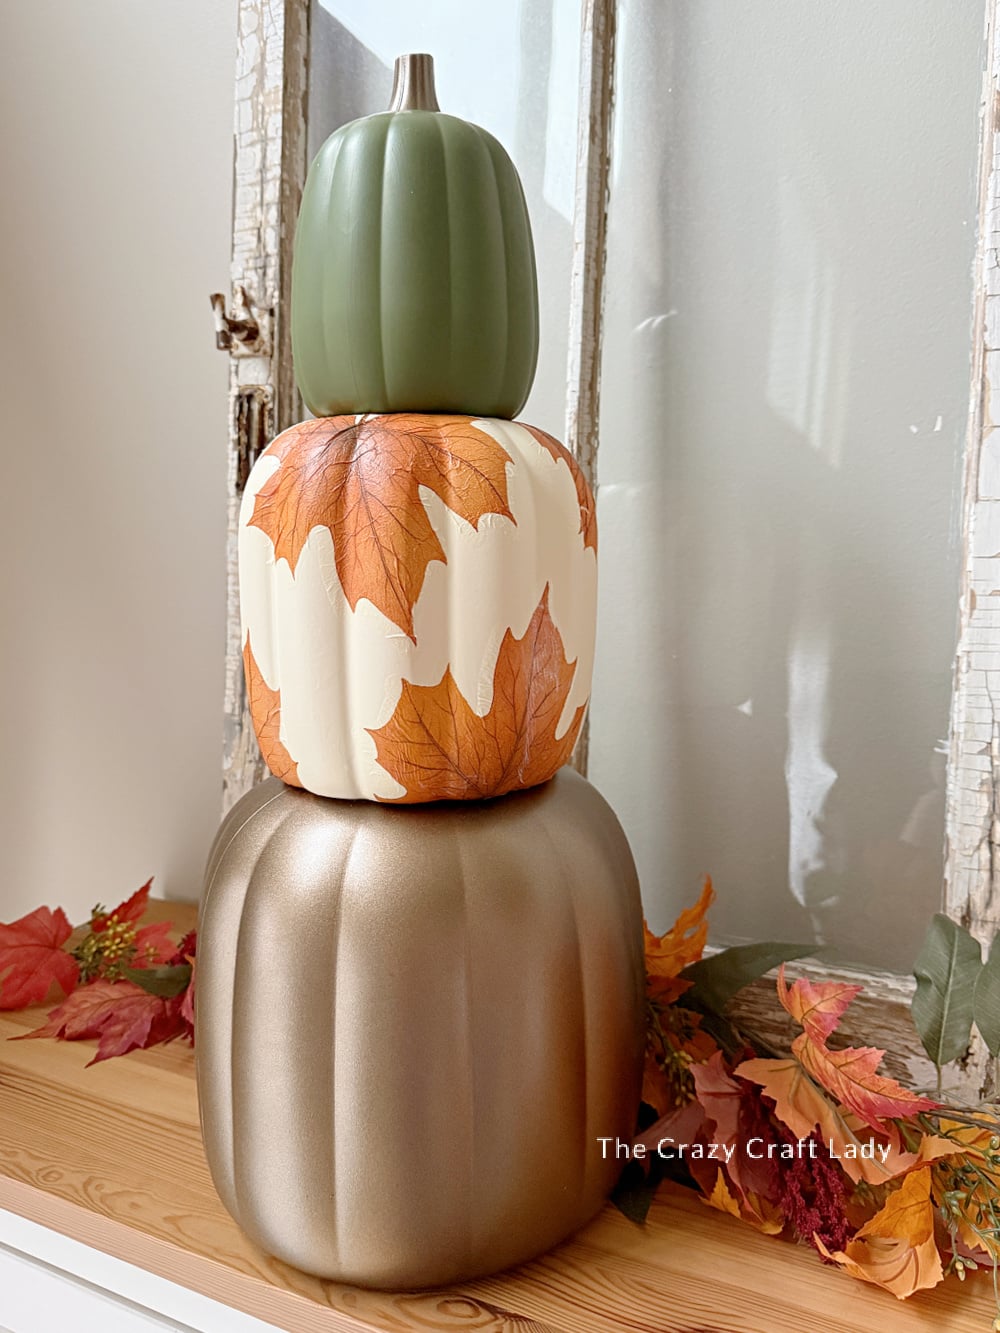
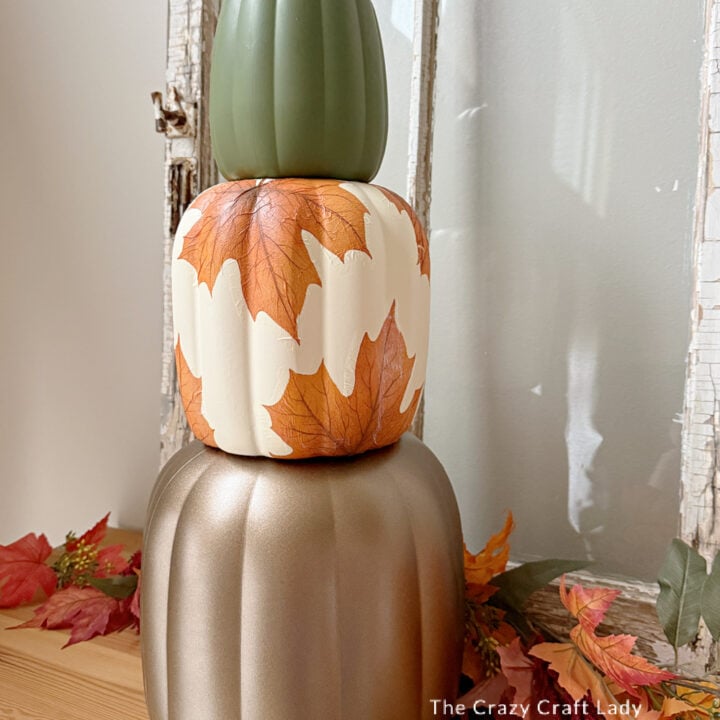
Those jumbo plastic pumpkin stacks from Dollar Tree have so much potential, and this one got a makeover with three different finishes! I paired an antique brass bottom pumpkin with a creamy white, leaf-covered middle pumpkin and a rich green pumpkin on top.
This paint and decoupage jumbo pumpkin stack combines spray paint, a little brush painting, and fall napkin decoupage. And can we talk about those leaf napkins for a second? I found them at Michaels, and they were just too pretty to pass up.
The finished stack has a mix of warm metallic shine, fall color, and leafy pattern. It’s a fun way to turn a basic plastic decoration into something that feels much more personal.
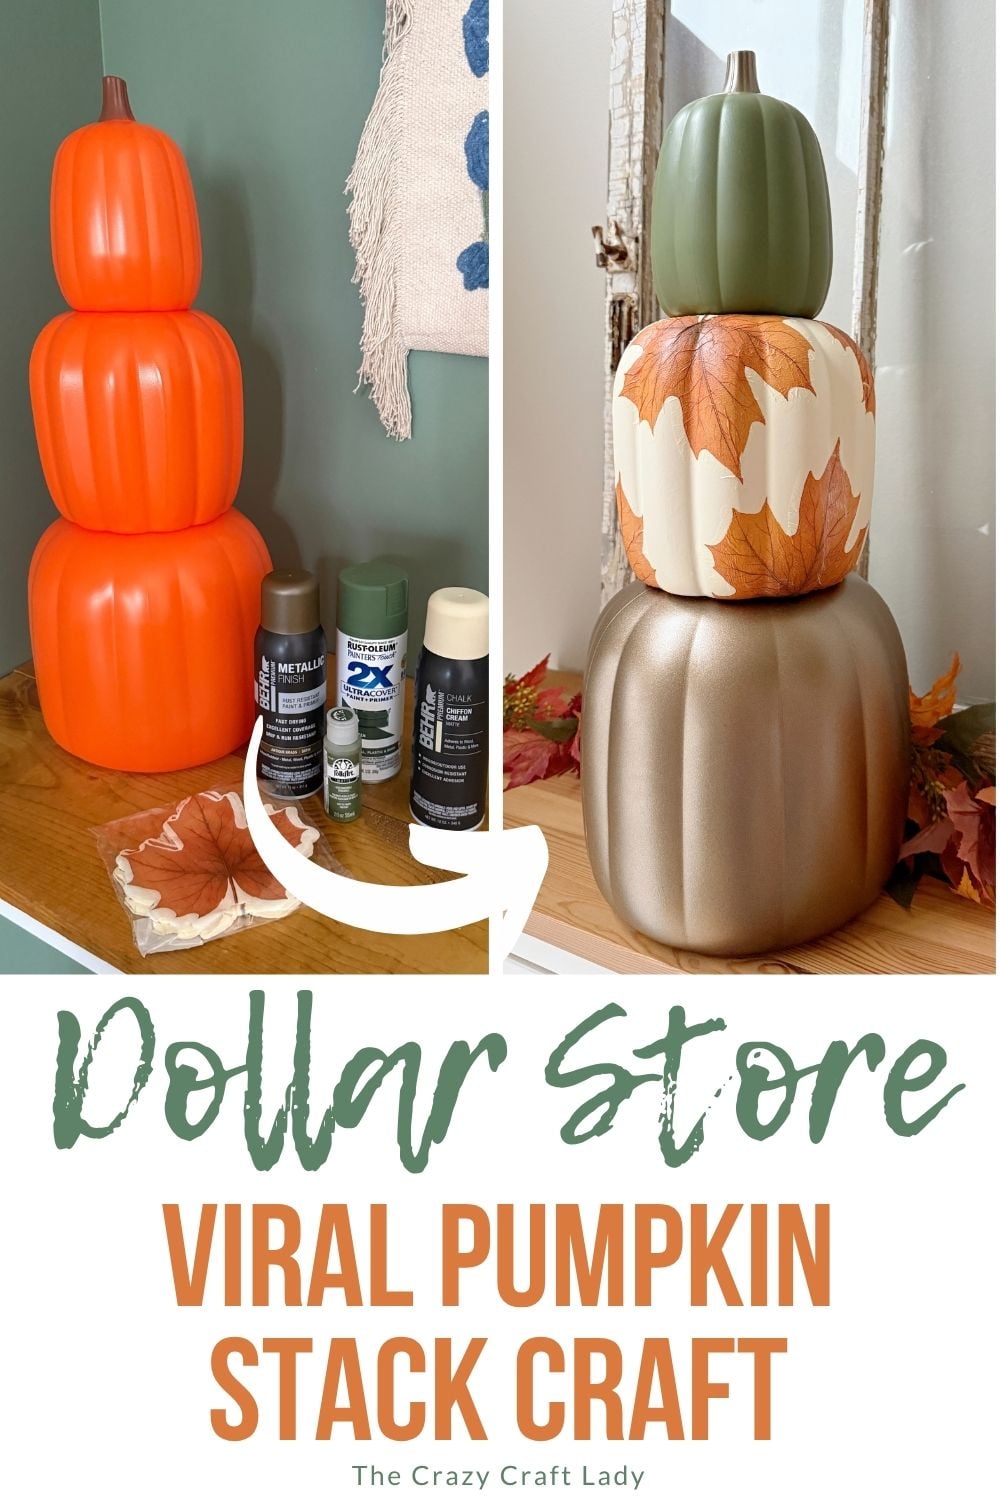
Three Pumpkins, Three Different Finishes
For this makeover, each pumpkin gets its own treatment:
- Bottom pumpkin: Antique brass spray paint.
- Middle pumpkin: Chiffon cream spray paint with decoupaged leaf napkins.
- Top pumpkin: Crocodile green craft paint with an antique brass stem.
I love how the cream background lets the leaf designs stand out. And repeating the antique brass on the little stem ties the top and bottom together.
You can absolutely change the colors or napkin pattern to match your own fall decor. This is just the combination I used!
Supplies Needed
- Jumbo three-piece plastic pumpkin stack from Dollar Tree
- BEHR chalk spray paint in Chiffon Cream
- BEHR metallic spray paint in Antique Brass
- Spray paint for the top pumpkin’s base coat—I used moss green
- FolkArt Matte paint in Crocodile
- Fall leaf paper napkins—I found mine at Michaels
- Matte Mod Podge
- Flat 1-inch paintbrush
- Scissors
- Plastic wrap
- Small sanding tool or fine-grit sanding block
- Tall, stable can or similar support for painting
- Protective work surface covering
Napkin note: My napkins had four leaf designs each, and I used six individual leaves to decorate the middle pumpkin. Have at least two matching napkins on hand if you’re working with a similar design.
How to Make This Dollar Tree Stacked Pumpkin Craft
Step 1: Watch the Video Tutorial
Watch the video tutorial located above, right here in this blog post, to see the full makeover. The video is especially helpful for seeing how I smooth the napkin leaves around the pumpkin’s curves and ridges.
Step 2: Separate and Spray Paint the Pumpkins
Take the pumpkin stack apart so you can work on each piece individually. Set your three pumpkins on a protected work surface in a well-ventilated area.
Spray paint the largest pumpkin Antique Brass and the medium pumpkin Chiffon Cream. These colors will show in the finished project, so give them several thin coats for even coverage.
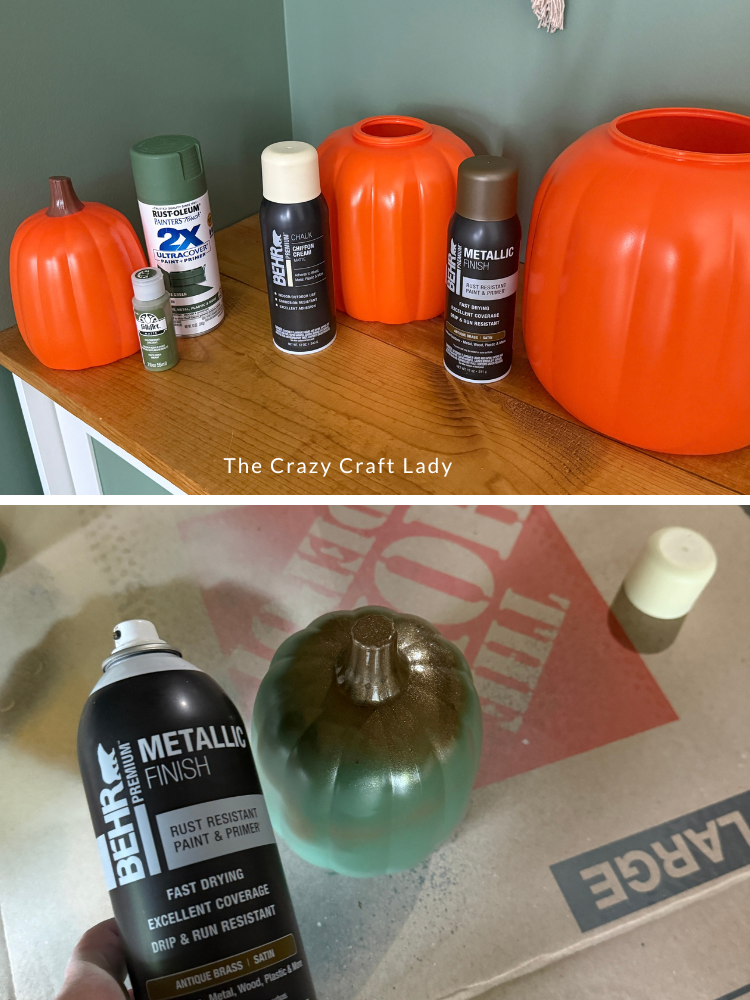
The smallest pumpkin just needs a spray-painted base coat before you brush on its final green color. I happened to have moss green spray paint, so that’s what I used. The base color isn’t important here because you’ll cover it with craft paint.
Once that base coat is dry enough to handle, spray the top pumpkin’s stem with Antique Brass. Don’t worry if a little brass gets onto the pumpkin around the stem—you’ll paint over that area later.
Let the spray paint dry before moving on.
Step 3: Cut Out the Napkin Leaves
Cut the individual leaf designs from your paper napkins. Where the leaves meet, round off the connecting corners so each leaf becomes its own separate piece. My napkins gave me four leaves each, and I ended up using six leaves around the middle pumpkin.
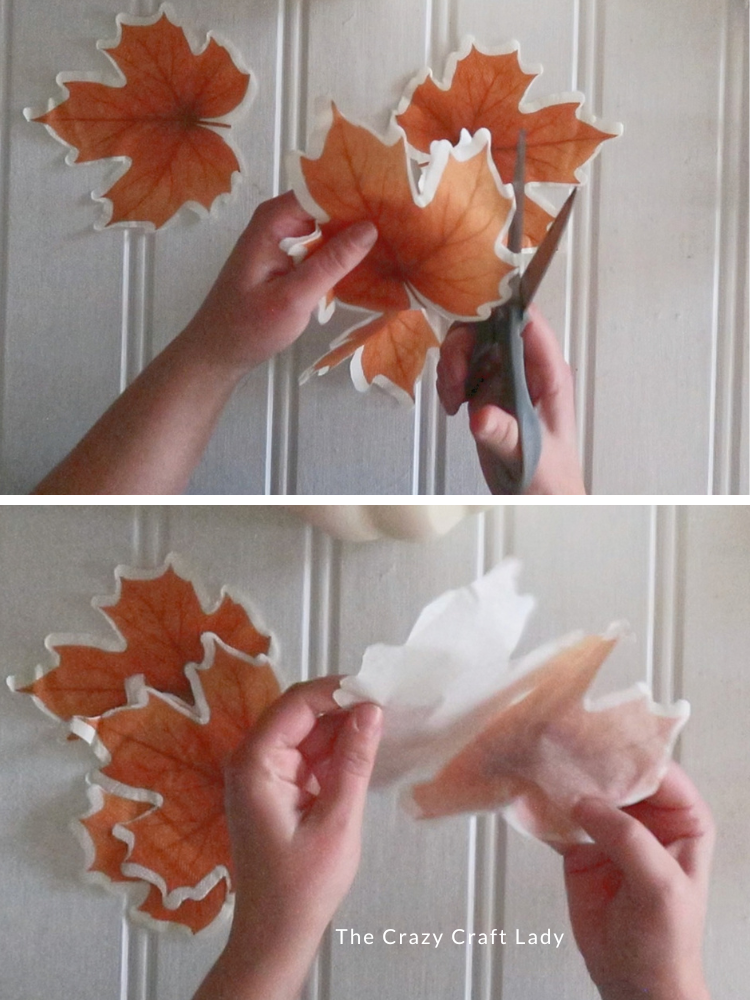
Separate the napkin layers and keep only the thin, printed top layer. Discard the plain backing layer. My napkins were two-ply, so there was one backing layer to remove.
New to napkin decoupage? A napkin with smaller designs may be easier to work with. These large leaves are beautiful, but getting them around a curved, ridged pumpkin takes a little patience!
Step 4: Apply the First Leaf with Mod Podge
Brush a thin, even layer of matte Mod Podge onto a section of the cream pumpkin where you want to place your first leaf.
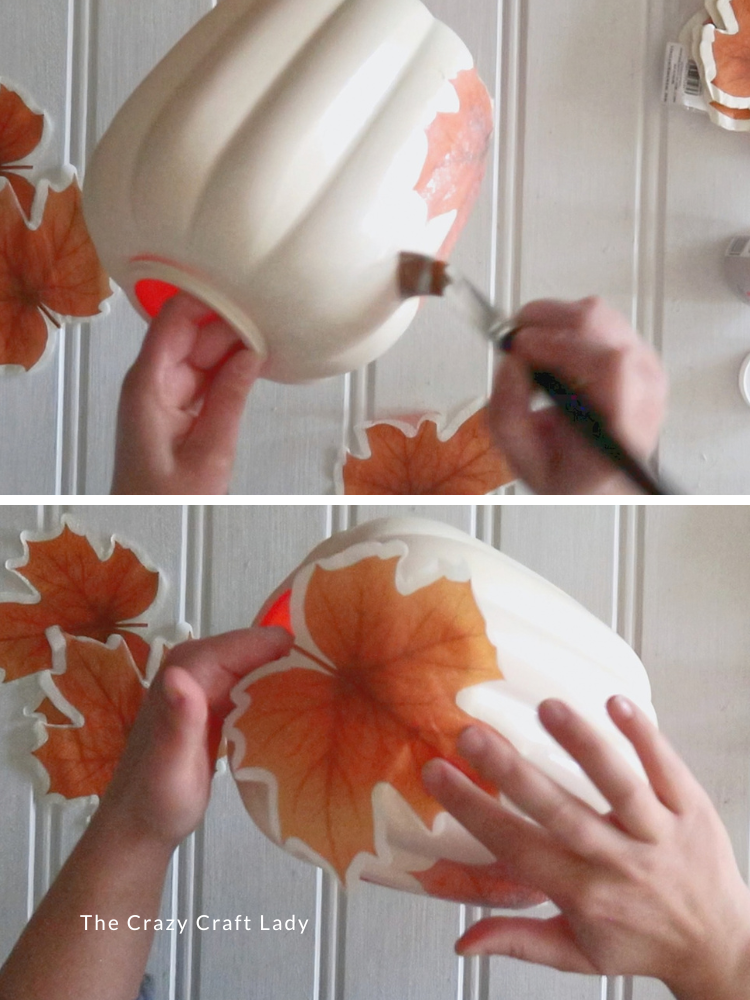
Carefully lay the printed napkin piece onto the wet Mod Podge. Place a piece of plastic wrap over the leaf, then gently smooth from the center toward the edges.
Work slowly around the pumpkin’s ridges. The plastic wrap helps you smooth the delicate paper without dragging your fingers directly across it. And listen, it doesn’t have to be perfect. Mine had a few wrinkles! That’s part of working with a large piece of napkin on a rounded surface.
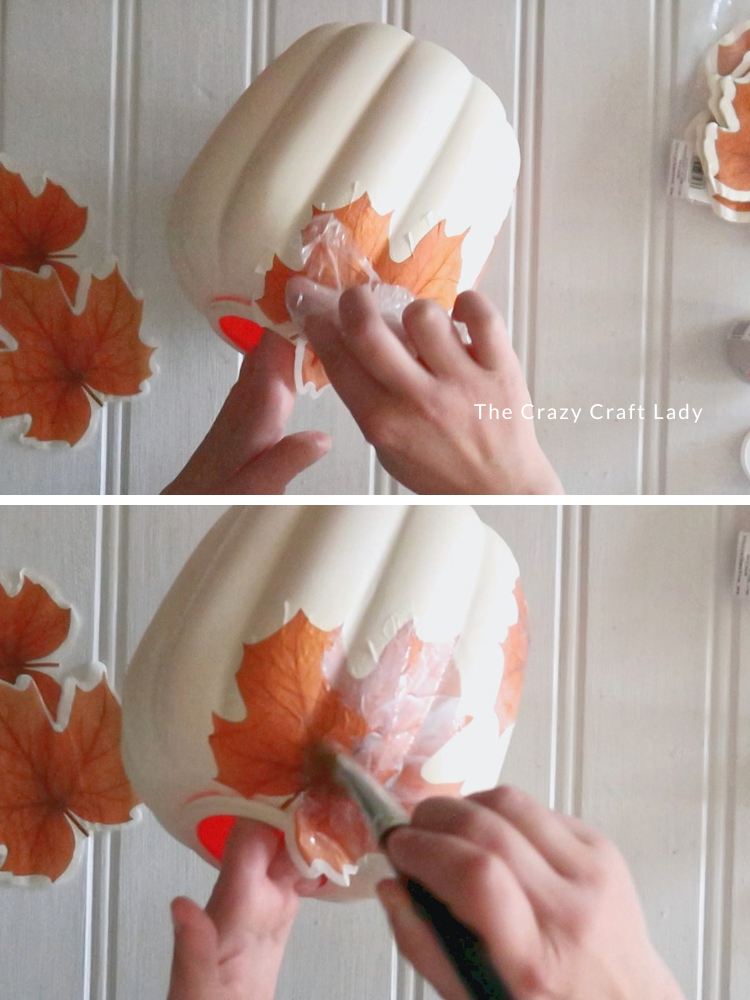
Step 5: Continue the Leaf Pattern Around the Pumpkin
Repeat the process around the middle pumpkin, adding a thin layer of Mod Podge and gently smoothing each leaf into place.
If the napkin tears a little, don’t panic. I had one spot rip while I was working. I used the plastic wrap to gently nudge the torn paper back into place so there wasn’t a noticeable gap in the leaf.
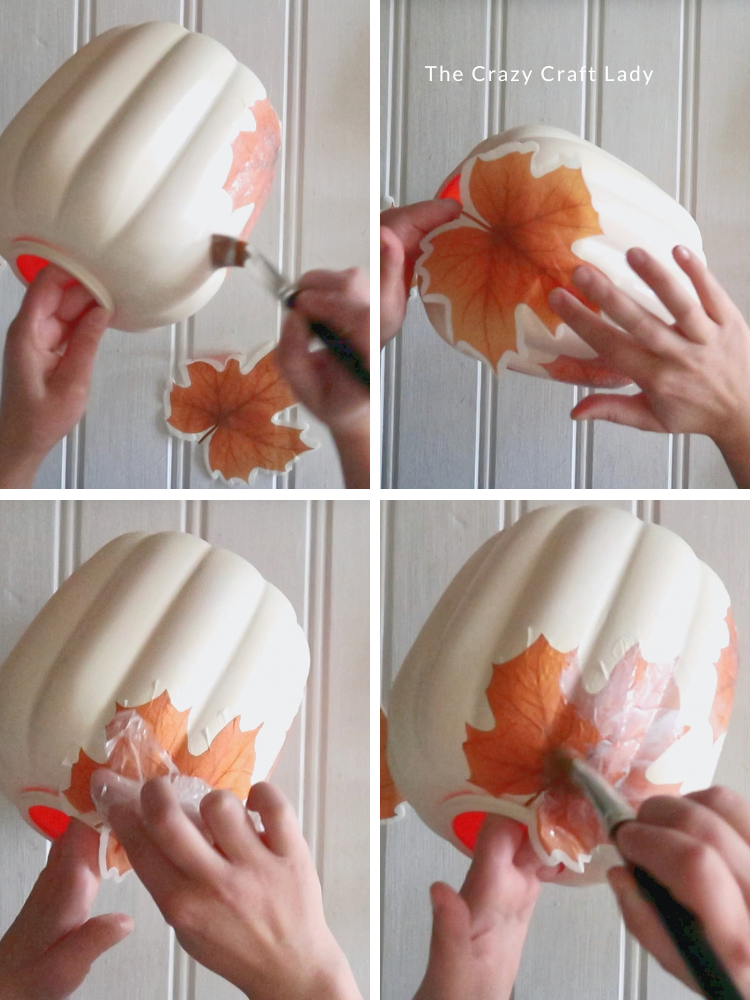
After smoothing each piece, carefully brush a thin coat of matte Mod Podge over the top. Use a light touch so you don’t pull or tear the damp napkin.
Coat the exposed cream areas with Mod Podge as well. You want a consistent finish around the entire pumpkin instead of patches of bare paint beside coated areas.
Set the pumpkin aside to dry thoroughly.
Step 6: Paint the Top Pumpkin Green
Use a flat 1-inch paintbrush to paint the smallest pumpkin with FolkArt Matte in Crocodile. Paint carefully up to the base of the antique brass stem, leaving the stem itself uncovered. This gives you a green pumpkin with that pretty metallic accent on top.
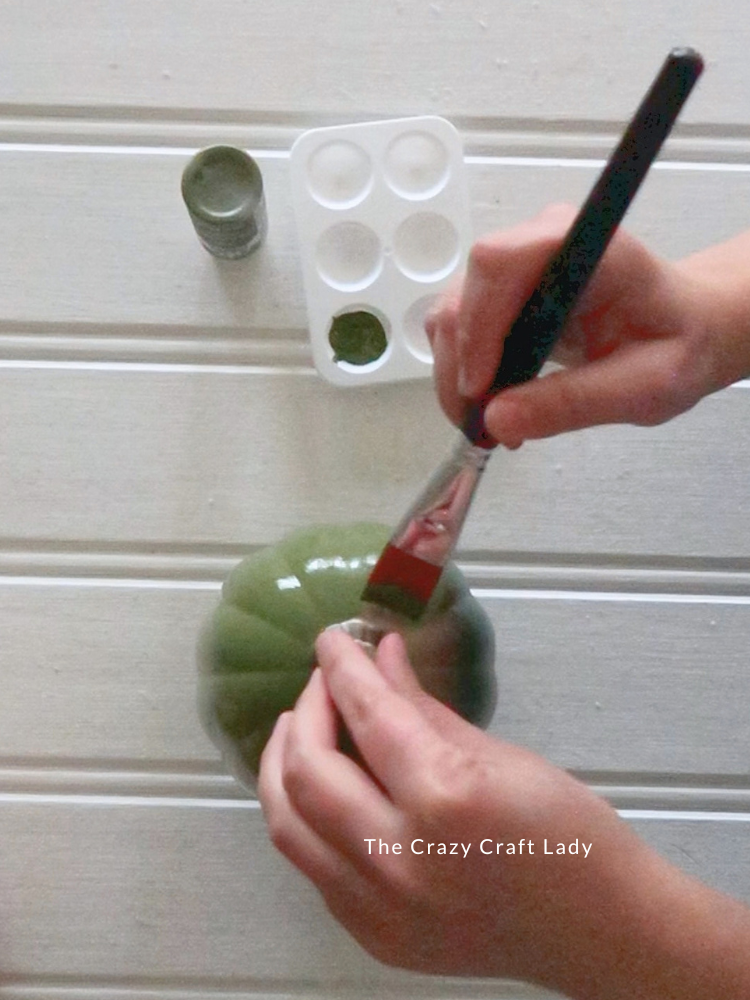
To reach the bottom edge, set the pumpkin on a tall, stable can or another support that holds it securely. I used an extra-tall Diet Coke can! Raising it off the table makes it easier to brush all the way down without handling the wet paint.
Let the paint dry completely.
Step 7: Remove Any Overhanging Napkin Edges
Once the Mod Podge is fully dry, check the bottom edge of the middle pumpkin for any napkin pieces hanging over.
Use a small sanding tool to gently remove the excess paper. Sand in one direction, moving off the edge, instead of scrubbing back and forth. This helps trim the paper without lifting the decoupaged design. You only need to tidy up the excess along the edge.
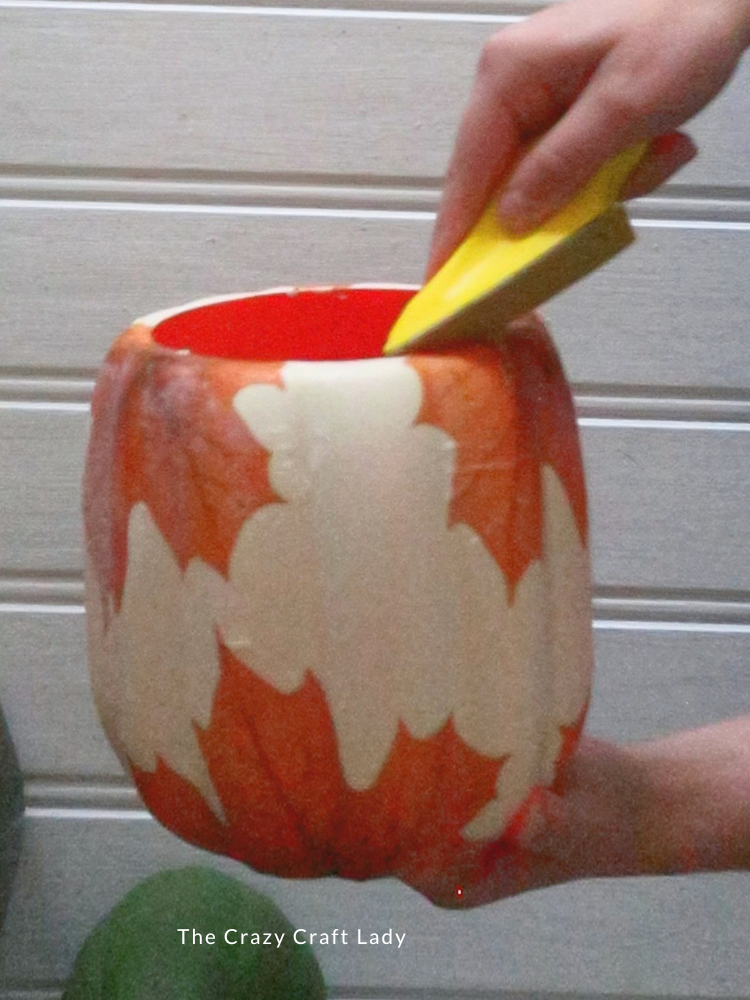
Step 8: Put the Pumpkin Stack Back Together
Reassemble the stack with the antique brass pumpkin on the bottom, the leaf-covered pumpkin in the middle, and the green pumpkin on top.
This part took a little finagling! Once the pieces have paint and Mod Podge on them, they may not snap together quite as easily. If a pumpkin won’t fit, lift it off, rotate it, and try again from a different angle. Use careful, firm pressure while protecting the painted and decoupaged surfaces.
Once all three pumpkins are connected, your fall makeover is complete!
Tips for Decoupaging a Plastic Pumpkin
- Remove the napkin backing. You only want the printed top layer for decoupage.
- Start with smaller designs if needed. Smaller napkin pieces are easier to smooth around curves and ridges.
- Keep the Mod Podge coats thin and even. Cover the whole middle pumpkin for a consistent finish.
- Smooth gently with plastic wrap. Work from the center of each design outward.
- Let everything dry before sanding or assembling. Damp napkins and fresh paint are easy to disturb.
A Pretty Fall Makeover with Paint and Paper Napkins
I love how this Dollar Tree stacked pumpkin craft turned out! The antique brass adds a little shine, the green gives it a rich fall color, and those napkin leaves make the middle pumpkin the star of the project.
You don’t need a complicated technique to give these plastic pumpkins a completely different look. A few paint colors and some pretty paper napkins go a long way.
Paint and Decoupage Jumbo Pumpkin Stack with Fall Napkins and Antique Brass
Transform a jumbo plastic pumpkin stack with antique brass spray paint, a cream pumpkin covered in fall leaf napkins, and a rich green top pumpkin.
Materials
- Jumbo Dollar Tree plastic pumpkin stack
- BEHR chalk spray paint in Chiffon Cream
- BEHR metallic spray paint in Antique Brass
- Spray paint for the top pumpkin’s base coat
- FolkArt Matte paint in Crocodile
- Fall leaf napkins—six individual leaf cutouts used
- Matte Mod Podge
Tools
- Flat 1-inch paintbrush
- Scissors
- Plastic wrap
- Small sanding tool
- Protective work surface covering
Instructions
1. Watch the video tutorial located above, right here in this blog post.
2. Separate the pumpkins. Spray paint the bottom pumpkin Antique Brass, the middle pumpkin Chiffon Cream, and the top pumpkin with a base coat of spray paint. Spray the top stem Antique Brass. Let dry.
3. Cut out the napkin leaves and remove the backing layers, keeping only the printed top layer.
4. Brush a thin layer of matte Mod Podge onto the cream pumpkin. Add a leaf and gently smooth with plastic wrap, working from the center outward. Repeat around the pumpkin.
5. Gently brush Mod Podge over the leaves and exposed cream areas for an even finish. Let dry thoroughly.
6. Paint the top pumpkin Crocodile, leaving the brass stem exposed. Use a stable support to reach the bottom edge. Let dry.
7. Sand away any dried napkin overhang along the middle pumpkin’s bottom edge, working in one direction.
8. Carefully snap the pumpkins back together. Lift and rotate the pieces if needed to help them fit.
Notes
Smaller napkin designs are easier to apply around pumpkin ridges.
Let all paint and Mod Podge dry thoroughly before reassembling to protect the finish.