
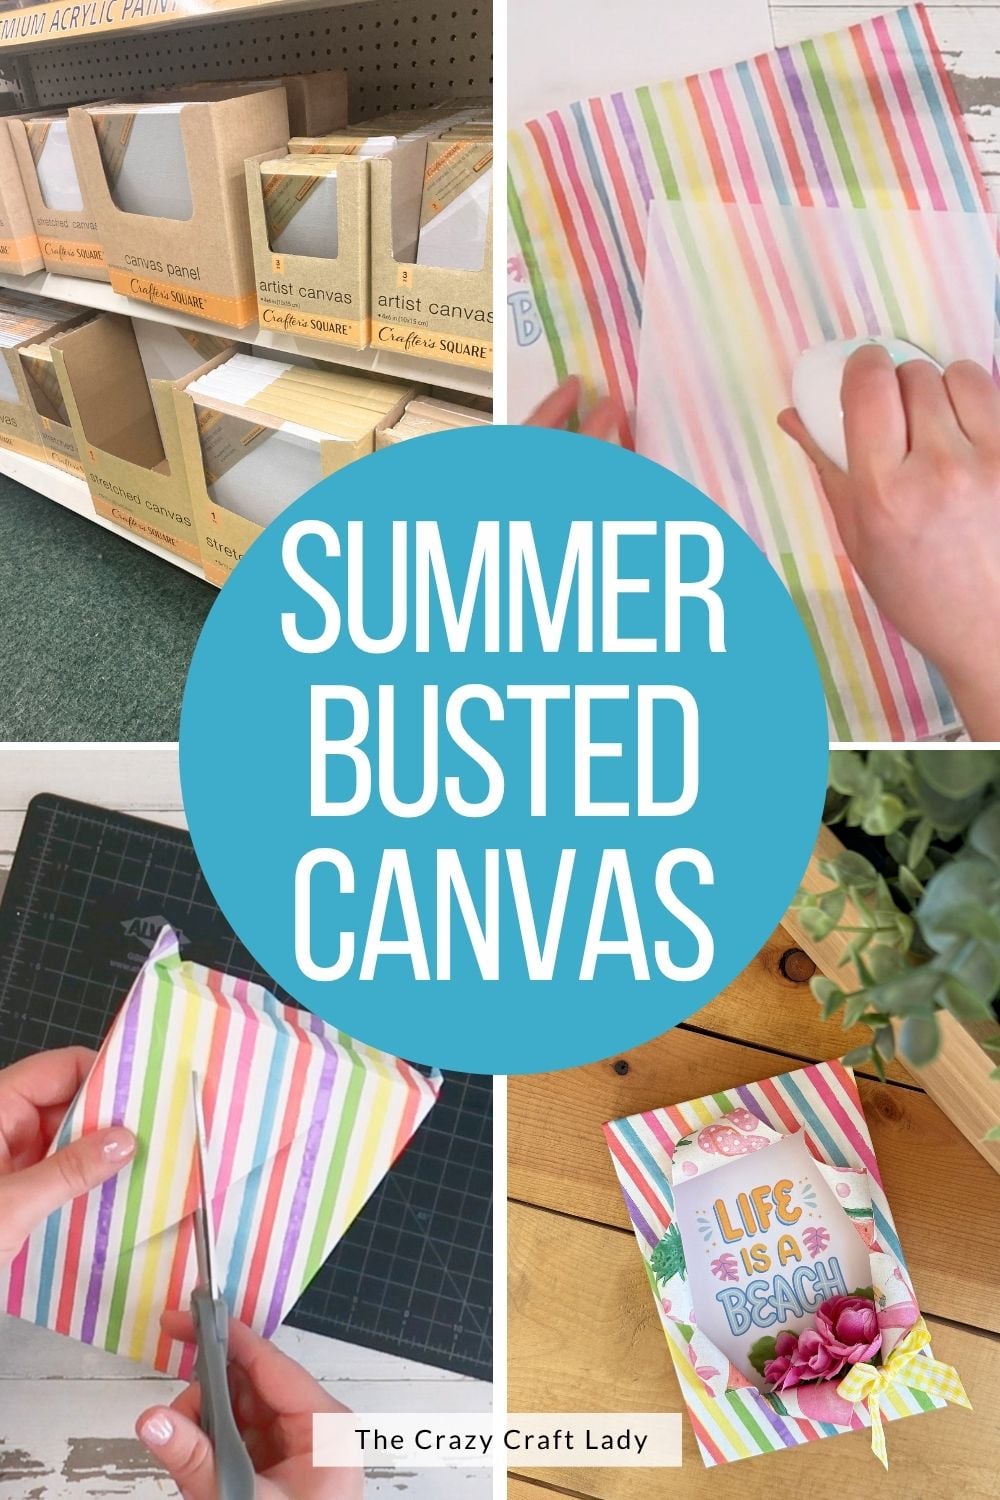
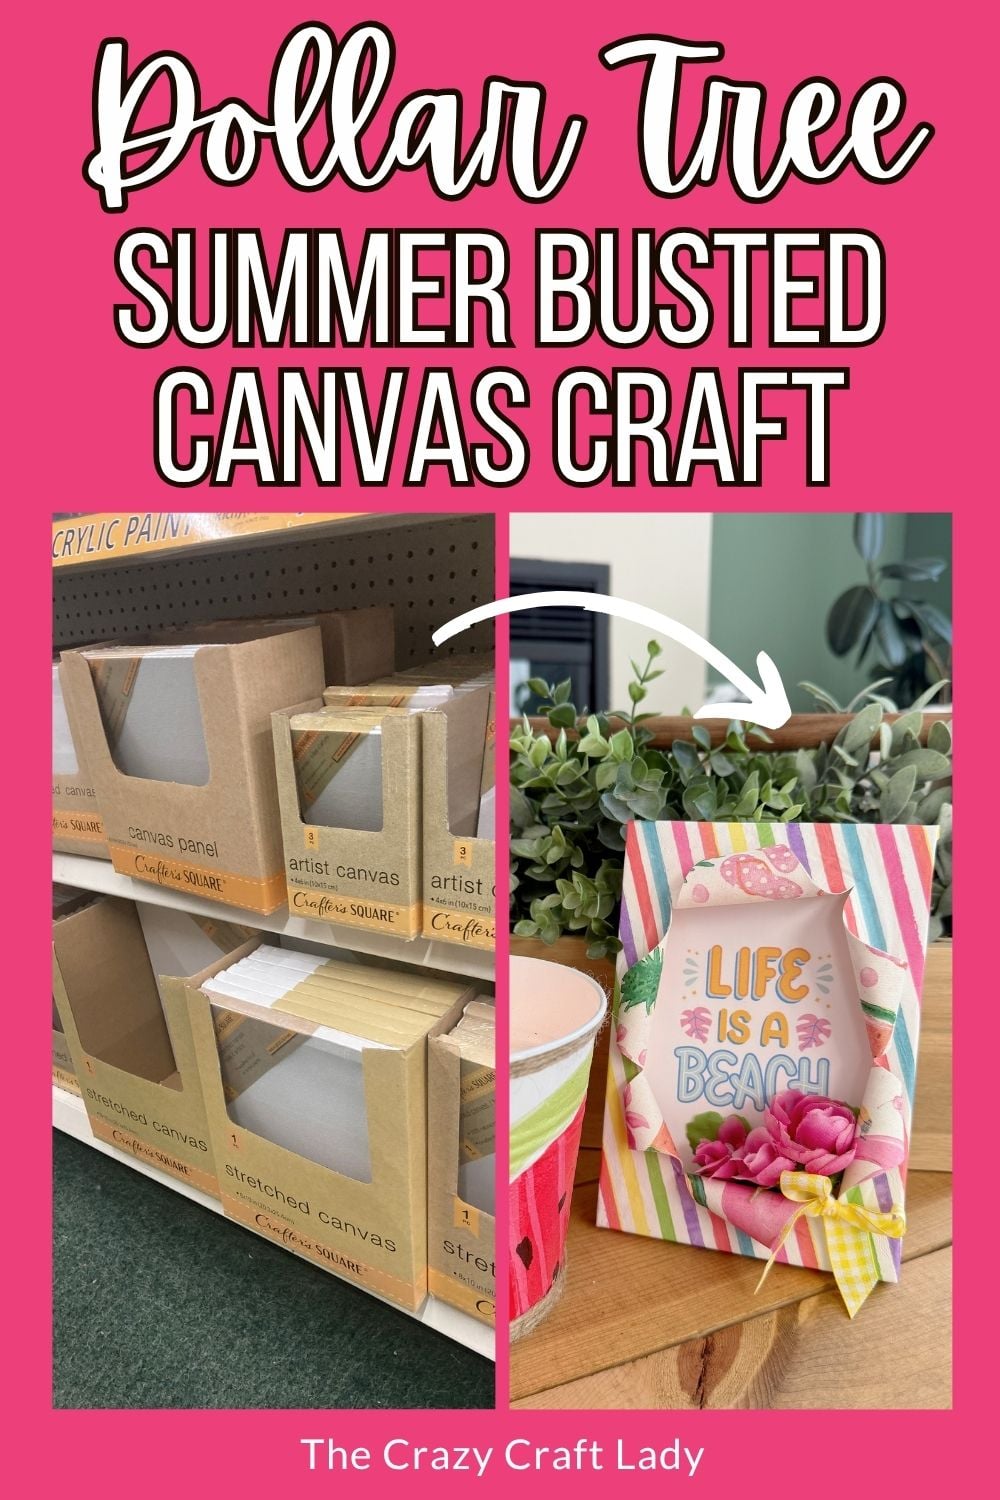
Create a colorful DIY summer busted canvas using Dollar Tree supplies, decorative napkins, faux florals, and a free printable. This easy budget-friendly craft is perfect for tiered trays and summer decor.
This post contains some affiliate links for your convenience. Click here to read my full disclosure policy.
How to make a summer busted canvas craft with Dollar Tree supplies.
Looking for a bright and cheerful summer craft idea using Dollar Tree supplies? This DIY summer busted canvas craft combines colorful paper napkins, a mini Dollar Tree canvas, faux florals, and a free printable to create adorable seasonal decor on a budget.
If you love my reverse canvas crafts and busted canvas projects, this craft is for you! The finished piece is perfect for decorating tiered trays, bookshelves, summer mantels, or adding a pop of color to your seasonal decor.
Why You’ll Love This Craft
- Made with affordable Dollar Tree supplies
- Great way to use decorative paper napkins
- Includes a free printable
- Perfect for summer tiered tray decor
- Uses a fun and trendy busted canvas technique
Video Tutorial: Napkin Decoupage Summer Busted Canvas
Watch this quick video to see how this craft came together:
Napkin Decoupage Summer Busted Canvas
Turn a Dollar Tree canvas into adorable summer decor with this easy busted canvas tutorial. Featuring colorful napkins, floral embellishments, and a free printable, it's perfect for shelves, tiered trays, and seasonal decorating.
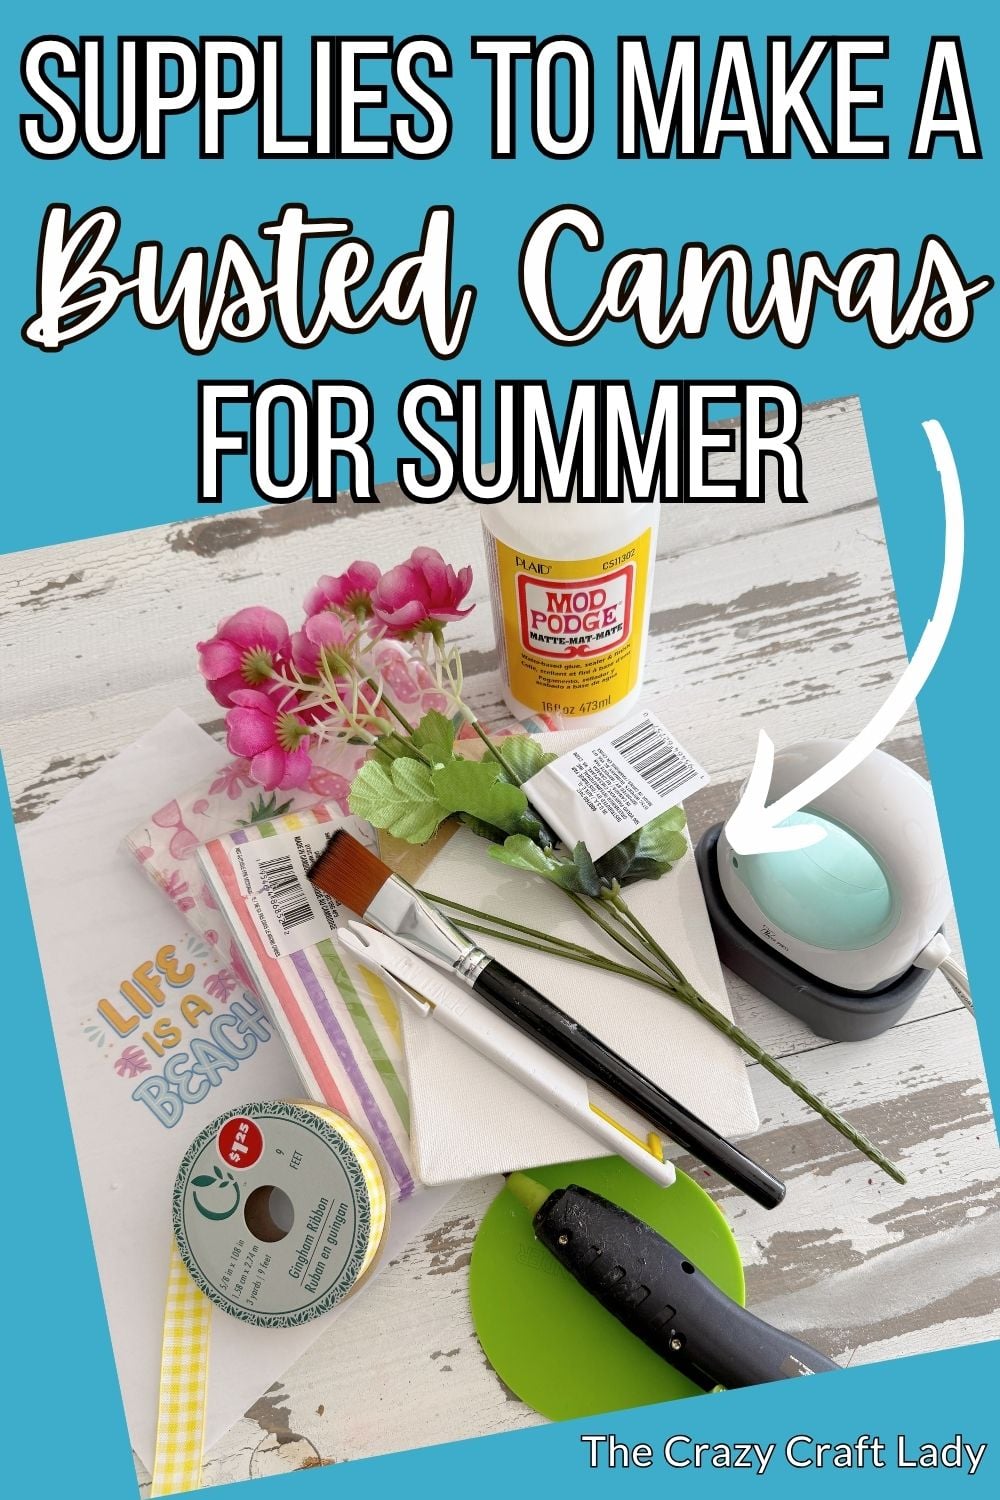
Materials
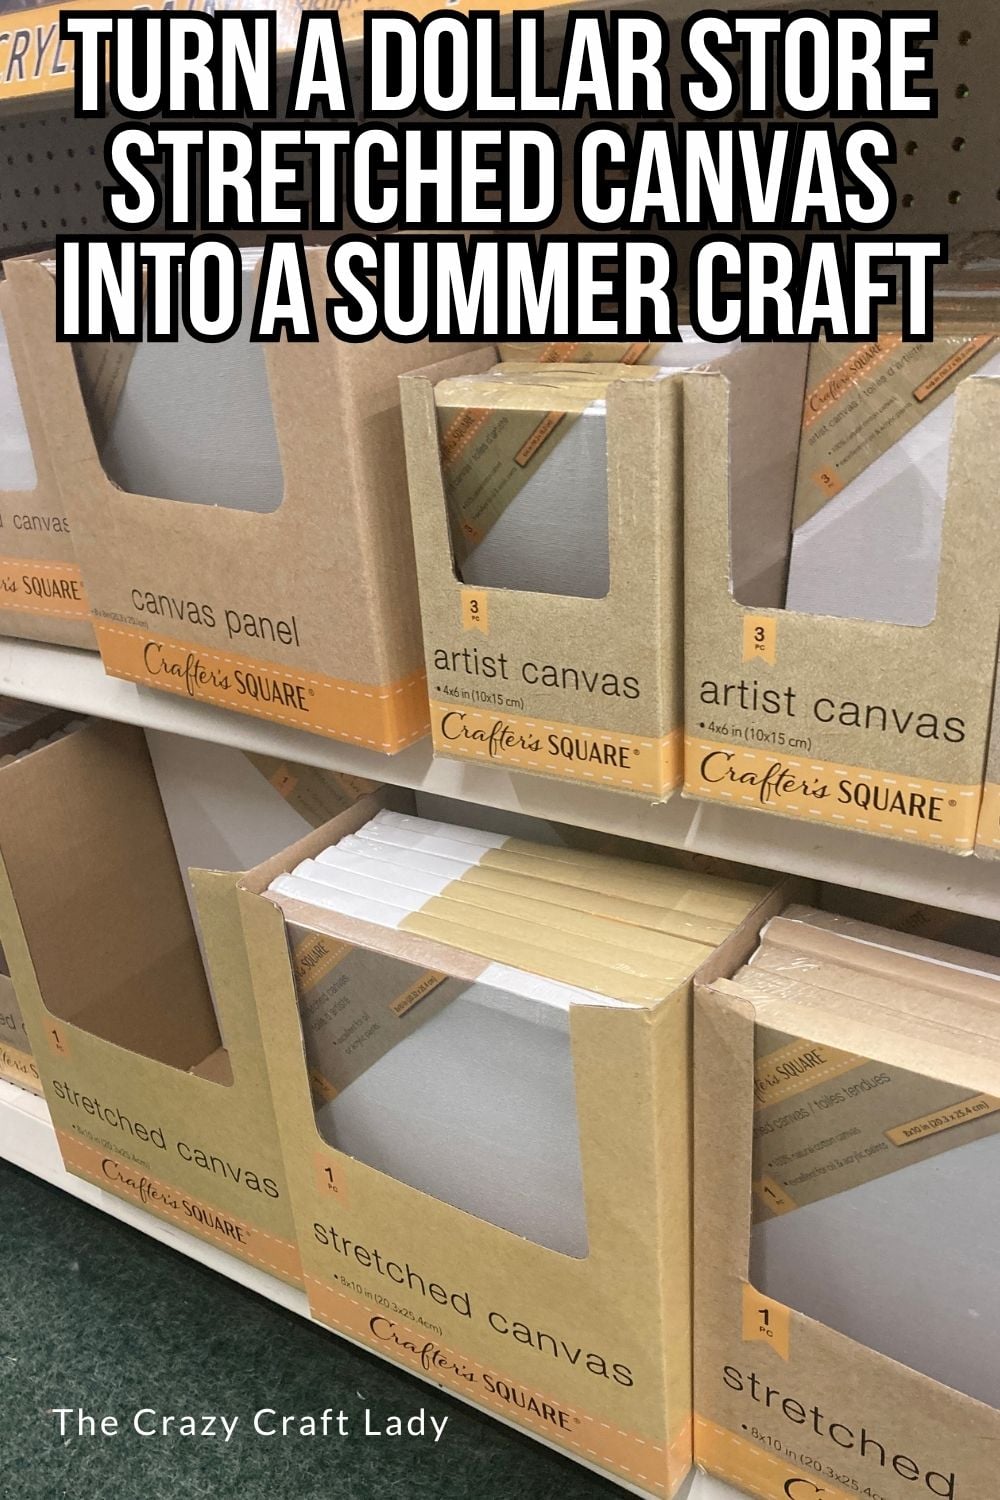
- 4x6 stretched canvas (Dollar Tree)
- Two decorative paper napkins (Dollar Tree)
- Matte Mod Podge
- Faux florals
- Ribbon for bow
- Free printable (download below)
- Manila folder or thin cardboard
Tools
- Mini heat press or iron
- Scissors
- Pen blade or craft knife
- Cutting mat
- Hot glue gun & glue sticks
- School glue stick
- Lighter (optional for sealing ribbon ends)
Instructions
- Watch the video. Follow along with the video tutorial for a step-by-step walkthrough of how to make your own summer busted canvas.
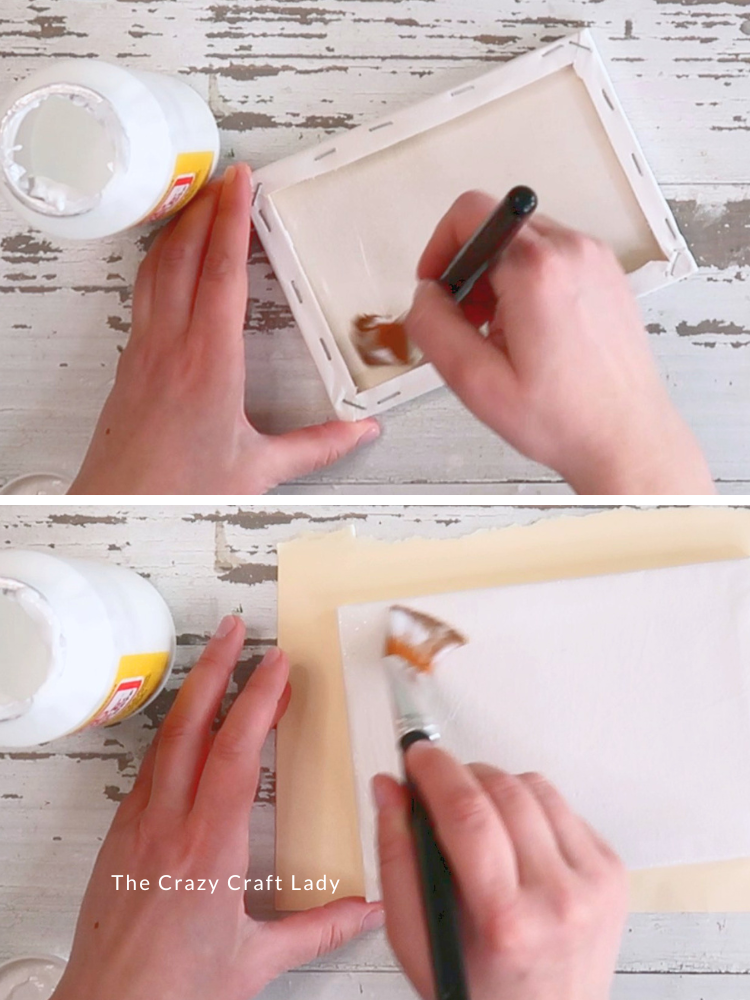
- Prep the Canvas. Apply a generous coat of Mod Podge to the inside back portion of the canvas frame. Since the unfinished canvas absorbs quite a bit of product, don’t be afraid to use a little extra. Next, coat the entire front surface and all outer edges of the canvas with Mod Podge as well. Set aside and allow everything to dry completely.

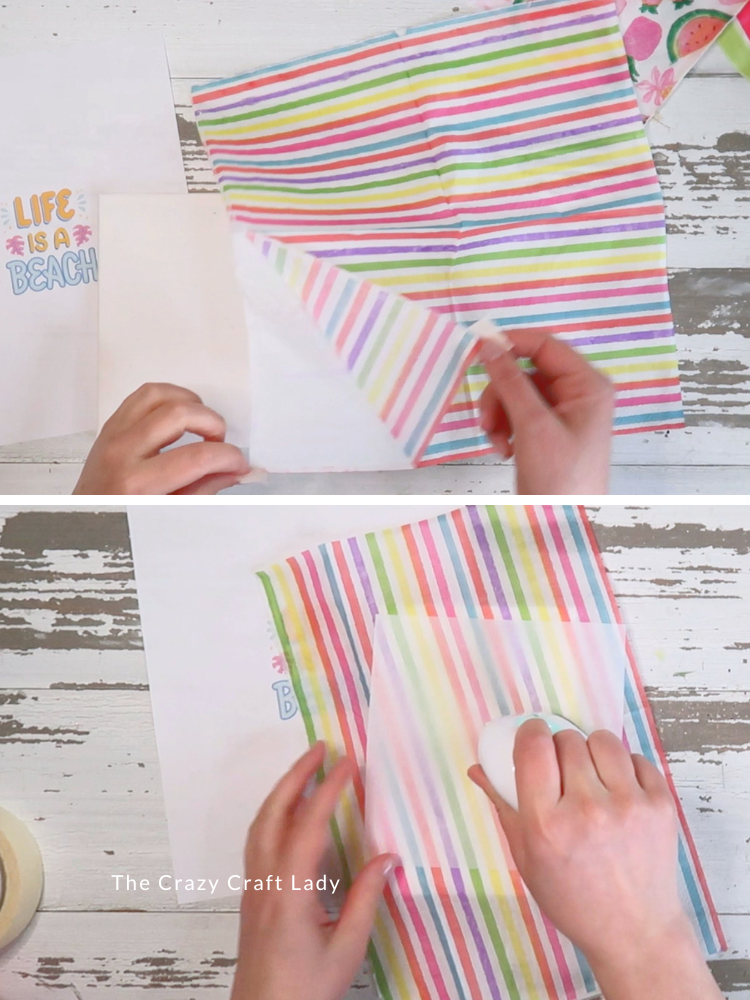
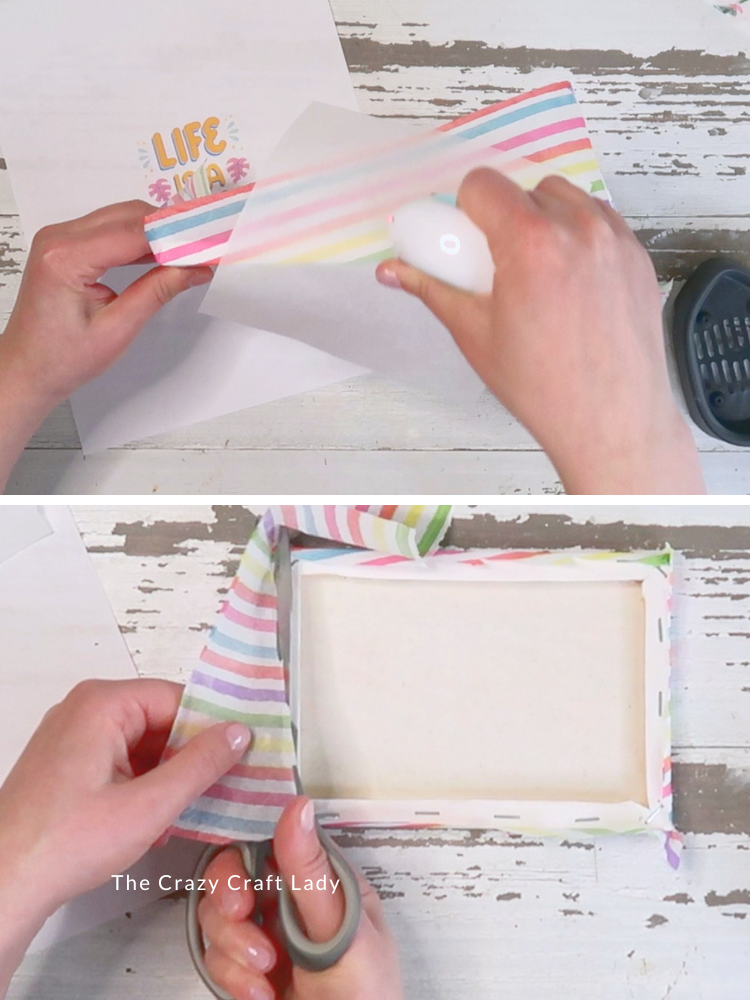
- Apply the First Napkin to the Front. Separate the layers of your first decorative napkin until only the printed top layer remains. Place the napkin over the front of the canvas and use parchment paper to protect the surface. Using a mini heat press or iron, press over the napkin to reactivate the dried Mod Podge underneath. Continue pressing until the napkin adheres to the front of the canvas and around all four edges. Trim away excess napkin, but leave about ¼-inch hanging over the edges. You’ll use that extra material later.
- Add the Second Napkin to the Inside. Take your second napkin and cut it to fit inside the back opening of the canvas frame. Separate the layers and keep only the decorative top layer. Use your mini heat press to adhere the napkin inside the back opening of the canvas. A mini heat press works especially well here since a traditional iron can be difficult to maneuver in smaller spaces.

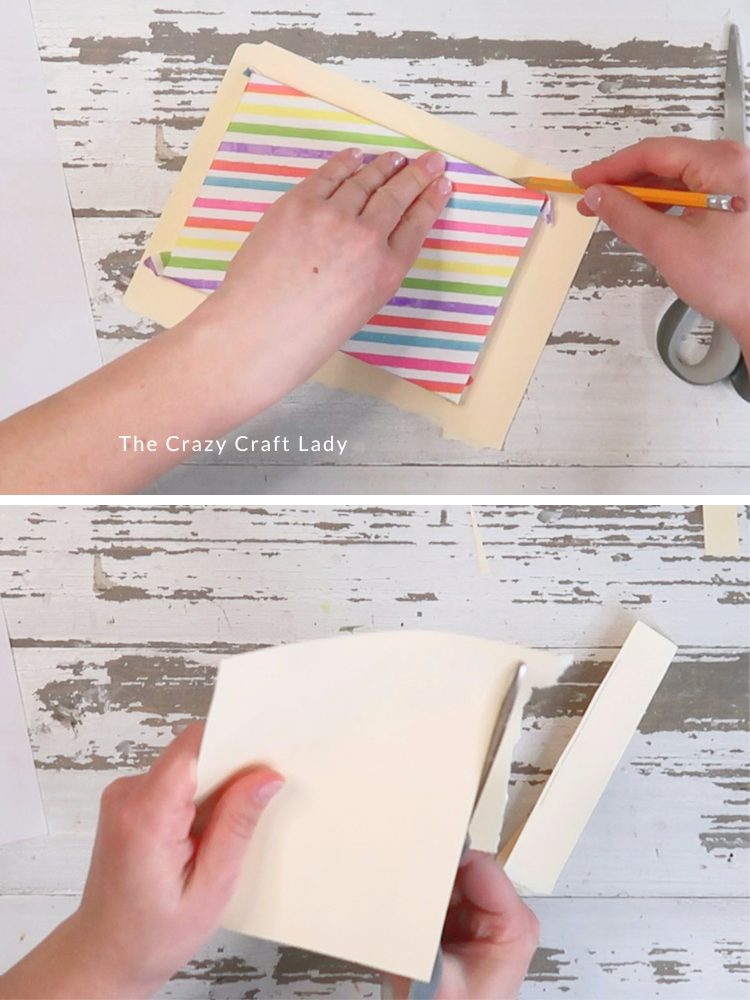
- Make the Canvas Backer. Trace the canvas opening onto a manila folder or thin cardboard. Cut slightly inside your traced line so the backer fits neatly onto the back of the frame.
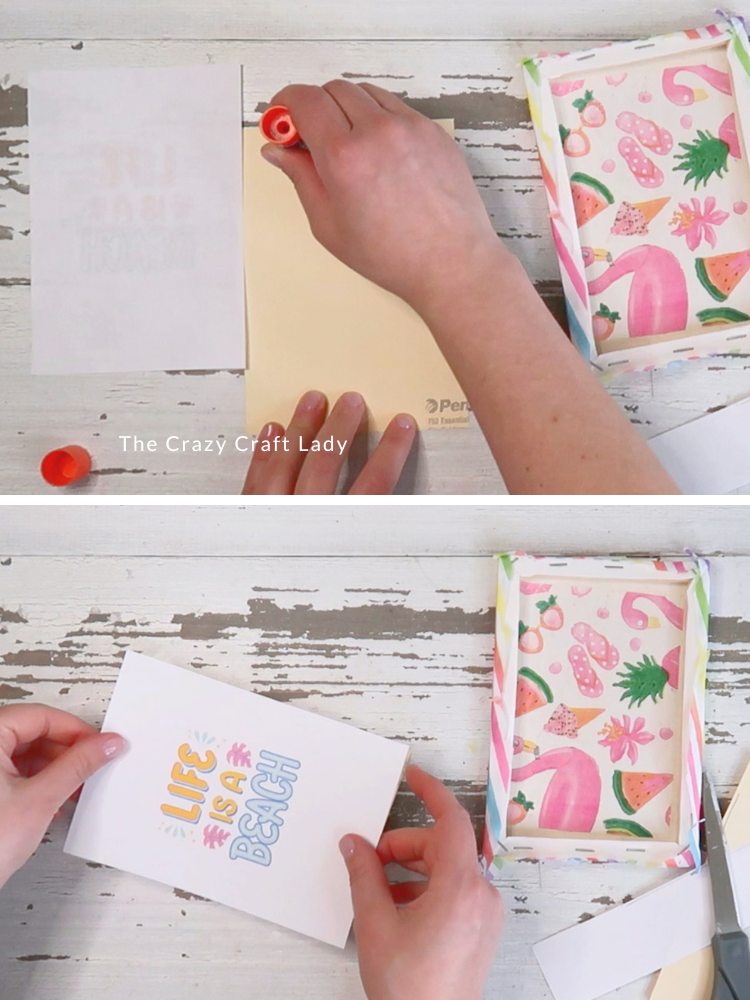
- Prepare the Printable. Print out your free design. Hold your cardboard backing piece up to the light and center it over the printable. Trace around it and cut the printable to size. Attach the printable to the cardboard backing using a glue stick. I prefer using a glue stick instead of Mod Podge here because it helps prevent bubbles and wrinkles.
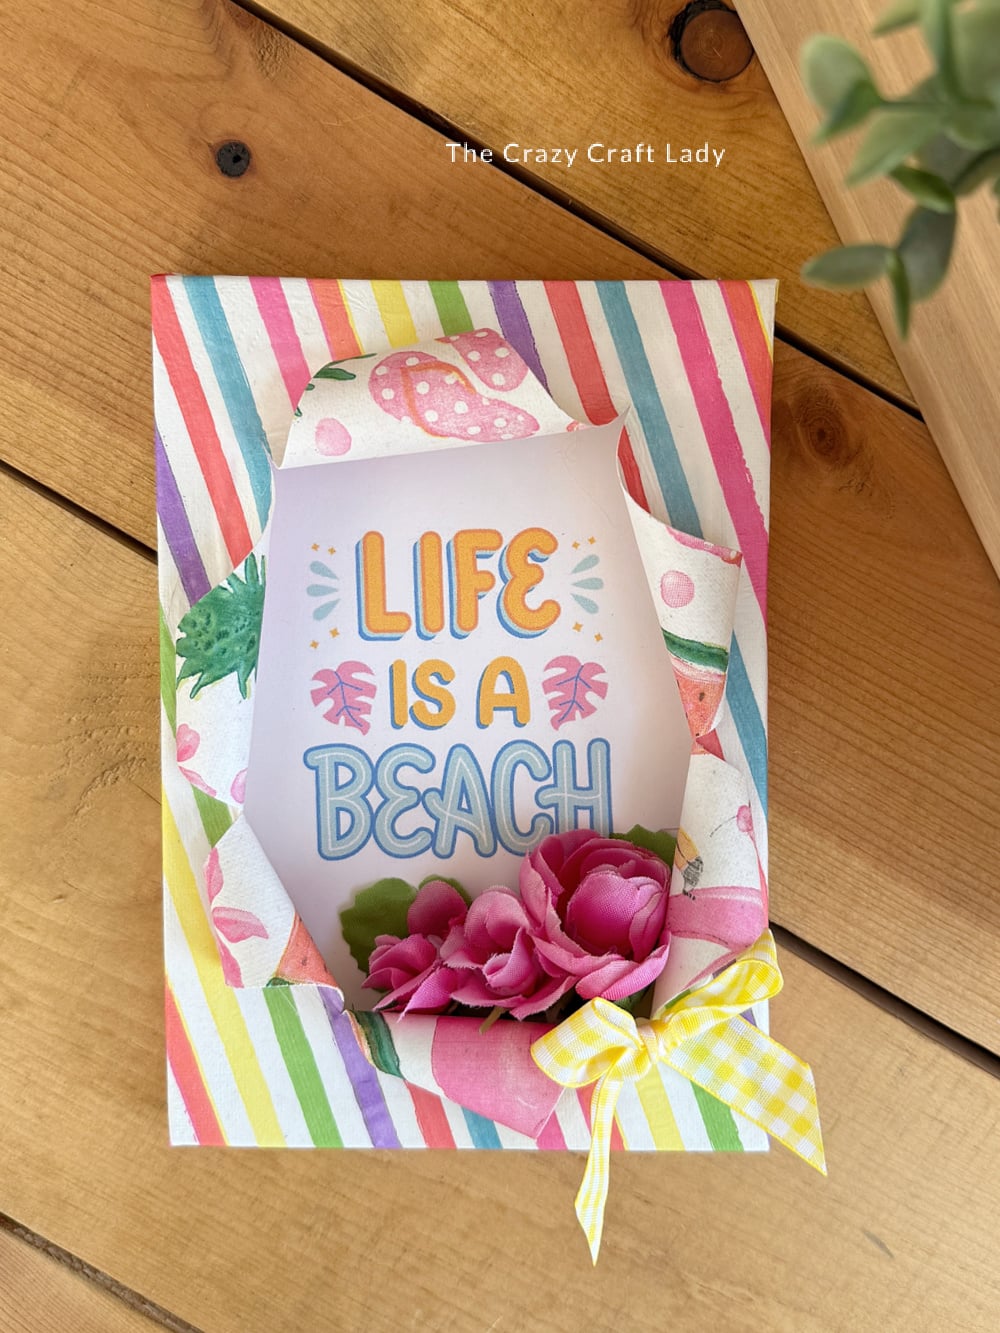
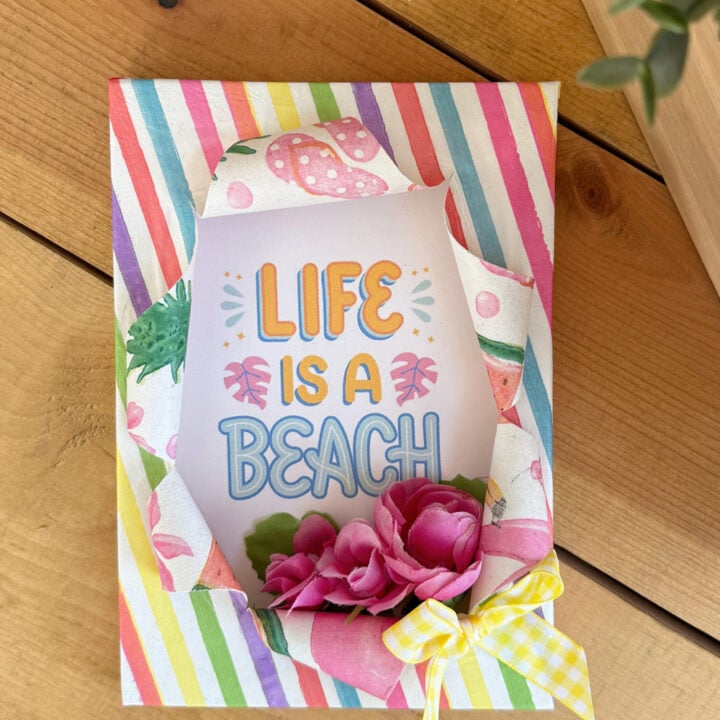
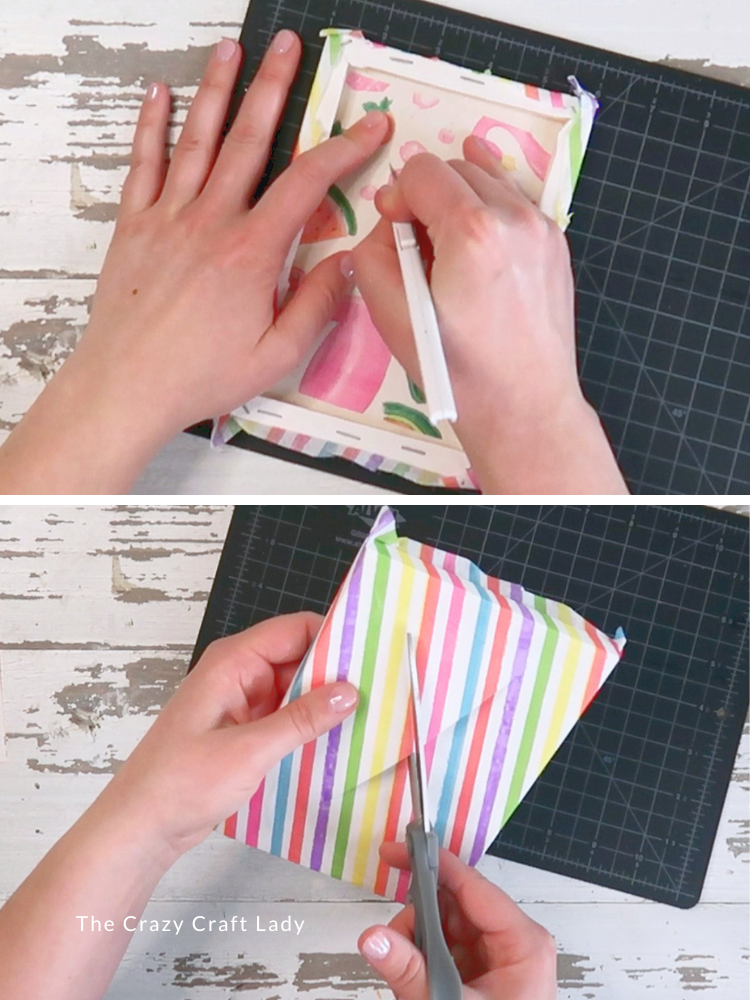
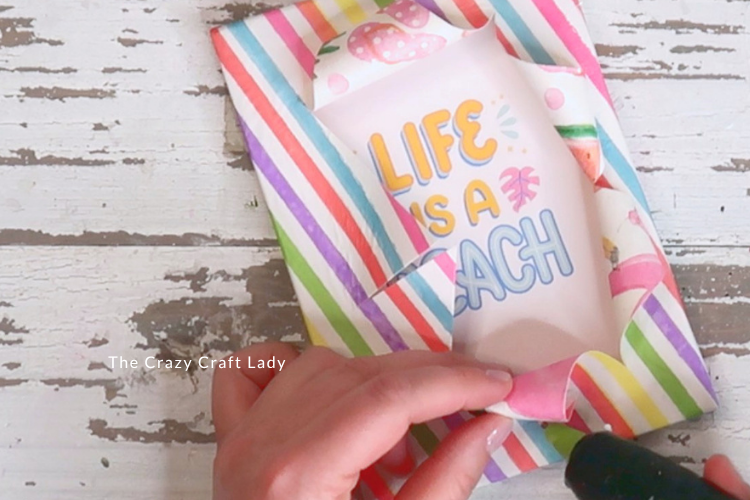
- Create the “Busted” Effect. Place the canvas face down on a cutting mat. Using a pen blade or craft knife, cut one diagonal slit first. Then use scissors to complete a total of six slits, creating six triangle-shaped flaps (similar to pizza slices). These cuts create the signature “busted” opening effect.
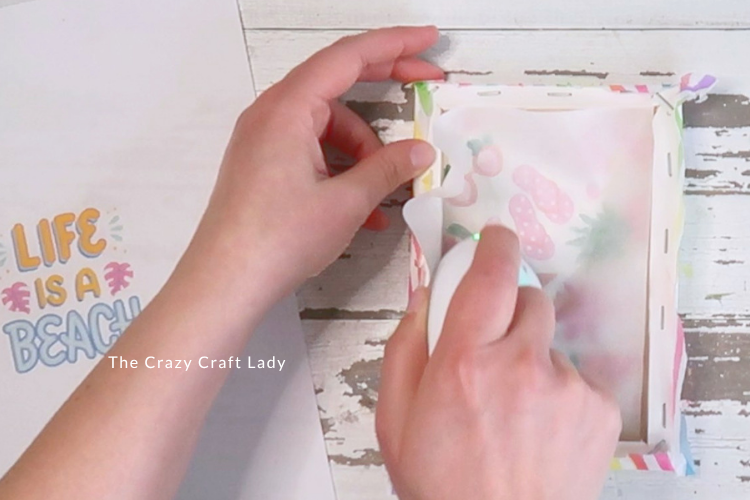
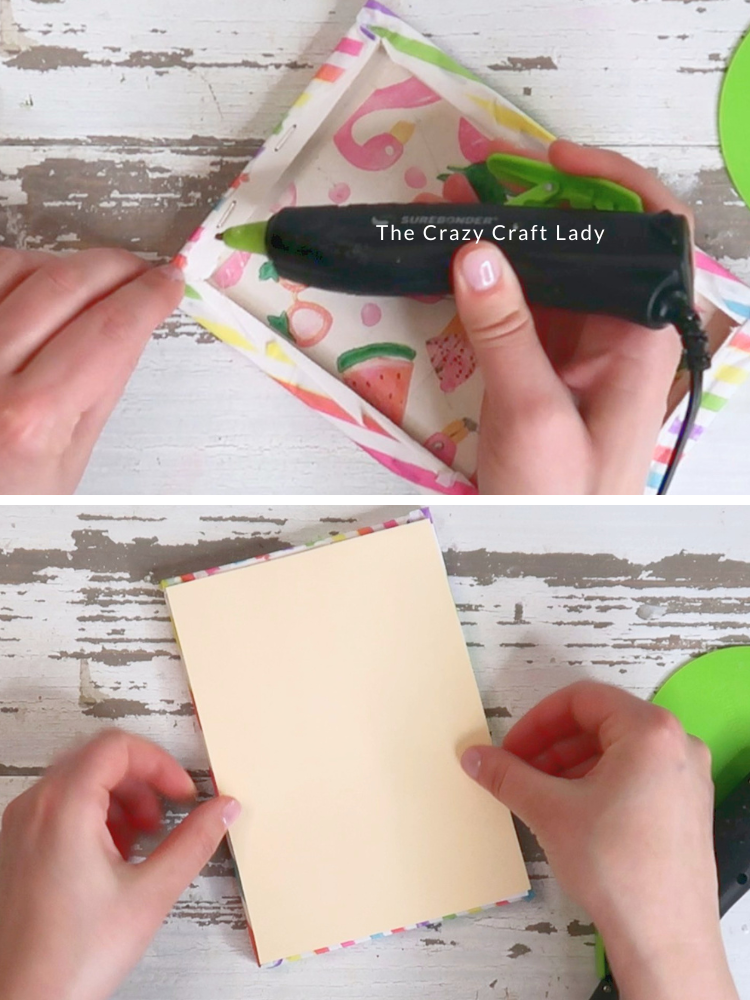
- Finish the Back. Fold that excess napkin over the back edges of the canvas and secure it with hot glue. Once finished, add a line of hot glue around the back edge of the canvas frame. Attach your printable backing piece so the printable shows through the opening.
- Roll Back the Canvas Pieces. Roll each of the six triangle flaps backward. Secure each flap with hot glue.
Add Floral Embellishments. Cut small pieces of faux florals. Place them inside the lower corner of the busted opening. Secure with hot glue if needed. - Make a Simple Ribbon Bow. Create a basic bunny ear bow: make two loops, tie them in a knot, adjust loops, and trim ends at an angle. Optional: Carefully seal ribbon ends with a lighter to prevent fraying. Attach the bow to the corner of your canvas with hot glue.

The Finished Craft
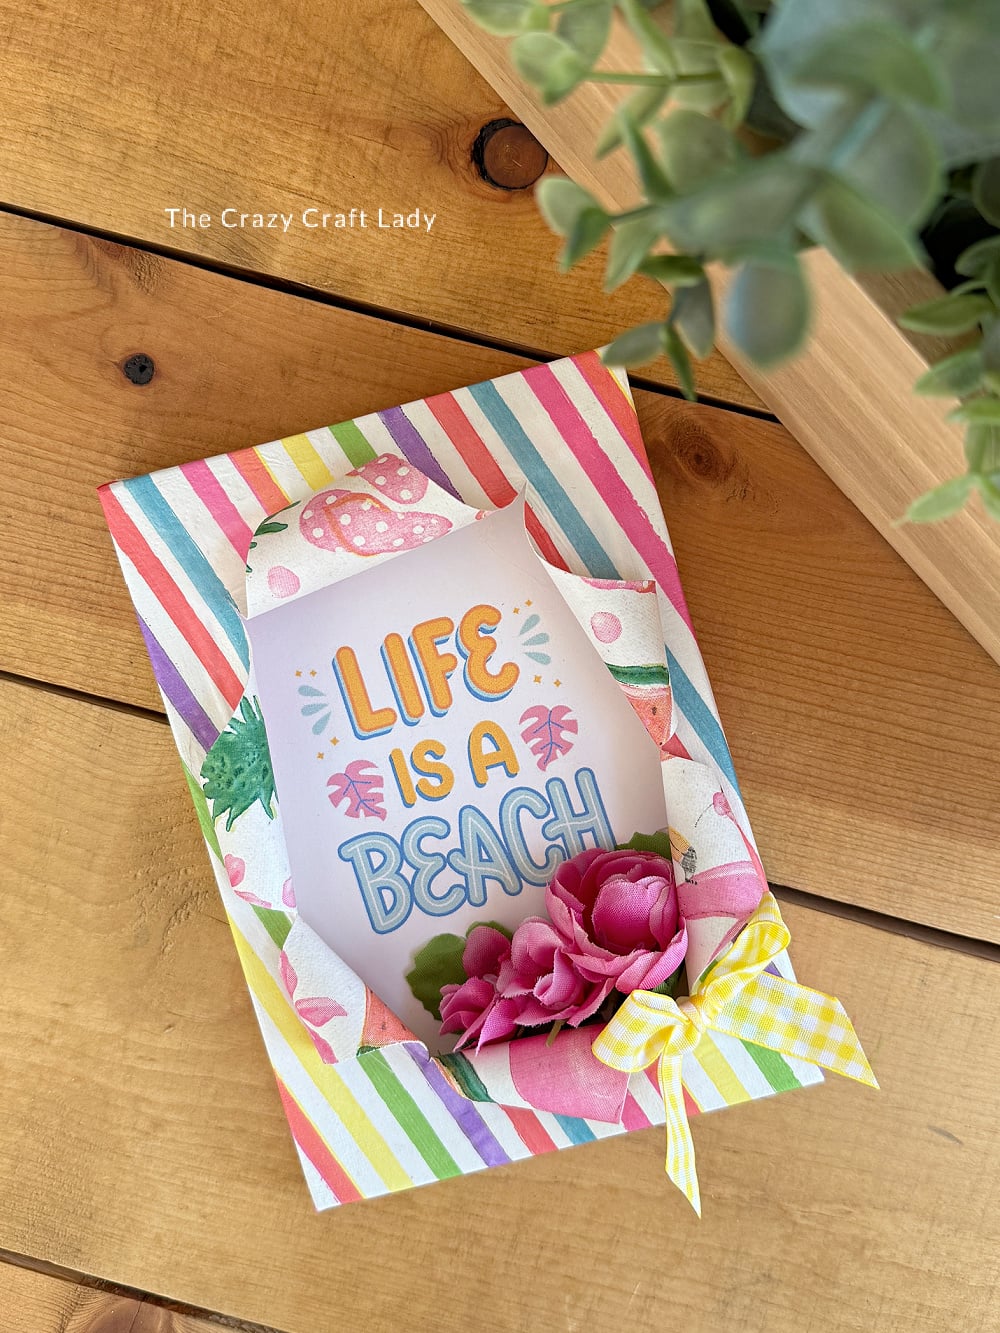
This mini summer canvas looks adorable styled on:
- Tiered trays
- Bookshelves
- Entryway shelves
- Summer mantels
- Kitchen decor displays
It’s colorful, budget-friendly, and such a fun way to use Dollar Tree napkins in a creative new way.
PIN this Summer Craft for Later:
More Dollar Tree Summer Crafts You’ll Love
If you love crafting with affordable Dollar Tree finds, be sure to check out these other summer craft ideas: