

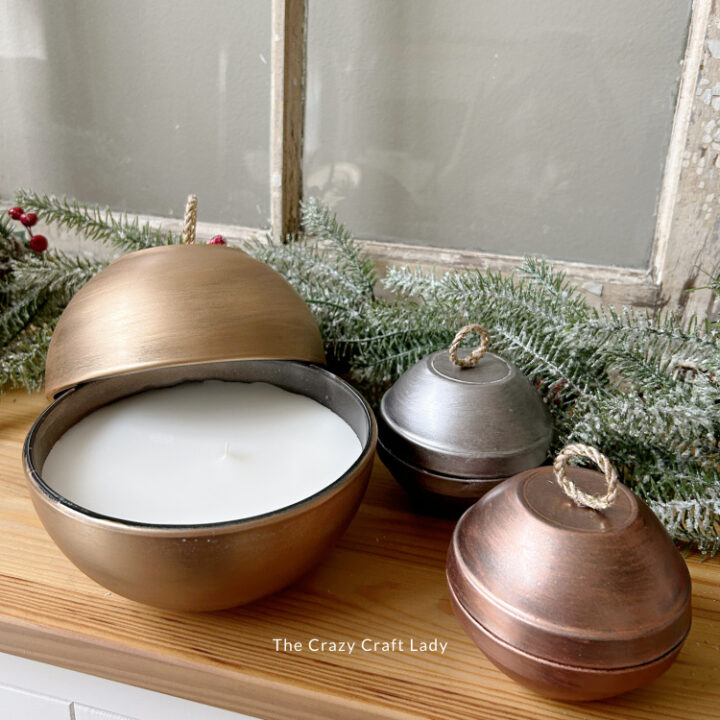
Make your own ornament-shaped candles inspired by Pottery Barn using Dollar Tree glass bowls! A festive DIY Christmas candle craft that looks high-end on a budget.
How to make Pottery Barn Inspired Ornament Candle Holders
This post contains some affiliate links for your convenience. Click here to read my full disclosure policy.
This isn’t a dupe — it’s an inspired by craft! Pottery Barn’s gorgeous ornament-shaped candles totally caught my eye, but let’s be honest: there’s no way I’m recreating their fancy glass texture and embossed finish. So instead, I made my own version that captures the vibe — using affordable supplies from Dollar Tree!
These DIY ornament candles are elegant, budget-friendly, and perfect for holiday decorating. They look beautiful on a mantel, as part of a Christmas centerpiece, or even as handmade gifts. Grab a few glass bowls, some spray paint, and old candles — and let’s turn simple supplies into stunning festive décor.

Video Tutorial: DIY Ornament Bowl Candles
Watch this quick video to see how this craft came together:

DIY Ornament Bowl Candles
Make your own ornament-shaped candles inspired by Pottery Barn using Dollar Tree glass bowls! A festive DIY Christmas candle craft that looks high-end on a budget.
Materials
- 4 small clear glass bowls (Dollar Tree, sold in 4-packs)
- 2 large clear glass bowls (Dollar Tree)
- Dark metallic spray paint — I used Hammered Dark Bronze by Behr - or just plain black spray paint
- Rub ‘n Buff in Antique Gold, Pewter, and Autumn Gold
- Small dish sponge (cut into pieces)
- Thick twine or cord with gold thread (mine was from Michaels)
- E6000 glue
- Painter’s tape (optional, to secure loops while drying)
- Old candles to melt down — 1 “prayer” candle and 2 votives
- Tin foil and baking sheet (for melting wax)
- Bamboo skewers
- Wicks (reused from melted candles)
Tools
- Heat gun (for removing labels)
- Oven (set to 250°F)
- Hot glue gun
- Oven mitt or heat-safe gloves
- Small scissors
- Rubber adhesive eraser or Goo Gone (optional for stubborn label residue)
Instructions
- Watch the video. Follow along with the video tutorial for a walkthrough on how to make your own ornament candles.
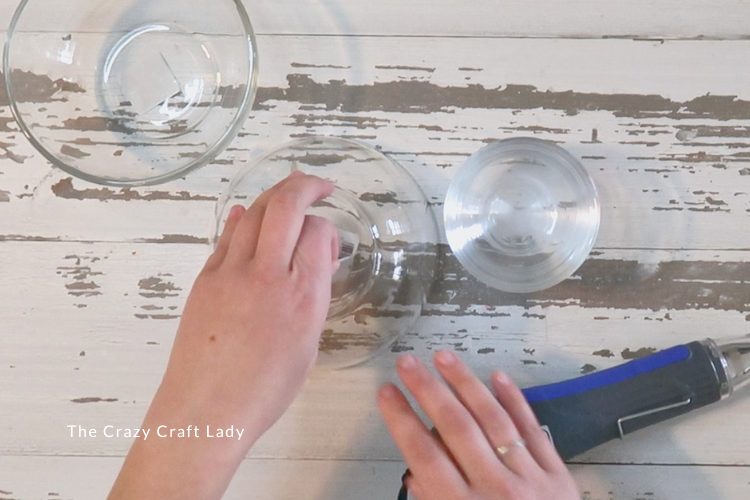
- Prep Your Glass Bowls. Gather four small and two large glass bowls — enough to make three total ornament candles. Use a heat gun to remove the labels. If you run into sticky residue, use a rubber eraser or Goo Gone to clean it off completely.

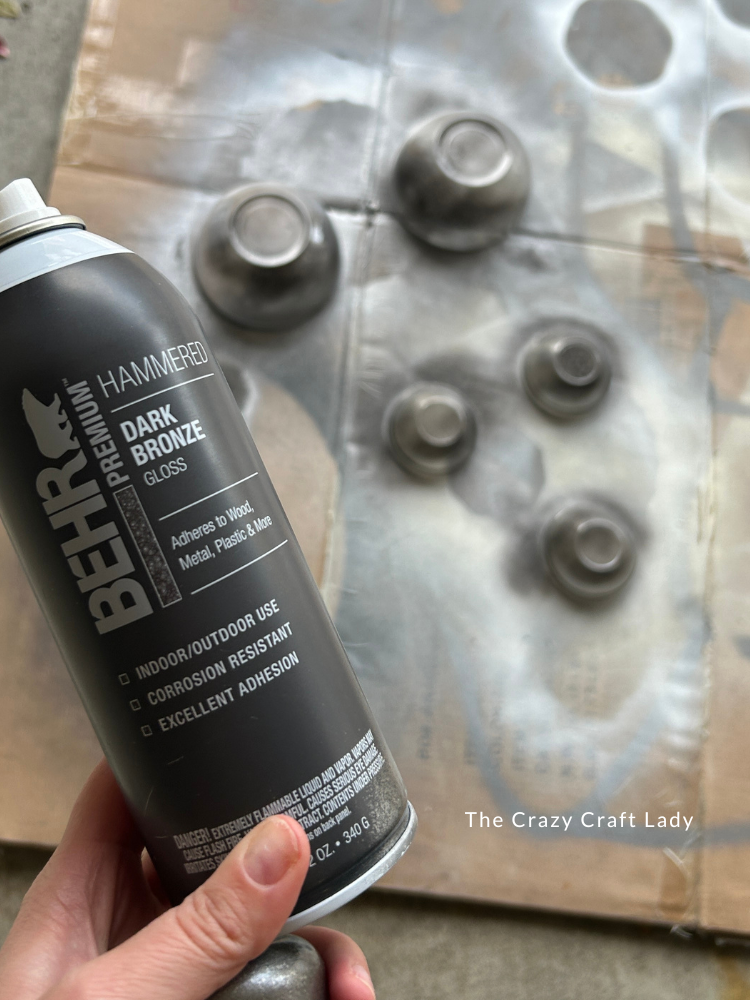
- Prime with a Dark Base Coat. Spray each bowl with a dark metallic spray paint — I used Hammered Dark Bronze by Behr. Apply a few light, even coats to cover fully. This dark base gives your metallic finish depth and dimension later on.

- Apply Rub ’n Buff Finishes. Once the spray paint is dry, it’s time to add some metallic magic. Using a small piece of sponge, apply Rub ’n Buff in small circular motions, keeping your strokes even and consistent. Use Antique Gold for the two large bowls. Use Pewter (a silver tone) for two of the smaller bowls. Use Autumn Gold for the remaining small bowls. The combination of colors adds variety while keeping everything cohesive and elegant.
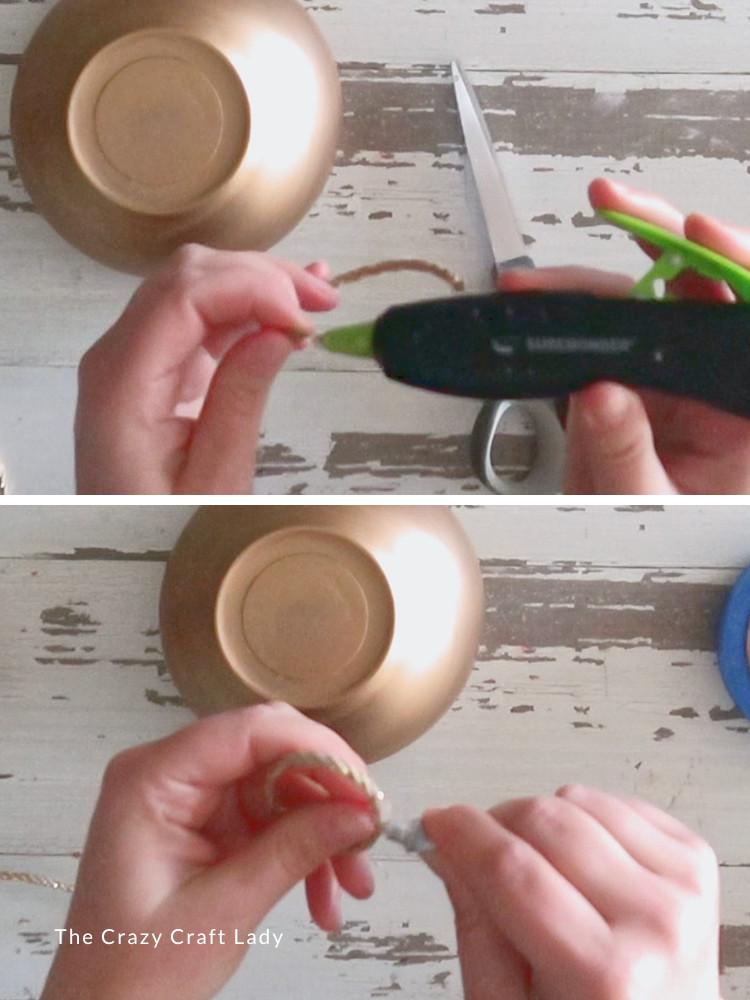
- Create Ornament Hangers. Cut short lengths of decorative twine or gold-flecked cord. For small ornaments, make loops about 1–1½ inches long; for the large ornament, about 3 inches. Hot glue the ends of each loop together, then attach them to the top half of each ornament using E6000 glue. You’ll only add loops to three of the bowls (the “tops”) since each ornament will have one top and one bottom bowl. Use painter’s tape to hold the large loop upright while the glue dries.
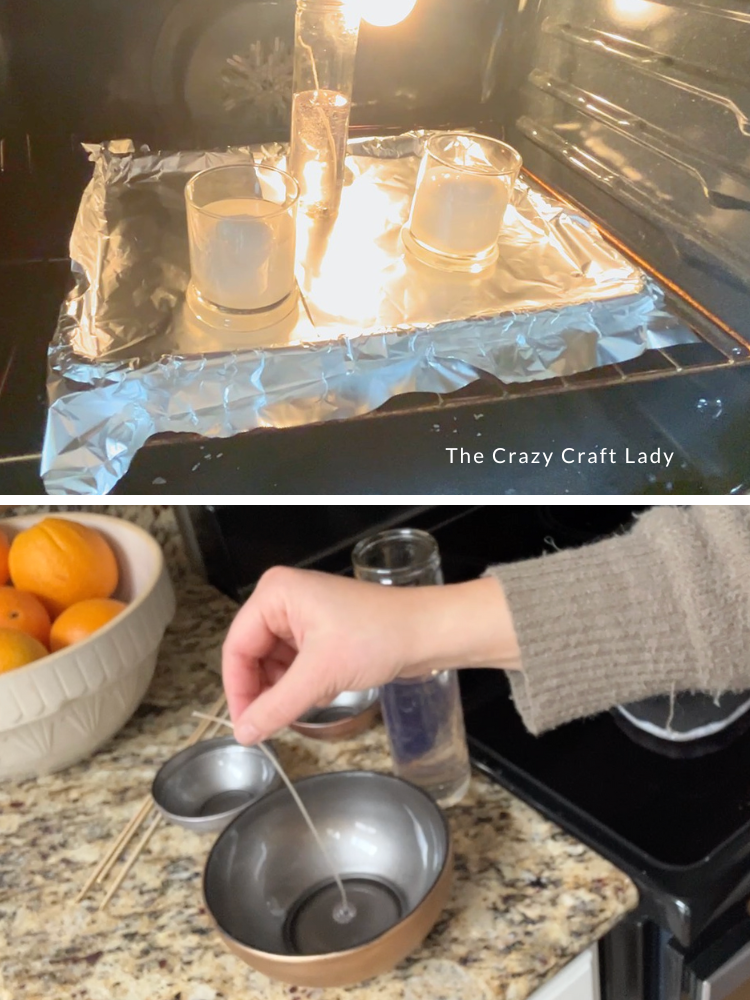
- Melt the Candle Wax. Preheat your oven to 250°F. Place your old candles — one large and two small — into heat-safe glass containers on a foil-lined baking sheet. Let them melt slowly (about 30 minutes for the large candle, longer for the small votives). Once melted, carefully remove the wicks — we’ll reuse them.
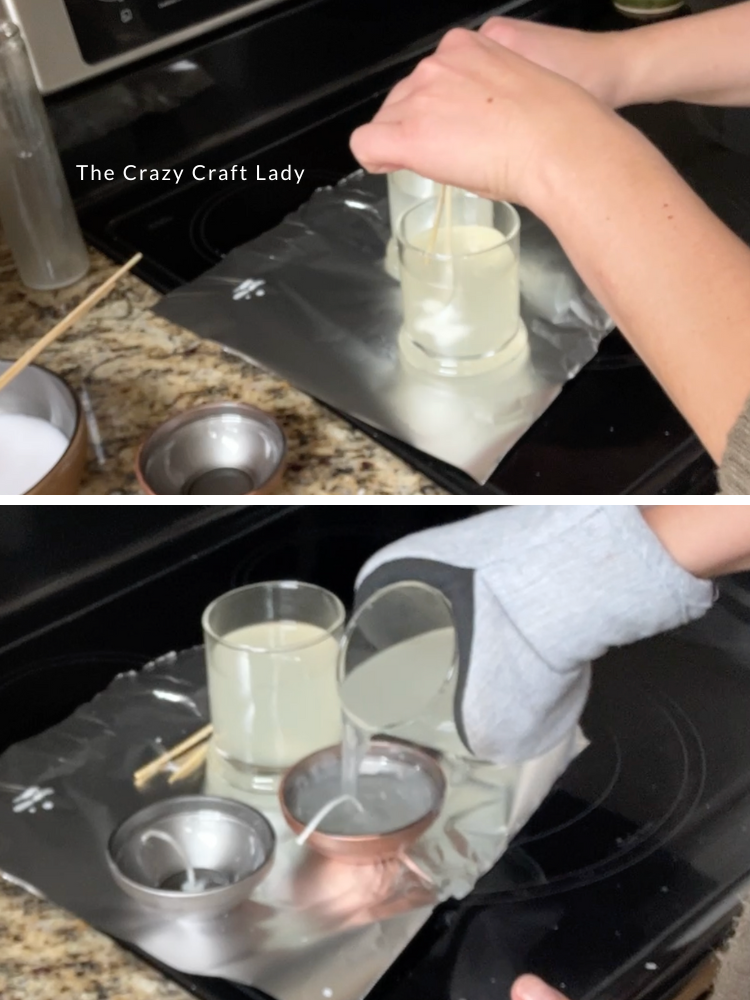
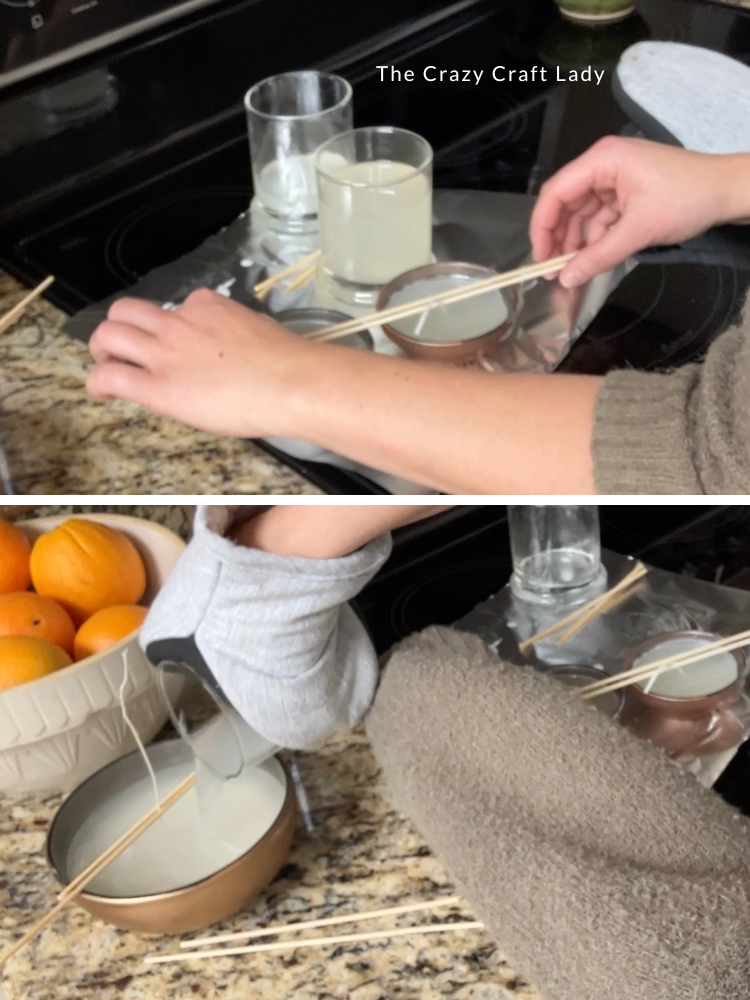
- Pour the Wax and Set the Wicks. Place one wick into the bottom half of each ornament bowl (the one without the glued loop). Use bamboo skewers to hold the wick upright and centered. Carefully pour the melted wax into each bowl. The large bowl will need more wax, but don’t worry if it doesn’t fill completely — you’ll top it off later.
- Use Leftover Wax. Once your smaller votive candles are melted and poured, combine any leftover wax and pour it into the large ornament candle. It’s the perfect way to use up every last bit — and if you’re lucky, the timing and volume will work out perfectly (mine did, by sheer luck!).
- Let Cool and Trim Wicks. Allow all three ornament candles to cool and set completely before trimming the wicks. Once the wax is firm, wipe away any fingerprints, pair up each “top” and “bottom” bowl, and admire your handiwork!


The Finished Craft

And that’s it — your own DIY ornament-shaped candles, inspired by Pottery Barn but made for just a few dollars! These are so festive and elegant, and they look beautiful whether displayed individually or grouped together.
Even though I’m not an expert candle-maker (please be kind, candle pros!), I absolutely love how these turned out. They’re proof that with a little creativity, you can make budget-friendly holiday décor that still looks luxe.
PIN these DIY Candles for Later:

More Pottery Barn Candle Crafts:
This candle DIY was part of a compilation video on YouTube along with – Candy Cane Stripe Candles, Gingerbread Candle Holders, and Bow Taper Candles. Check it out!