
Turn a drop cloth into oversized Christmas sheet music wall décor! Get step-by-step instructions for this Pinterest-worthy holiday craft using paint pens and transfer paper.

DIY Drop Cloth Sheet Music Wall Hanging (Vintage-Style Fabric Art)
This post contains some affiliate links for your convenience. Click here to read my full disclosure policy.
Hey there, crafty friends! I’m coming at you with another budget-friendly drop cloth craft. I’ve been on a serious roll lately (see: my drop cloth Christmas pillow covers), and I’m clearly not slowing down. This project is for all the makers who love repetitive, cozy crafts. You know, the kind you can work on while watching a Christmas movie or listening to a podcast.
I turned a piece of plain canvas drop cloth fabric into a giant sheet music wall hanging. Think Pinterest-worthy vintage art… but on fabric instead of paper. Sure, you could buy something like this, but I think it’s so much more fun to go the DIY route. Grab your drop cloth and paint pens — we’re doing this thing!
Video Tutorial: Christmas Music Wall Hanging
Watch this quick video to see how this craft came together:

DIY Christmas Music Wall Hanging
Turn a drop cloth into oversized Christmas sheet music wall décor! Get step-by-step instructions for this Pinterest-worthy holiday craft using paint pens and transfer paper.
Materials
- Drop cloth fabric (cut to preferred size — my final size was approx. 32” x 43”)
- Printable sheet music (I used “Silent Night” – printed in poster size layout)
- Carbon transfer paper
- White craft paint (chalk paint, Apple Barrel, or anything you have)
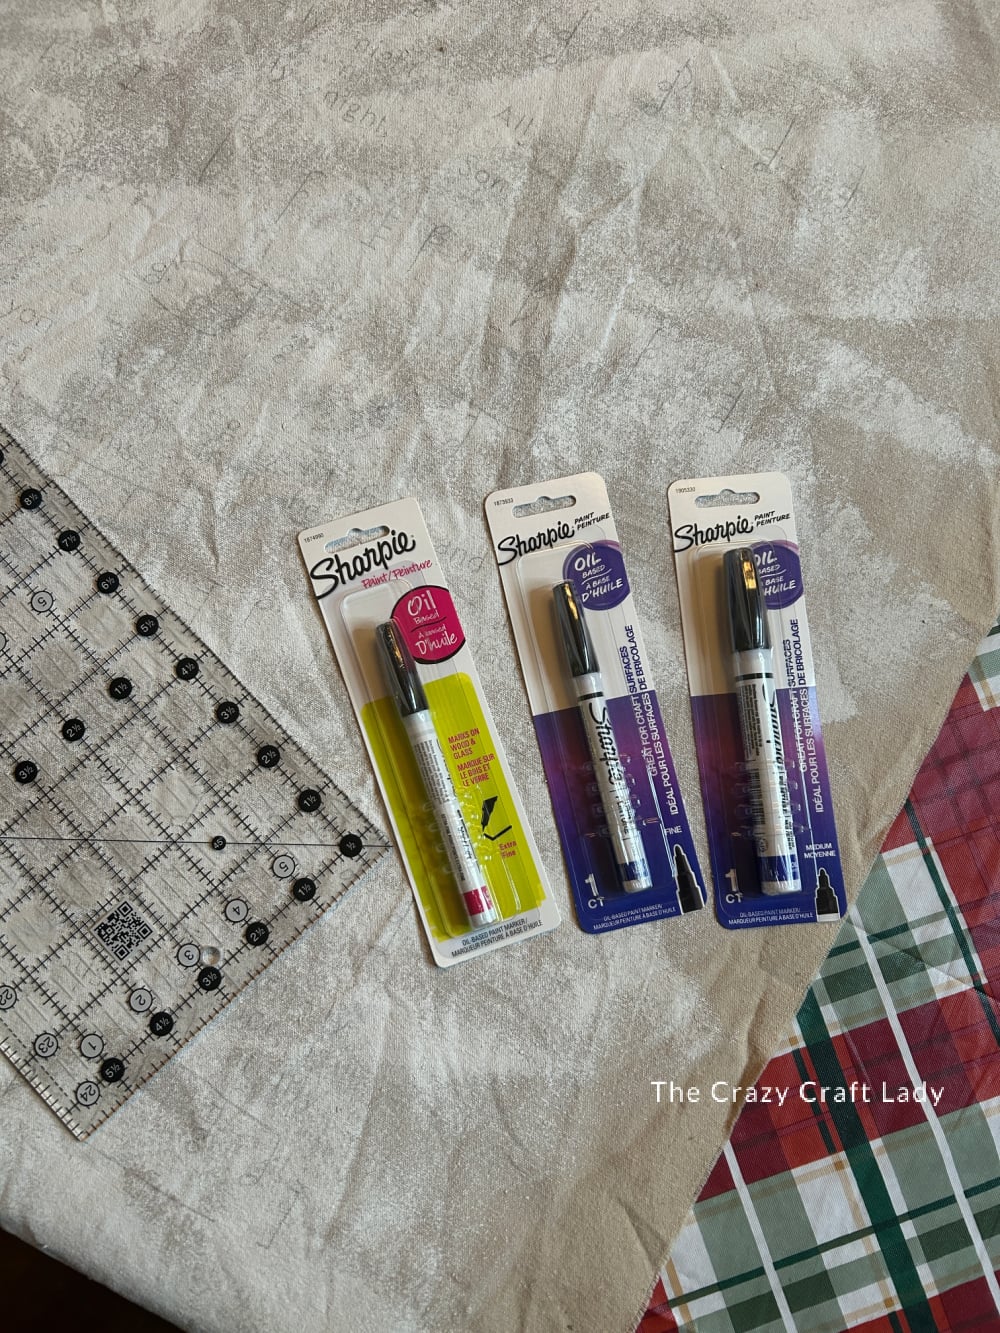
- Black paint pens (oil-based recommended — one fine tip + one medium tip)
- Painter’s tape
Tools
- Rotary cutter + cutting mat (or fabric scissors)
- Sewing machine (optional — for limiting fraying)
- Iron
- Small paint roller + paper plate
- Printer (use “poster” print settings on a PDF)
- Plastic cutting grid/ruler (helpful for drawing lines)
- Washing machine + dryer (optional, but creates nice lived-in wrinkles)
Instructions
- Watch the video. Follow along with the video tutorial for a walkthrough on how to make your own wall hanging.
- Cut the Drop Cloth to Size. Trim your fabric to fit the sheet music you’re planning to print. I printed mine poster-style from a PDF that I found for free online (3×4 pages), which dictated my final fabric size of 32″ x 43″. Your dimensions may vary, and if you go bigger… just know your time investment goes with it!

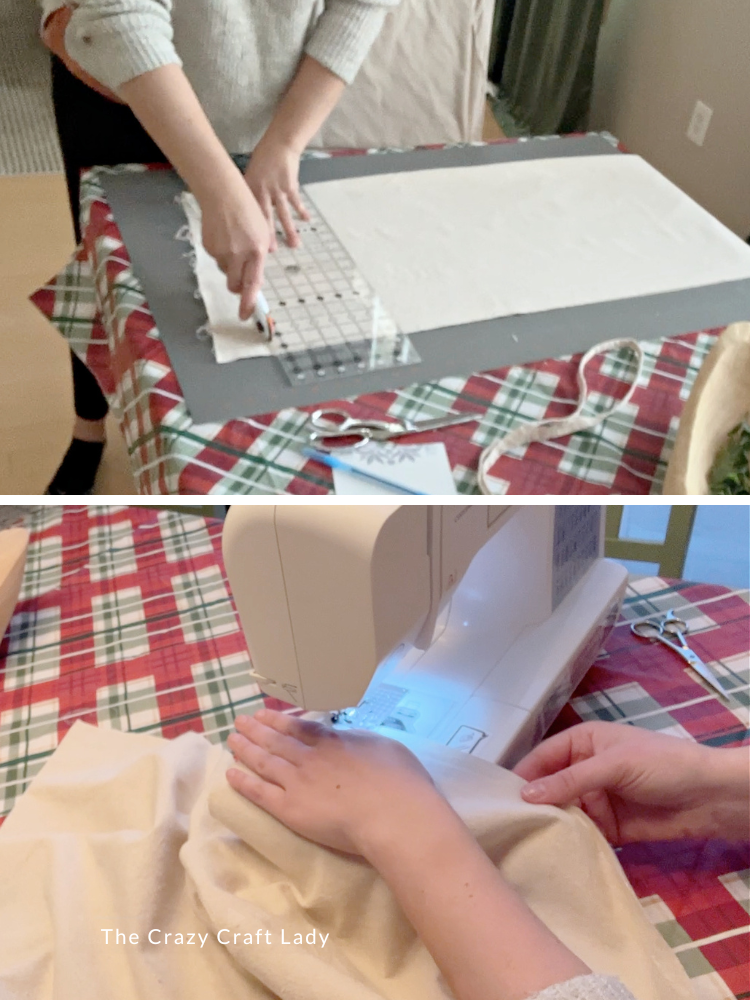
- (Optional) Sew the Edges. You can leave the drop cloth raw for a more rustic fray, but I chose to sew a simple ¼” straight seam all the way around. This supports a controlled fray after washing, which gives a nice vintage look without unraveling into chaos.
- (Optional) Try Coffee Staining. This step… did not go as planned. I boiled water, dumped in instant coffee, soaked the cloth, and it barely changed color after washing. If you’re using white fabric, coffee-staining works great. For regular drop cloth? Meh. Not worth the effort.
- Wash, Dry, and Press. Wash and dry your fabric to soften it and create wrinkles. Don’t panic if it wrinkles a lot (I accidentally left mine in the dryer overnight — whoops). Just press lightly. Some wrinkles actually add amazing texture!
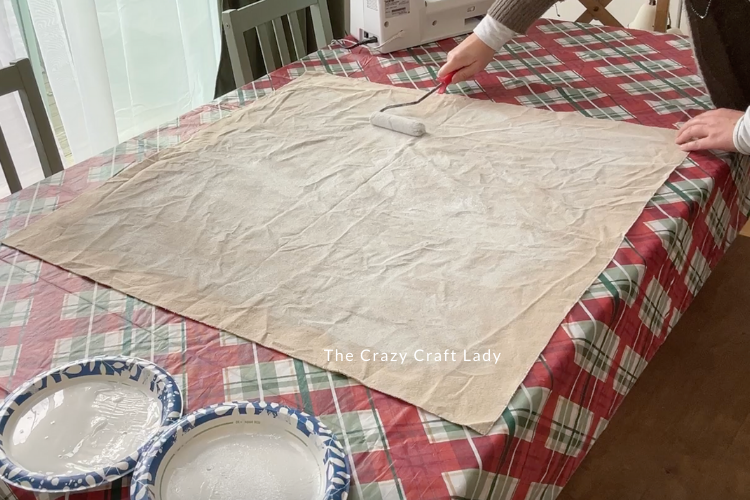
- Add a White Paint Base. To make the black paint pop, use a small roller to lightly coat the center of the fabric with white paint. Don’t cover edge to edge — leave about a 4″ border untouched. Roll unevenly and imperfectly on purpose. You’re aiming for “weathered paper,” not perfection.

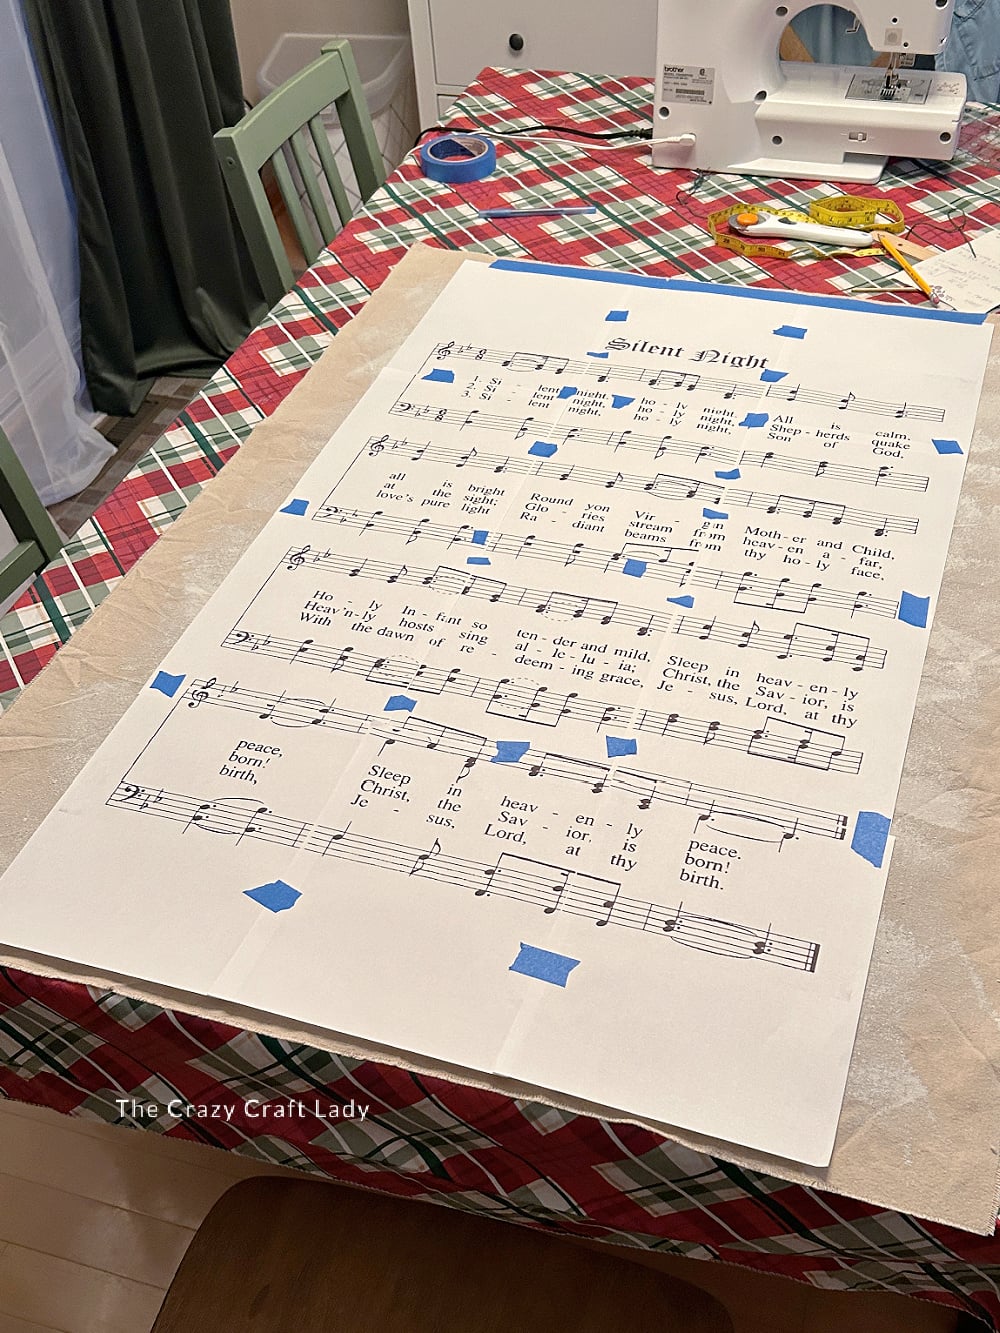
- Print and Assemble the Sheet Music. Search “free Christmas sheet music printable” (I chose Silent Night). Print it in poster mode so it tiles across multiple sheets. Trim edges as needed and tape all pieces together like a big puzzle. Take care during this step — especially aligning staff lines — it matters later.

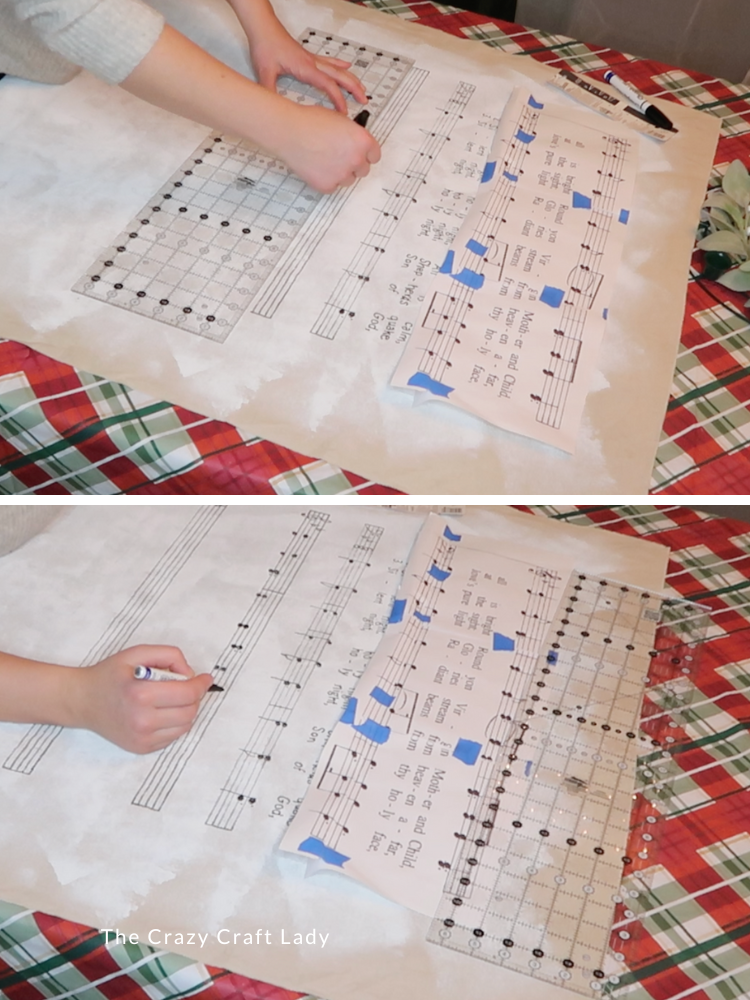
- Transfer the Music to Fabric. Tape the giant sheet to the top edge of your drop cloth. Slide carbon paper underneath and trace every music lyric, note, and symbol. Note: I did NOT trace every staff line, I just made little tick marks where the staff lines met the bar lines. Use firm pressure so the carbon transfers well to the textured cloth. Queue a podcast… you’ll be here a while.
- Start Painting (Hello, Paint Pens!). Use oil-based paint pens in a fine tip and a medium tip. Here’s the magic combo: Fine tip for staff lines, letters, thin marks; Medium tip for note dots + thicker details (go light to avoid bleeding). Pro tip: Cut your printed sheet music into individual systems (treble + bass stacks) so you can reference them as you paint. Go slow and enjoy it — there’s something weirdly relaxing about painting sheet music!
- Hang & Display. For this part, you can: ddd grommets, mount on a dowel, hang with clips, drape like a tapestry. I opted for two small 3M velcro command strips in the top left and right corners on the back of the fabric. However you display it, it looks stunning for Christmas — or even all winter long.
The Finished Wall Hanging

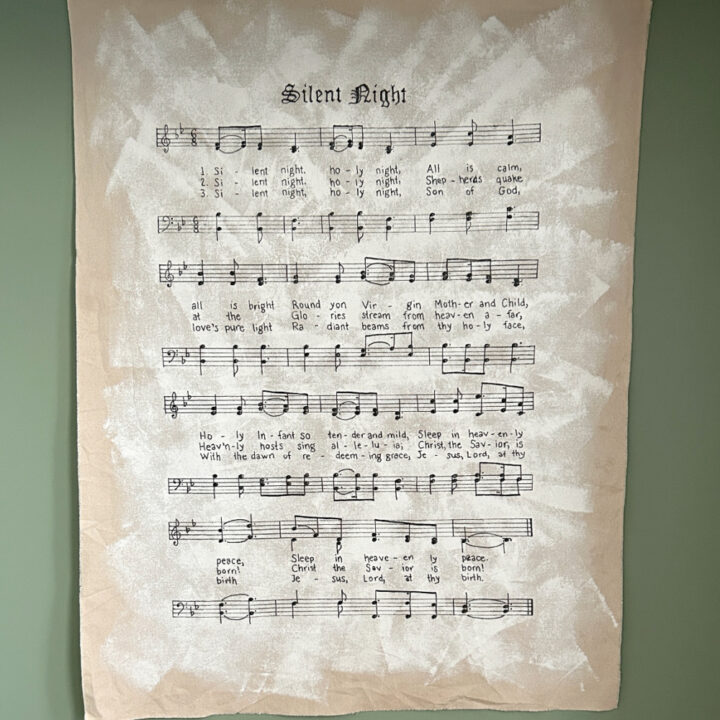
And that’s a wrap on my drop cloth sheet music wall hanging! It’s cozy, vintage, big-impact décor made almost entirely from basic supplies and just a pinch of craft-obsessive patience.
I’m thrilled with how mine turned out! It looks like an old piece of sheet music printed on fabric, wrinkles and all. And now I have a giant customizable piece of art to hang every holiday season.
PIN this Drop Cloth DIY for Later:

More Christmas Dropcloth DIYs:
- DIY Reverse Applique Christmas Pillows you can make for under $10 using drop cloth, quilting fabric, and easy hand stitching. Learn how to create stunning Pottery Barn–style peekaboo pillows for the holidays.
- Grab some paint and drop cloth or canvas fabric to make a Christmas tree wall hanging. It’s a fun alternate to a real tree, or just a great addition to winter decor.
- How to make inexpensive DIY Christmas pillows – using a drop cloth and Sharpie markers. This budget-friendly holiday decorating idea is pure genius!
Very pretty. I’m going to make one for next year. Wish me luck.