
Learn how to make a beautiful DIY crushed can flower pocket using Dollar Tree supplies. It’s perfect for spring decor on a budget!

How to Make a Spring Crushed Can Flower Pocket
This post contains some affiliate links for your convenience. Click here to read my full disclosure policy.
If you’ve seen the viral crushed can trend floating around, you’re going to love this version! I’m turning a recycled can into a sweet little floral wall pocket mounted on a Dollar Tree cutting board. It’s perfect for spring decorating on a budget.
This project is easy, affordable, and has that handmade charm we all love.

Video Tutorial: Spring Crushed Can Flower Pocket
Watch this quick video to see how this craft came together:

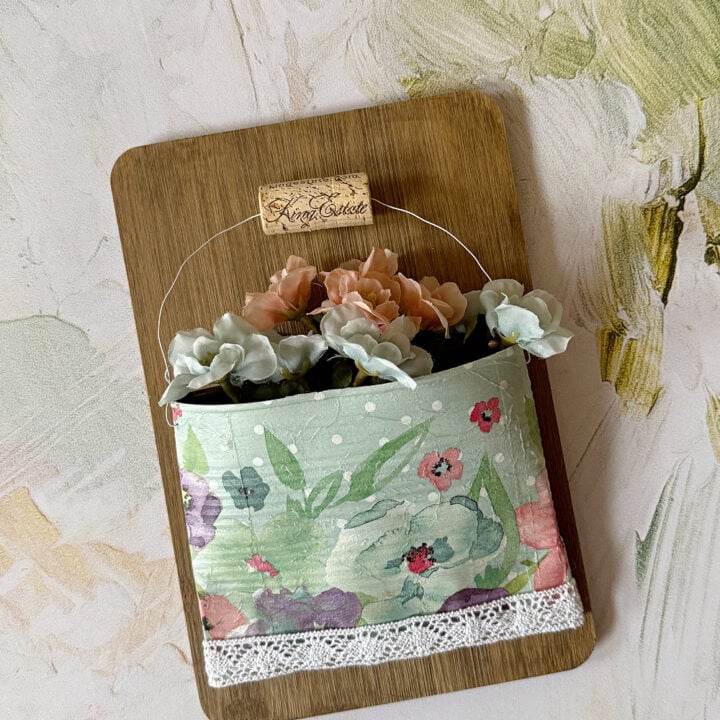
Spring Crushed Can Flower Pocket
This viral crushed can craft becomes a stunning spring floral sign using a bamboo cutting board and simple supplies.
Materials
- Large empty food can (28–30 oz works best)
- Dollar Tree bamboo cutting board
- Decorative paper napkin (floral works great!)
- Chalk paint (white or linen)
- Wood tint or stain
- Mod Podge (matte or satin)
- Lace ribbon
- Floral wire
- Wine cork (optional)
- Faux flowers
Tools
- Paintbrush (1-inch flat brush)
- Can opener
- Hole punch tool (like a Crop-a-Dile Hole Punch or hammer + nail)
- Rubber mallet (optional)
- Nail file or sandpaper
- Hot glue gun
- E6000 glue
Instructions
 Watch the video. Follow along with the video tutorial for a step-by-step walkthrough of how to make your own spring crushed can craft.
- Prep the Cutting Board Base. Start by staining or painting your bamboo cutting board. Bamboo doesn’t absorb stain as well as other woods, so a wood tint works best. Apply, then wipe off excess for a smooth finish.
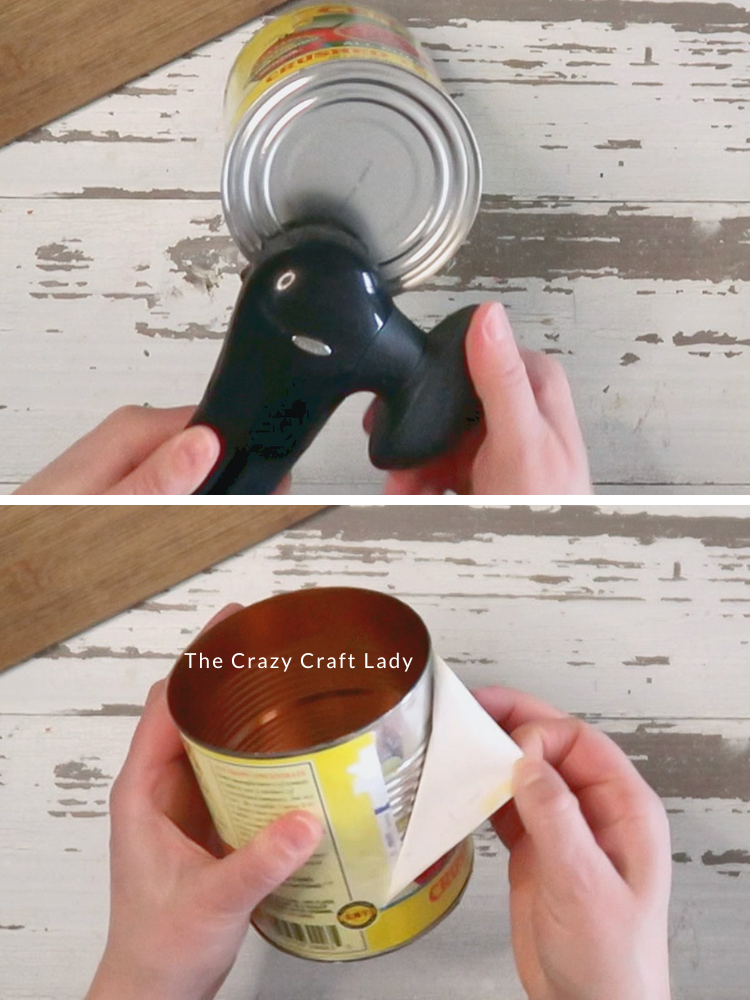
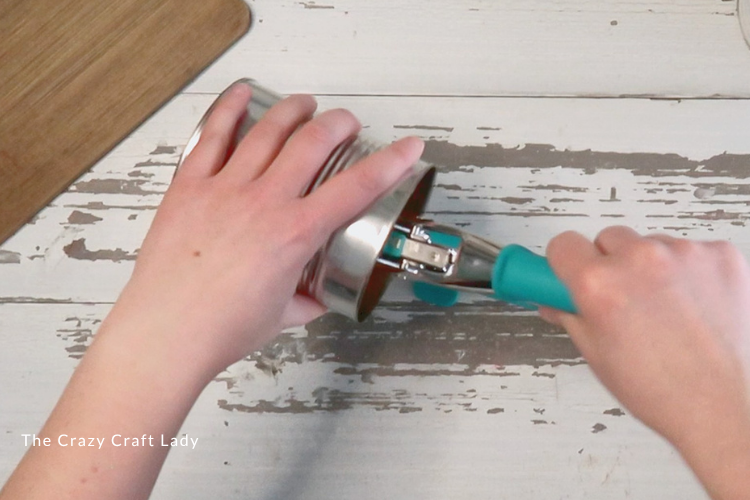
- Prep the Tin Can. Remove both the top and bottom of your can so you’re left with a cylinder. REmove the paper wrapper and any adhesive as well.
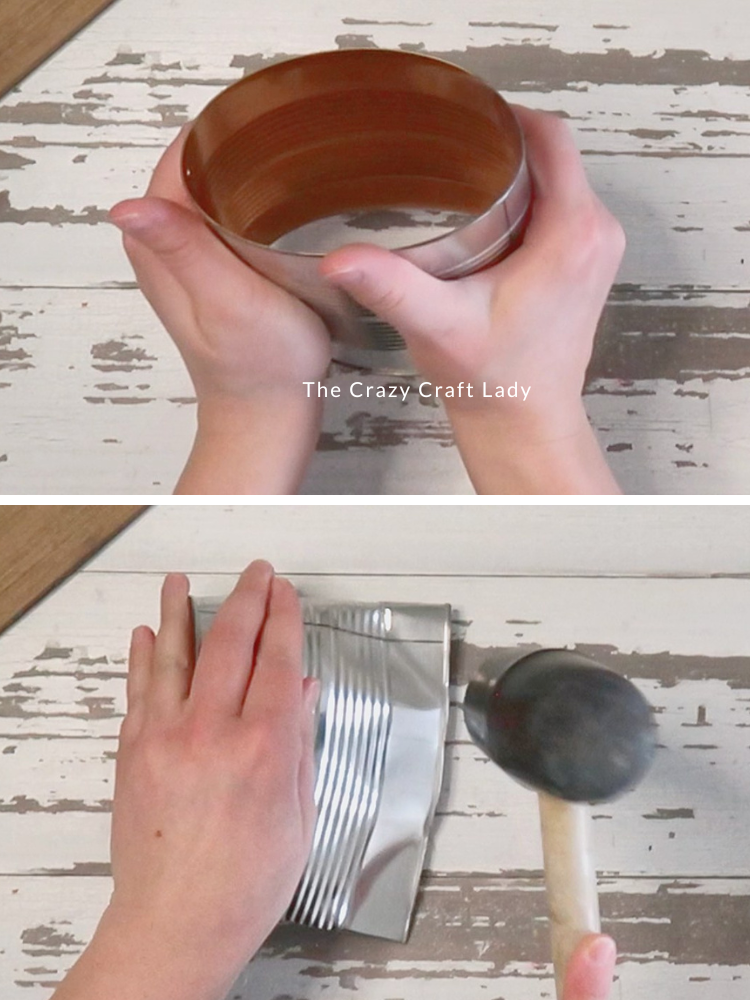
- Cut and Shape the Can. Punch a hole on each side near the top. Then carefully crush the can so the bottom flattens while the top stays open, This creates your “pocket.”

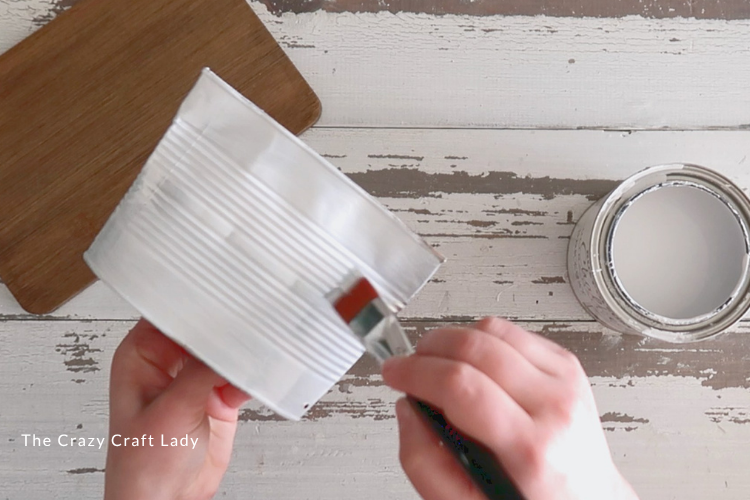
- Paint the Can. Apply a coat of white chalk paint to the front and edges of the can. Let dry completely.
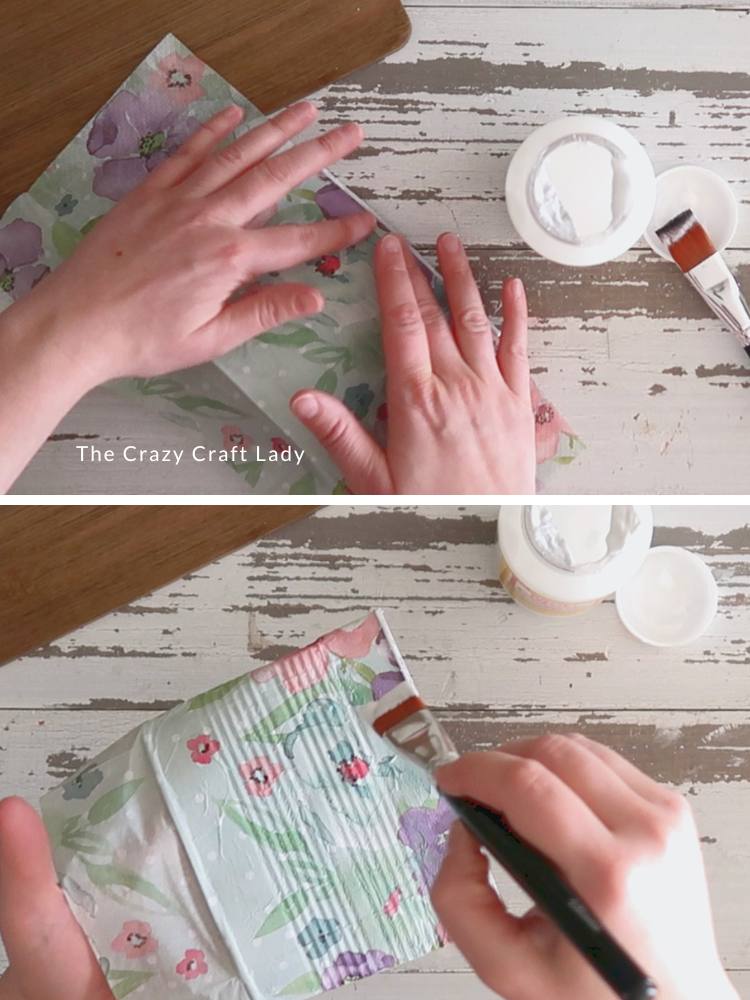
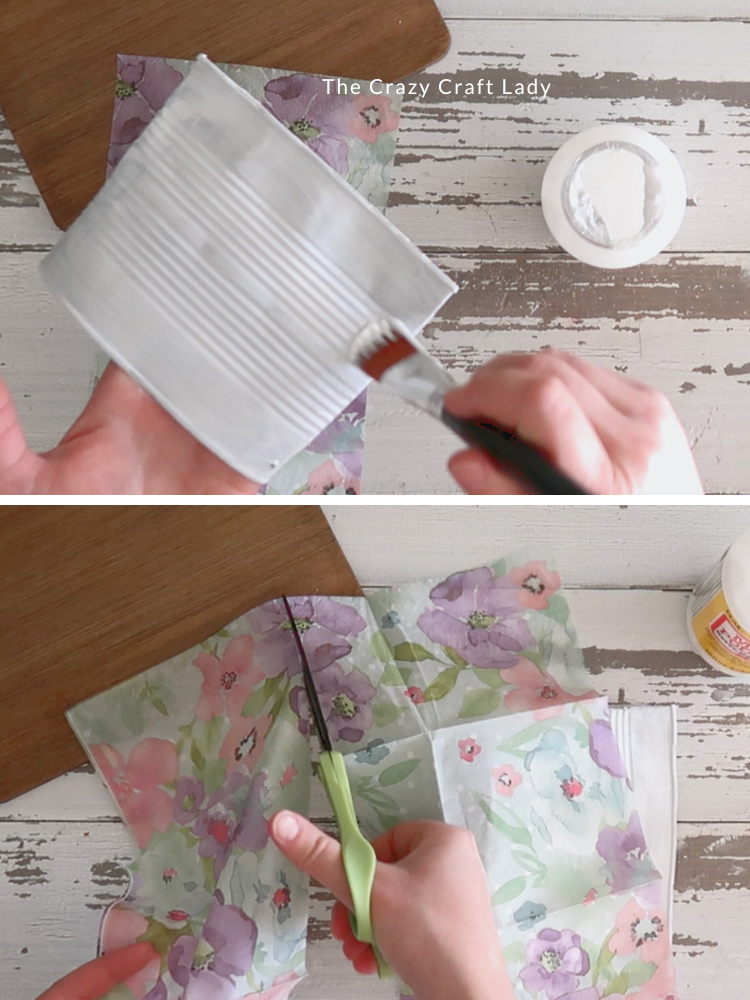
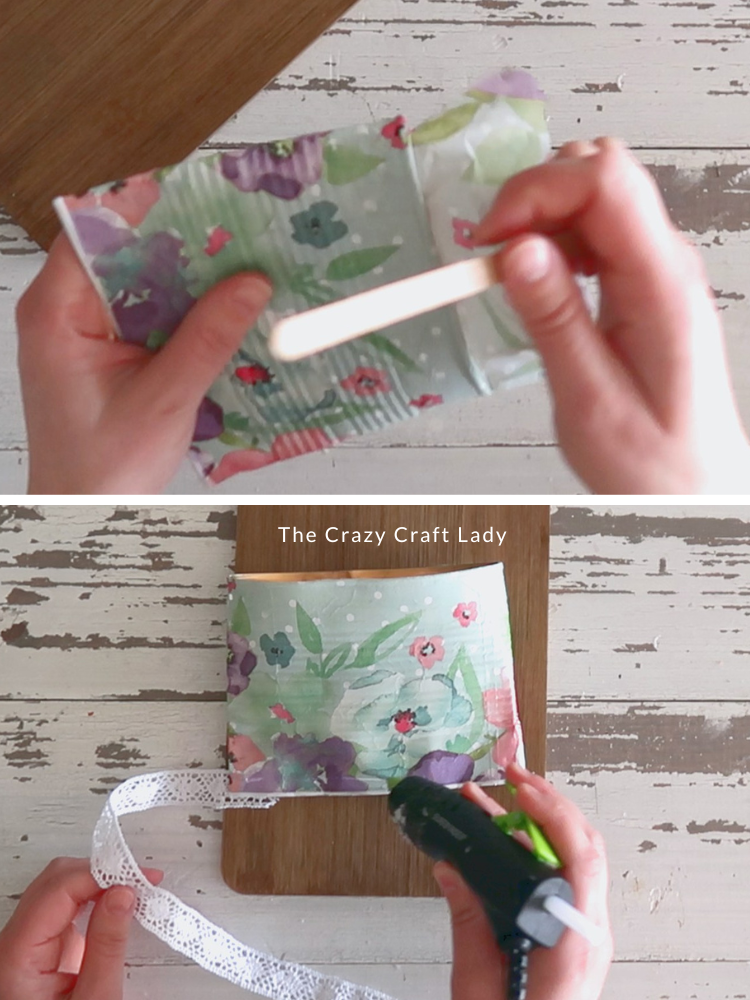
- Decoupage the Can. Separate the napkin layers so you’re using just the top printed layer. Brush Mod Podge onto the can, and then gently lay the napkin over the surface. Smooth carefully to avoid tears. Seal with another coat of Mod Podge. Let dry fully.
- Clean Up the Edges. Use a nail file or sandpaper to remove excess napkin around the edges. This gives you a clean, crisp edge.
- Add Decorative Trim. Cover the bottom seam of the can with lace ribbon using hot glue. This hides imperfections and adds a soft, decorative touch.
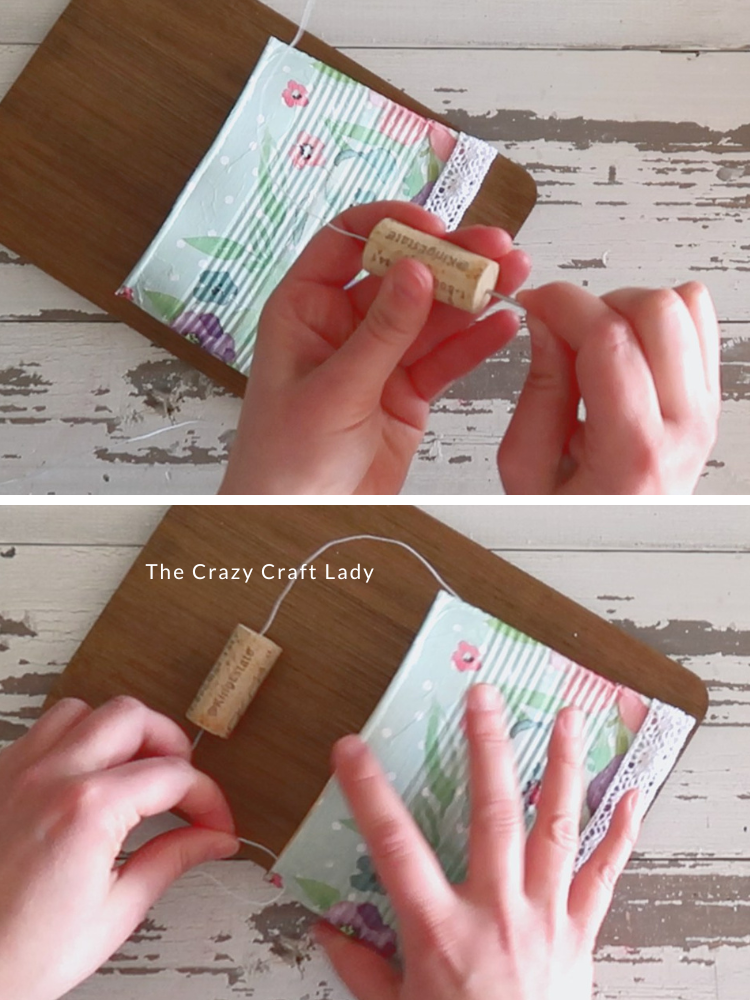
- Create the Handle. Cut two pieces of floral wire and insert them into a wine cork (optional but cute!). Thread each end through the holes in the can and twist to secure. Now you’ve got a charming little handle detail.
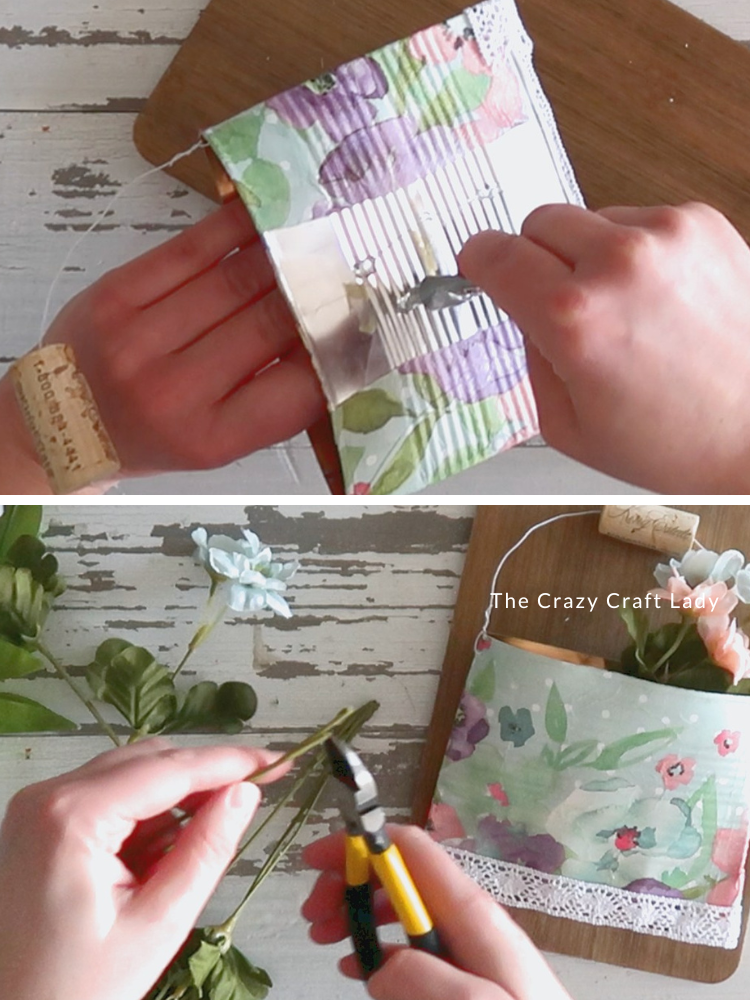
- Attach to the Board. Apply E6000 glue to the back of the can and press it onto the cutting board. Let it fully cure.
- Add Faux Florals. Trim your faux flowers and tuck them into the pocket. Choose colors that match your napkin for a cohesive look.
 Watch the video. Follow along with the video tutorial for a step-by-step walkthrough of how to make your own spring crushed can craft.
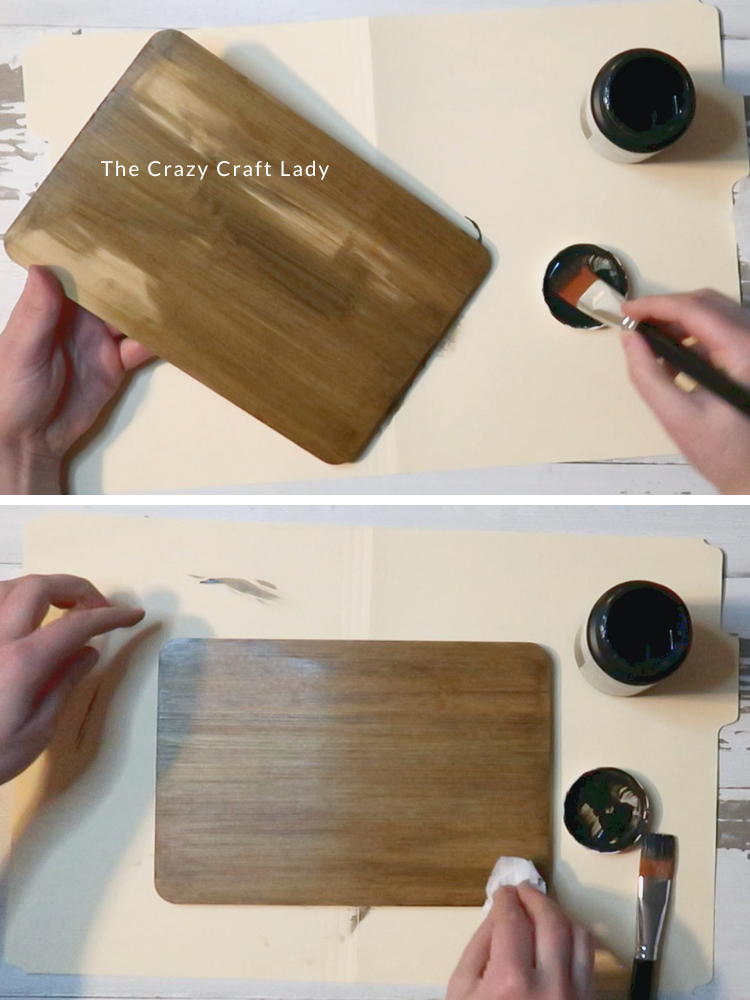
The Finished Craft

This crushed can flower pocket is such a fun way to jump on a viral trend while still making it your own. I love how it combines upcycling + Dollar Tree supplies + spring florals into one super cute project.
You can hang it, prop it up, or even make a few for a gallery wall.
PIN this Spring Craft for Later
