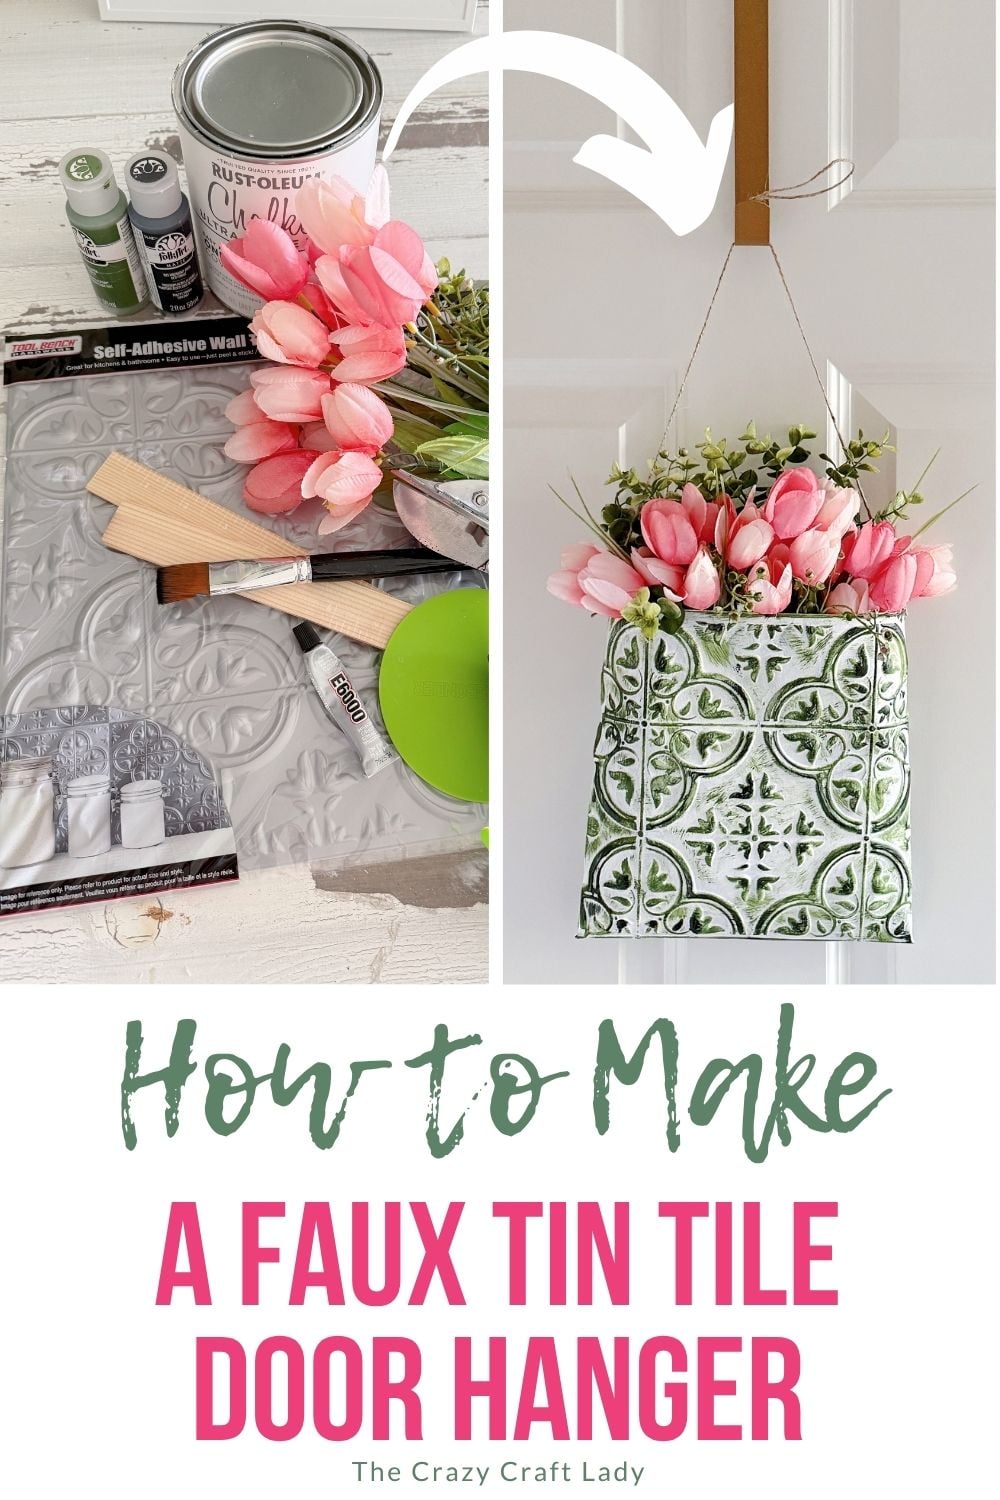
Turn a Dollar Tree faux tin tile into a gorgeous vintage-inspired floral wall pocket! This easy DIY door hanger looks high-end but costs just a few dollars to make.
This post contains some affiliate links for your convenience. Click here to read my full disclosure policy.
How to make a beautiful door hanger using a dollar store faux tin tile.
If you’ve been around here for any length of time, you probably already know that Dollar Tree faux tin tiles are one of my favorite crafting supplies ever. Seriously, I don’t think I’ve made a single project with them that I didn’t absolutely love.
They’re lightweight, inexpensive, easy to cut, and somehow always end up looking like something you’d find in a cute little boutique for ten times the price.
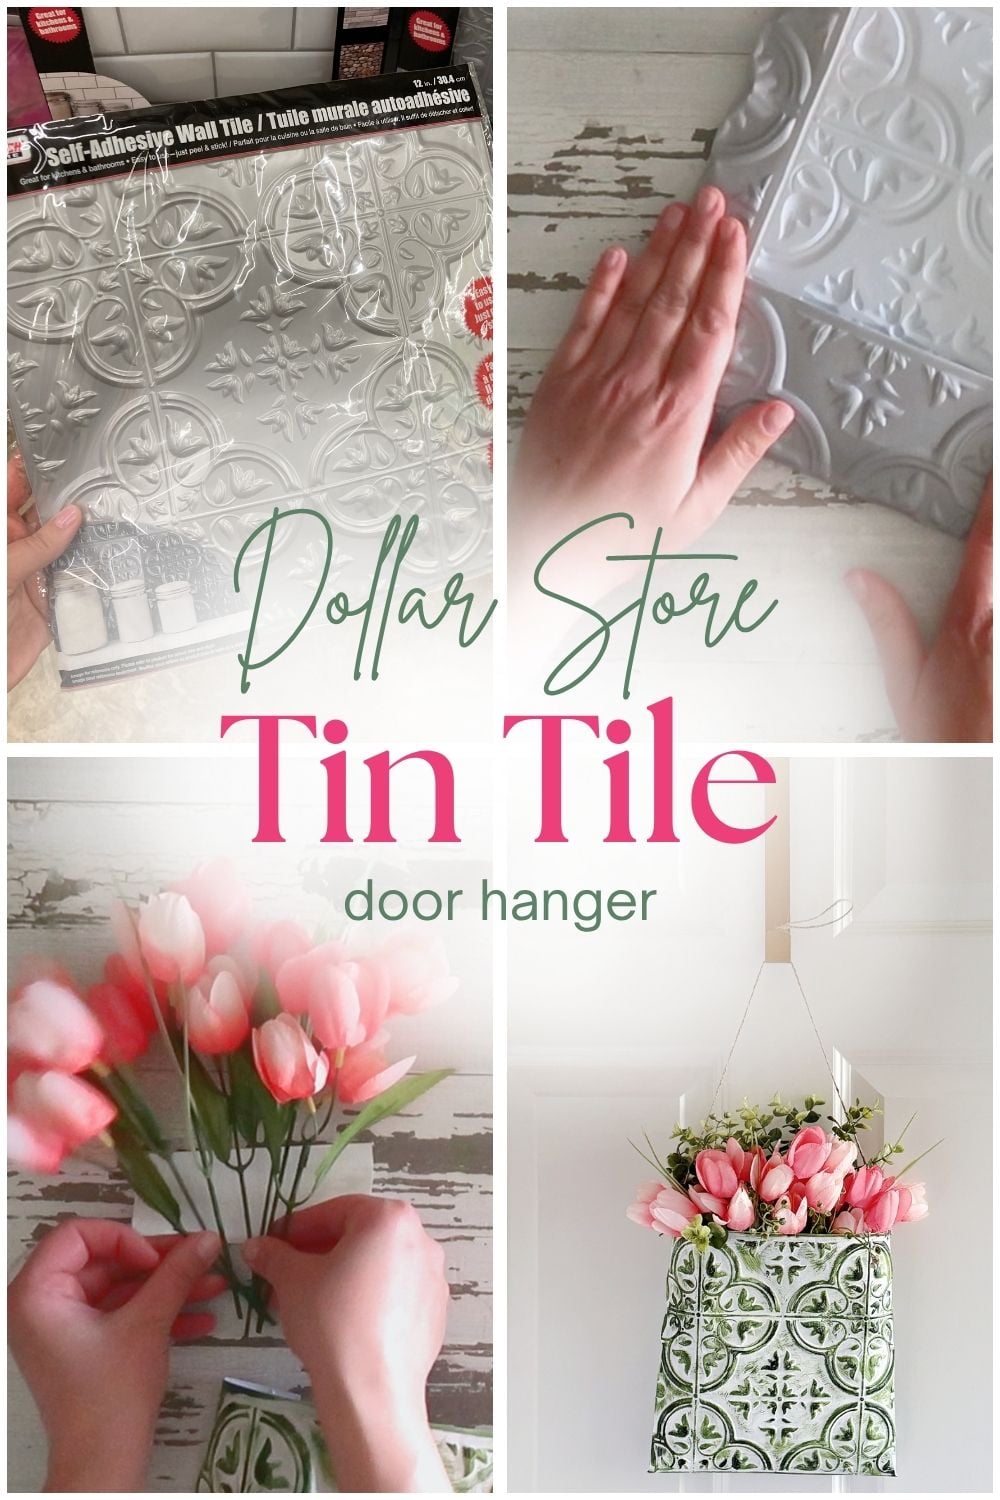
Today we’re turning one faux tin tile into the sweetest little floral wall pocket. It’s part wreath, part door hanger, part wall decor, and completely adorable. The distressed paint finish gives it a vintage farmhouse feel, while the faux flowers make it perfect for spring and summer decorating.
Video Tutorial: Faux Tin Tile Flower Pocket
Watch this quick video to see how this craft came together:


Faux Tin Tile Flower Pocket
Create a charming farmhouse floral wall pocket using Dollar Tree faux tin tiles, paint stir sticks, and faux flowers. A simple budget-friendly craft with designer style!
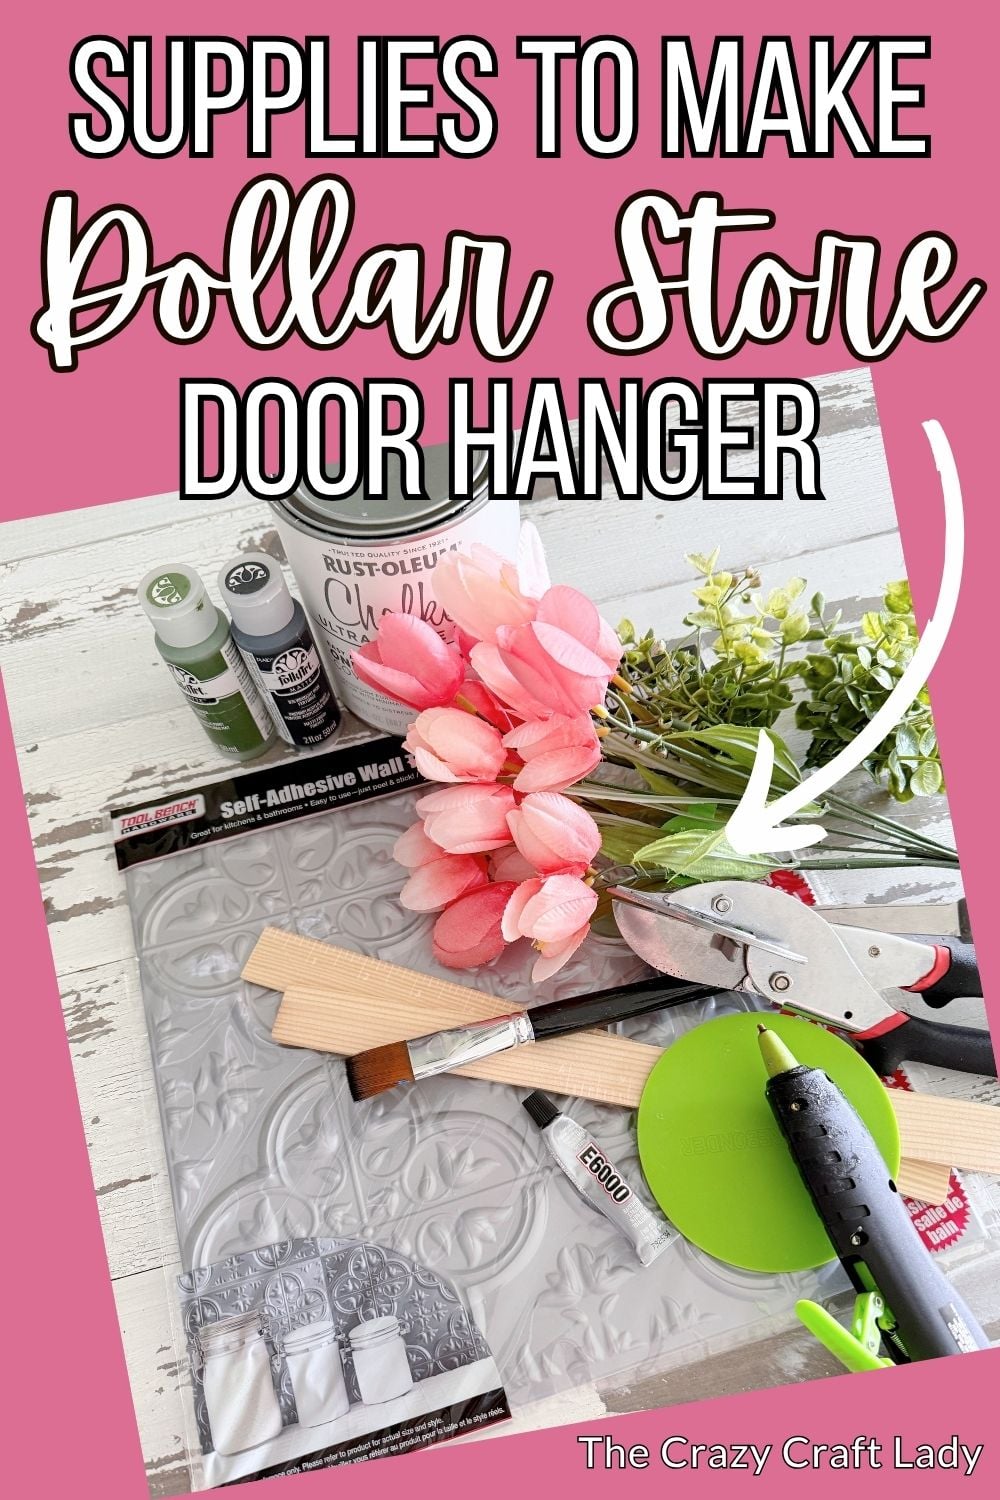
Materials
- 1 Dollar Tree faux tin tile
- 2 paint stir sticks
- Rust-Oleum Linen White Chalk Paint (or similar)
- Green craft paint
- Dark charcoal gray craft paint
- Dish sponge
- E6000 glue
- Faux flowers
- Faux greenery or boxwood stems
- White duct tape
- Twine
Tools
- Hot glue gun and glue sticks
- Wire cutters
- Hole punch
- Miter shears or saw
- Paintbrush
Instructions
- Watch the video. Follow along with the video tutorial for a step-by-step walkthrough of how to make your own tin tile flower pouch.
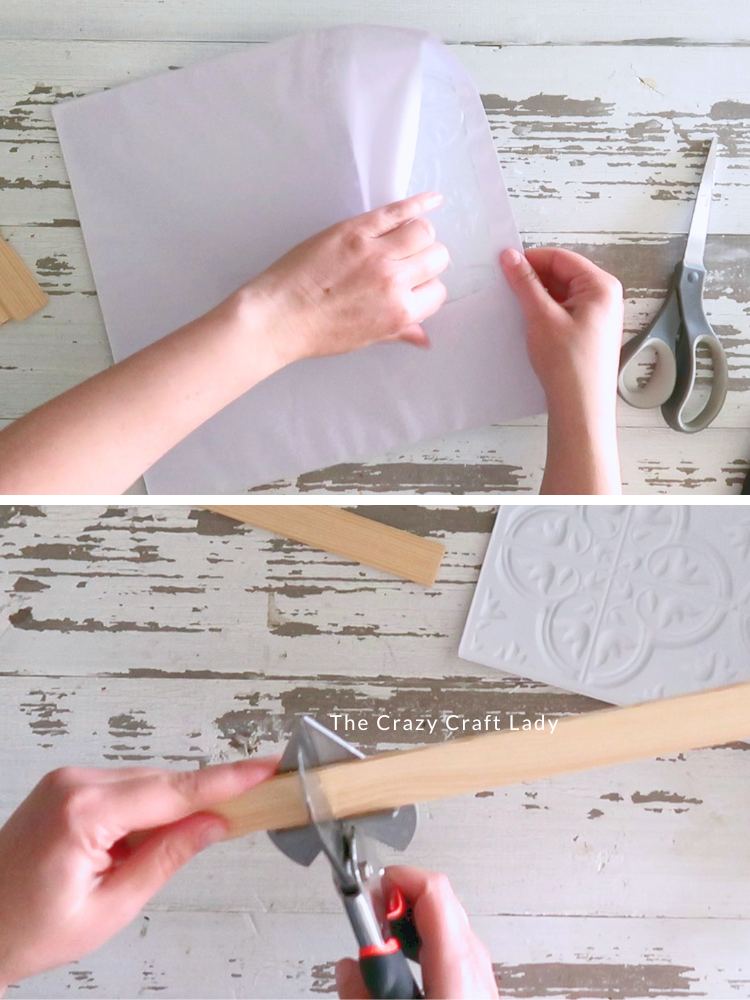
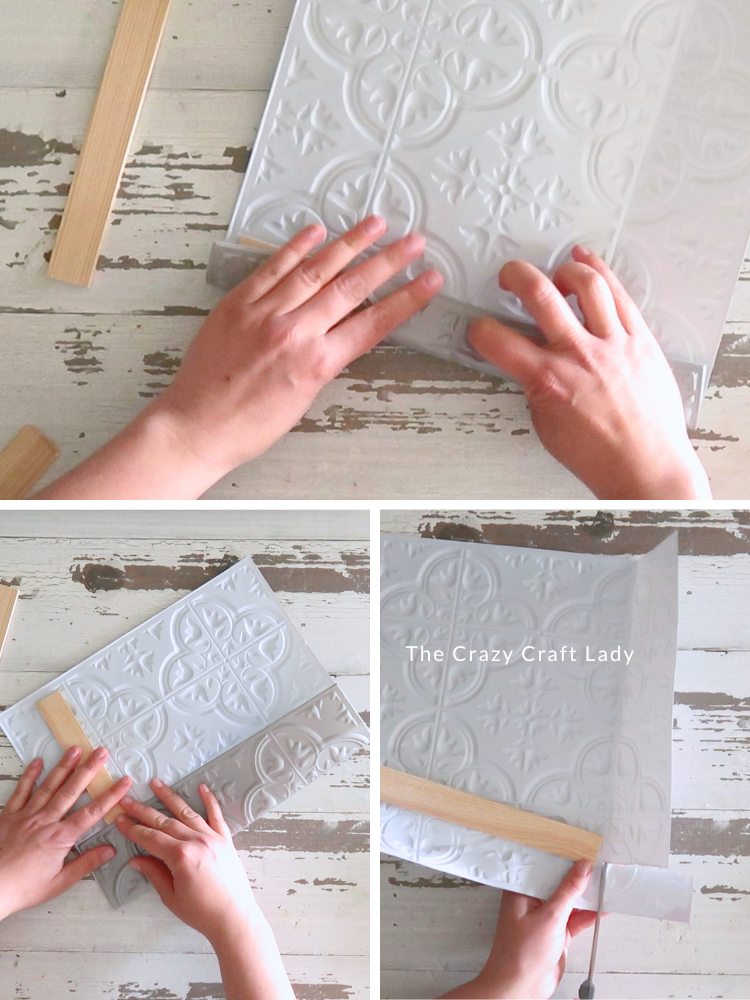
- Create the Wall Pocket Shape. Start by peeling the adhesive backing off your faux tin tile. Fold the bottom edge upward one embossed section. Next, fold both side edges inward. This will create a pouch.

- Reinforce the Sides. Cut the handles off two paint stir sticks so they're the same height as the folded side sections of the faux tin tile. Place a paint stir stick inside each side fold. Next, cut small rectangles from both bottom corners of the tile. This will allow the bottom section to fold upward neatly and create the pocket shape.
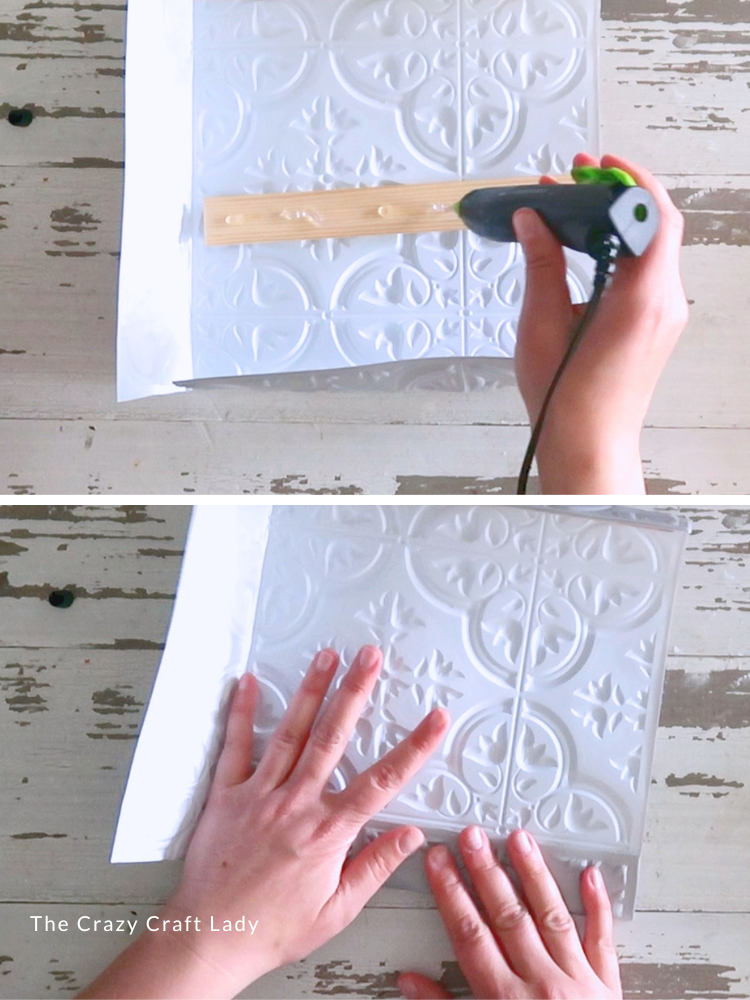
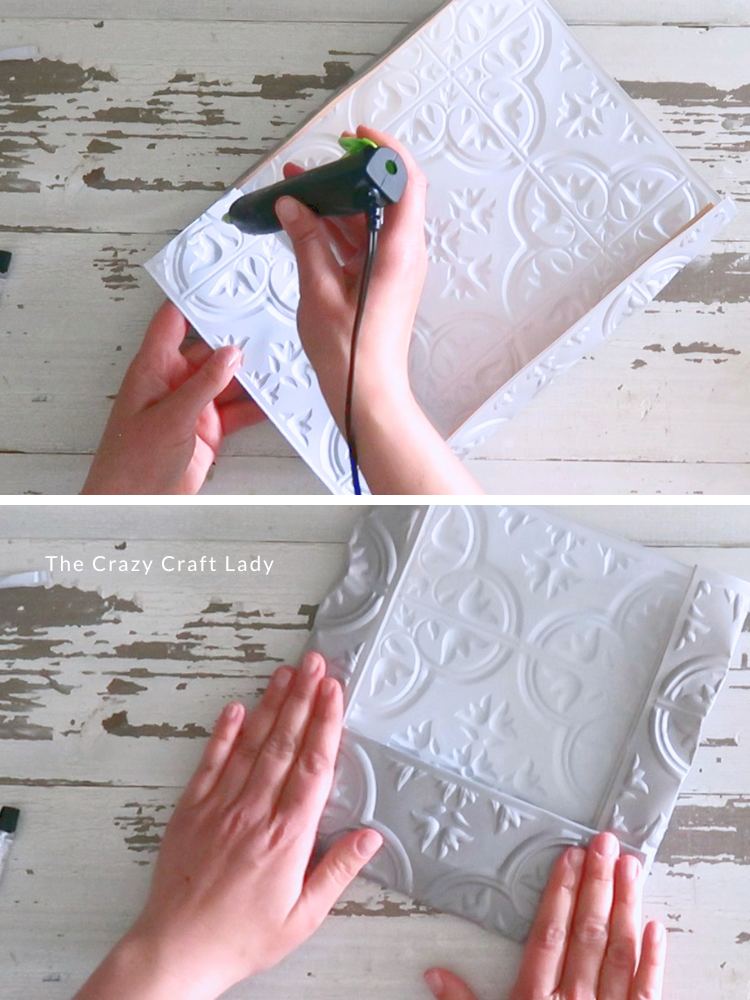
- Glue Everything Together. For a strong, long-lasting hold, use both E6000 and hot glue. Apply several dabs of both adhesives along one side and fold the faux tin tile over the paint stir stick.
Repeat on the opposite side. Hold each side in place until the hot glue sets. Once the sides are secure, add more glue along the bottom flap and fold it upward to create the pocket. - Paint the Faux Tin Tile. Paint the entire front surface with white chalk paint. Don't stress about getting a perfectly smooth finish, since we will be distressing later. Allow the paint to dry completely before moving on.
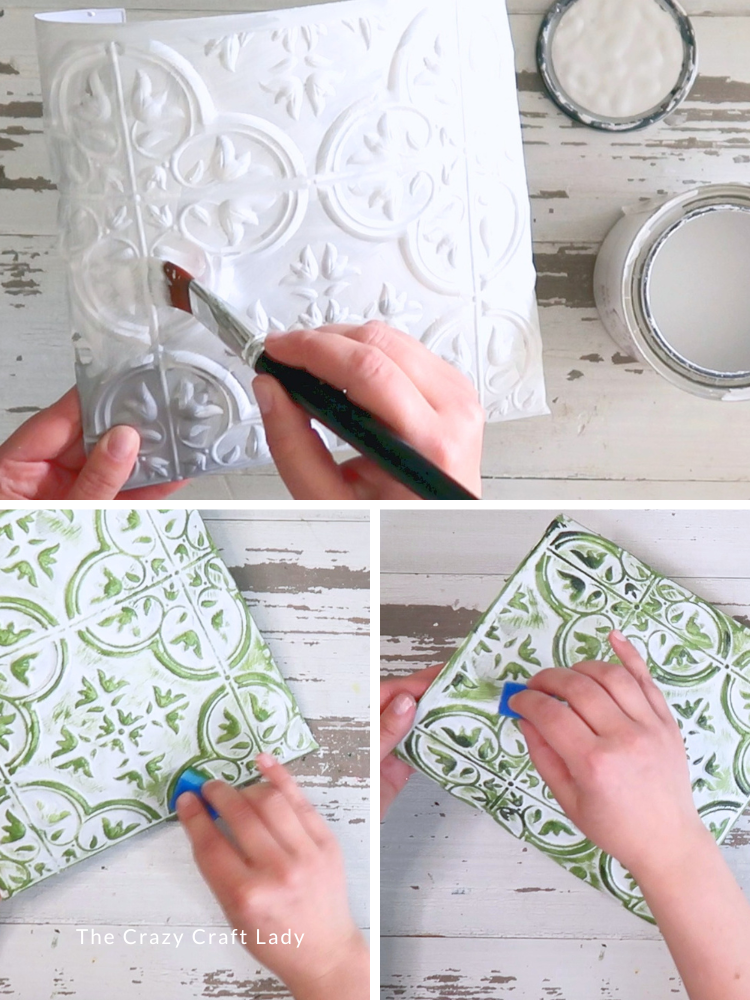
- Distress with Green Paint. Using a small piece of a clean piece of dish sponge, brush green paint over the entire front surface. Be fairly aggressive with the distressing. You want lots of green showing through because we'll be layering another color over the top.
- Distress with Gray Paint. Once the green paint dries, use another sponge to lightly apply dark charcoal gray paint. Use a much lighter hand this time. The goal is to add depth and age without completely covering the green.
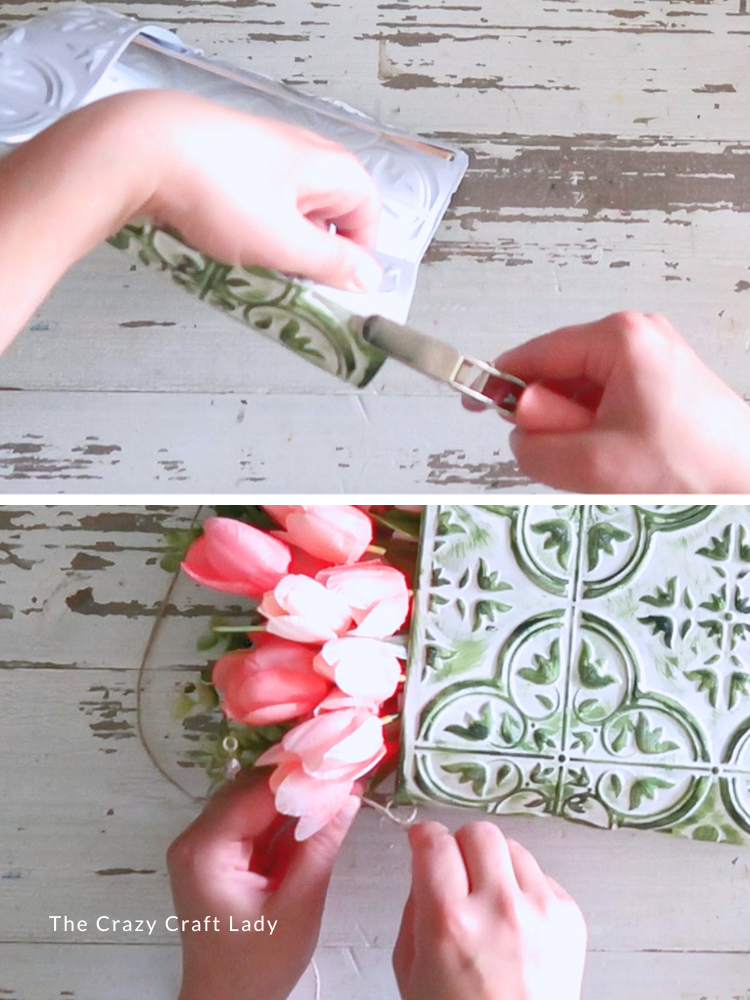
- Punch Hanging Holes. Use a hole punch to create one hole on each side of the wall pocket near the top. These holes will be used to thread the twine hanger through later.
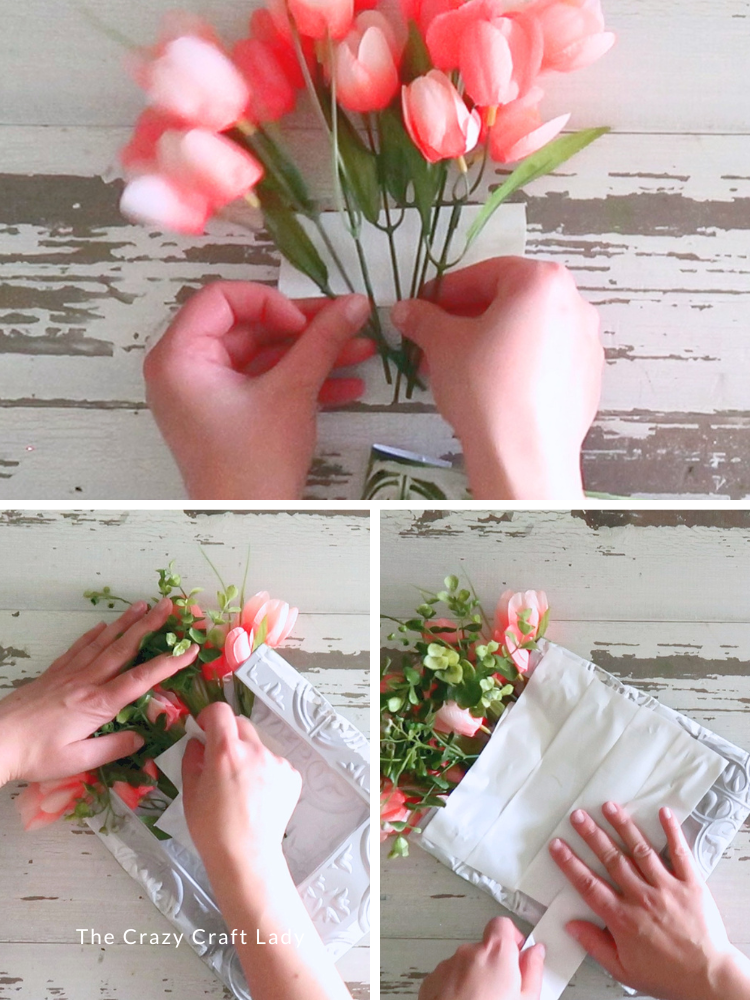
- Create the Floral Arrangement. Grab your favorite faux flowers and trim the stems using wire cutters. I used pink tulips, but any florals would work beautifully. Arrange the flowers until you're happy with the fullness. To keep everything together, lay the stems across a strip of duct tape and roll or fold the tape around them to create a floral bundle. Add a few pieces of faux boxwood or greenery behind the flowers for extra texture and fullness.
- Secure the Flowers Inside the Pocket. Place the floral bundle inside the wall pocket. Use additional duct tape to secure everything in place from the back. Optional: If you'd like a cleaner finished look, cut another piece of faux tin tile and glue it over the back to conceal the tape.
- Add the Twine Hanger. Thread twine through the two hole-punched openings. Tie secure double knots on both ends. Now your floral wall pocket is ready to hang!
The Finished Craft
I absolutely love how this project turned out. The faux tin tile gives it tons of texture, the distressed finish makes it look beautifully aged, and the floral arrangement adds the perfect pop of color.

Best of all, it’s a fun alternative to a traditional wreath and can be customized for any season. If you’re anything like me and can’t resist crafting with Dollar Tree faux tin tiles, this is definitely a project you’ll want to add to your DIY list!
PIN this craft for later: