Make a Dollar Tree calendar tin can vase with winter artwork, gold accents, and ribbon. An easy upcycled craft for Christmas and winter decorating!
This post contains some affiliate links for your convenience. Click here to read my full disclosure policy.
Dollar Tree Calendar Tin Can Vase for Cozy Winter Decor
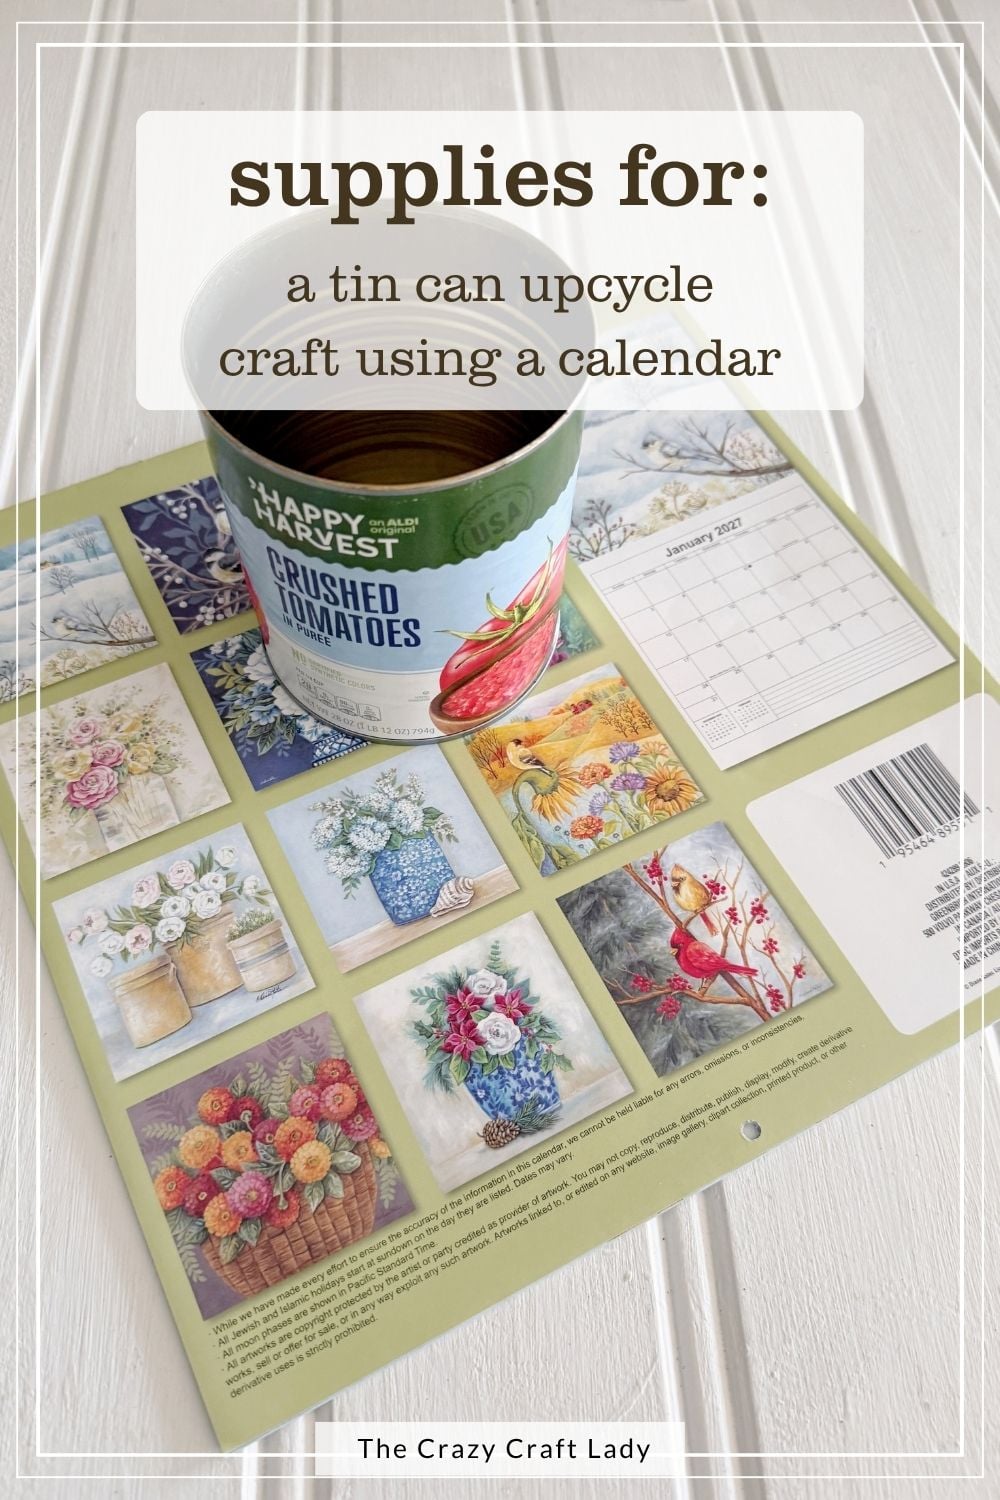
A pretty calendar page and an empty tomato can? Yep, we’re turning those into winter decor! This Dollar Tree calendar tin can vase features a snowy scene, a little antique gold around the edges, and a few evergreen sprigs to finish it off.
I started with the January page from a Dollar Tree Painted Moments calendar. The winter artwork was too cute to leave tucked inside a calendar, and a big can from a batch of homemade soup was just waiting for a makeover.
Of course, the paper didn’t quite wrap all the way around the can. But a little ribbon took care of that. Crafting problem solved!
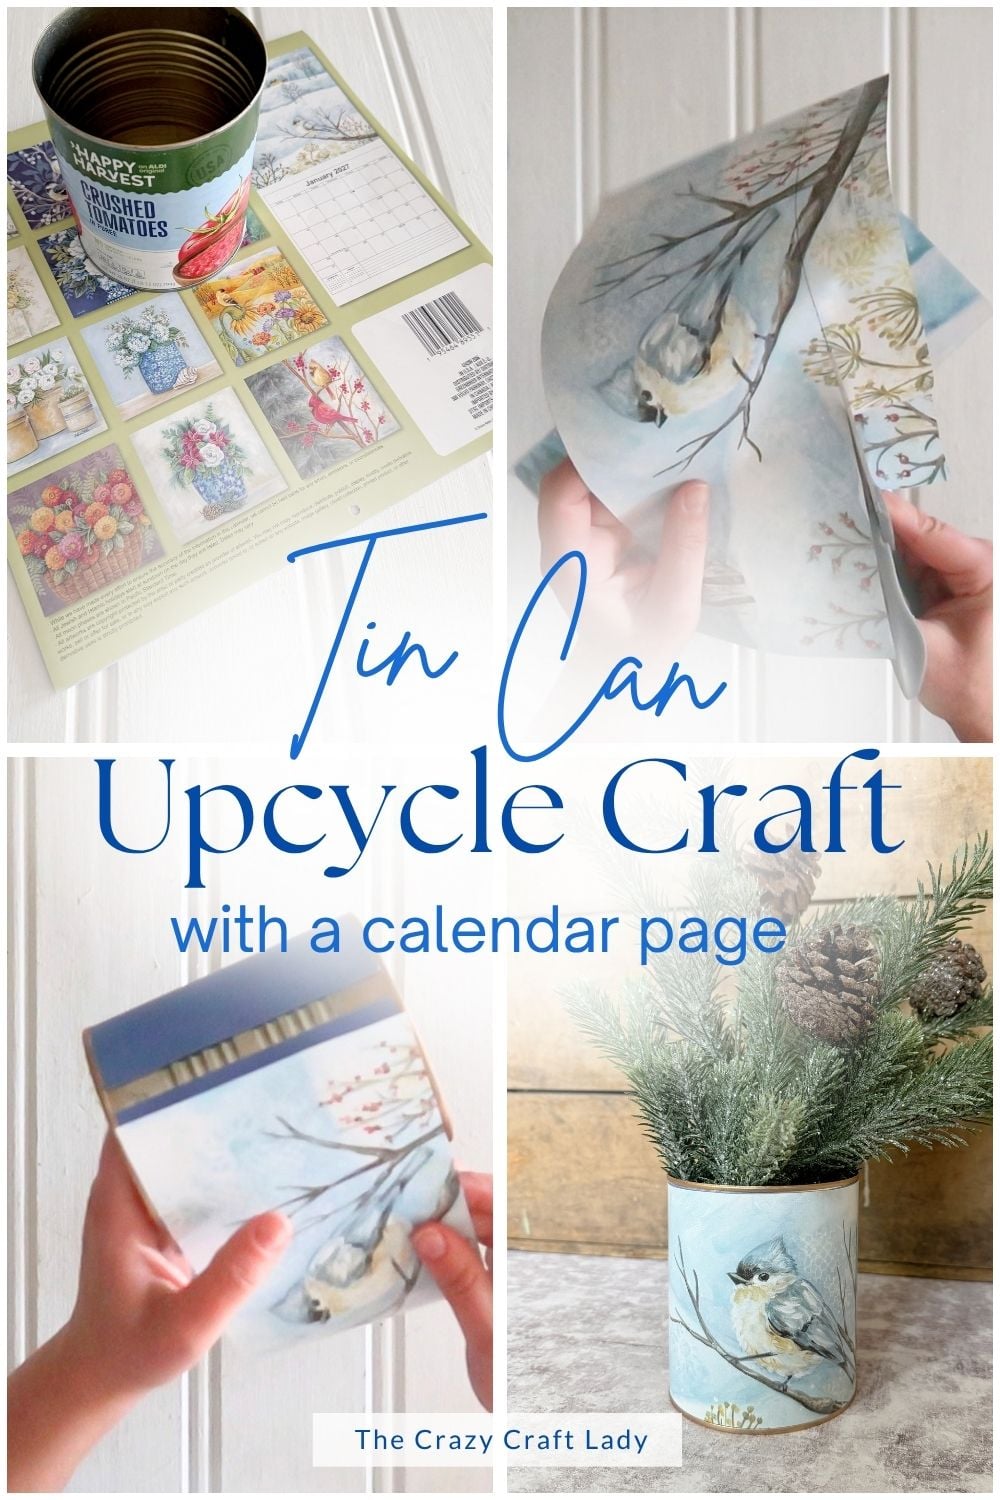
Supplies and Equipment
Supplies
- Clean, empty 28-ounce tin can with its paper label saved
- Dollar Tree calendar page—I used a winter scene from the Painted Moments calendar
- 12-by-12-inch cardstock—I used blue
- Antique Gold Rub ’n Buff
- Double-sided tape
- Coordinating ribbon wide enough to cover the gap at the back—I used natural jute ribbon
- Faux evergreen sprigs or other decorative stems
Equipment
- Scissors
- Pen
- Ruler or straightedge
- Small piece of a clean dish sponge
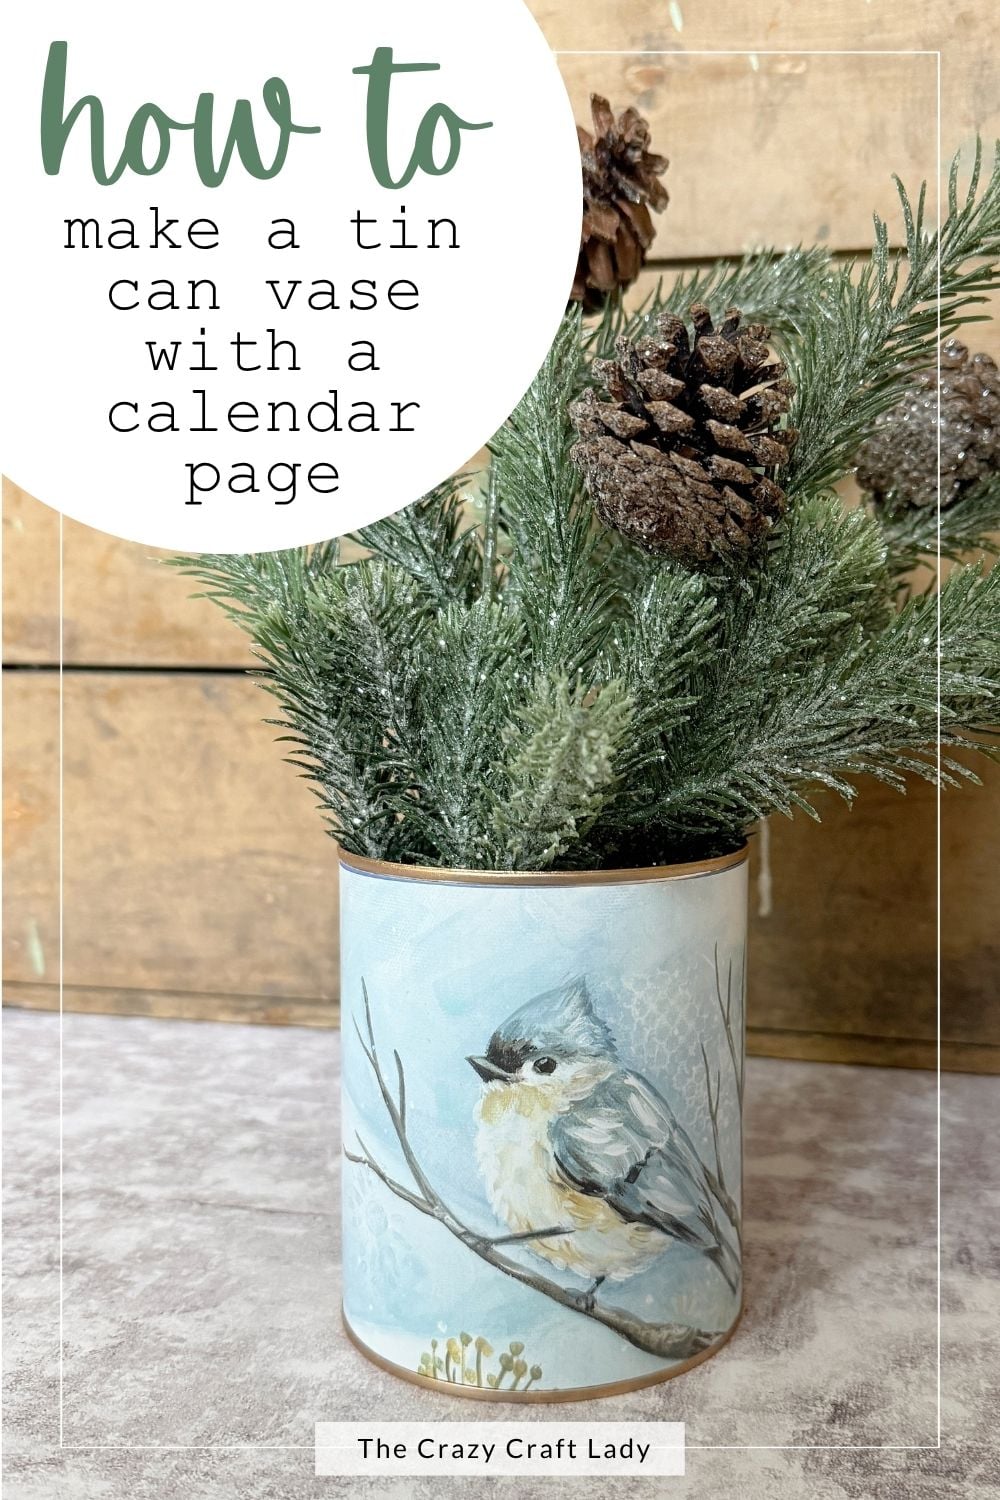
How to Make a Dollar Tree Calendar Tin Can Vase
Step 1: Watch the Video Tutorial
Watch the video tutorial located above, right here in this blog post, to see how I wrap the can, position the winter artwork, and cover the gap at the back. Then follow the steps below to make your own.
Step 2: Prepare the Can and Save the Label
Start with a clean, dry tin can. Mine was a 28-ounce crushed tomato can—because homemade soup is always a good idea!
Carefully cut or peel the paper label along its seam and remove it in one piece. You’ll use this label as a template for cutting the cardstock and calendar page. Make sure the can’s opening is smooth and free of sharp edges before handling or decorating it.
Step 3: Cut the Cardstock and Calendar Page
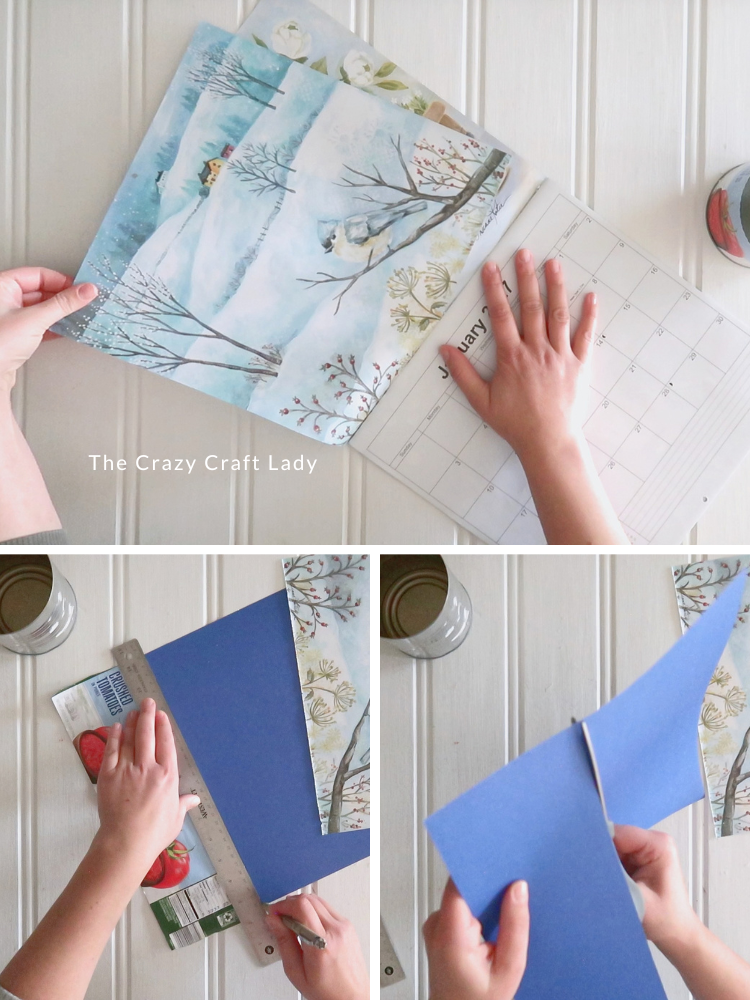
Lay the original label on your cardstock and use it as a guide to trace the height and wrap length. A ruler helps keep the edges straight. Cut just inside your pen lines and check the fit around the can.
Next, use the label to mark the same height on your calendar page. Before cutting, check which part of the artwork will show. I had to adjust mine so the little bird wouldn’t lose its head. Definitely worth a second look!
Trim away the torn edge and cut your chosen section, keeping the details you love inside the finished strip. Both paper pieces should fit between the can’s top and bottom rims.
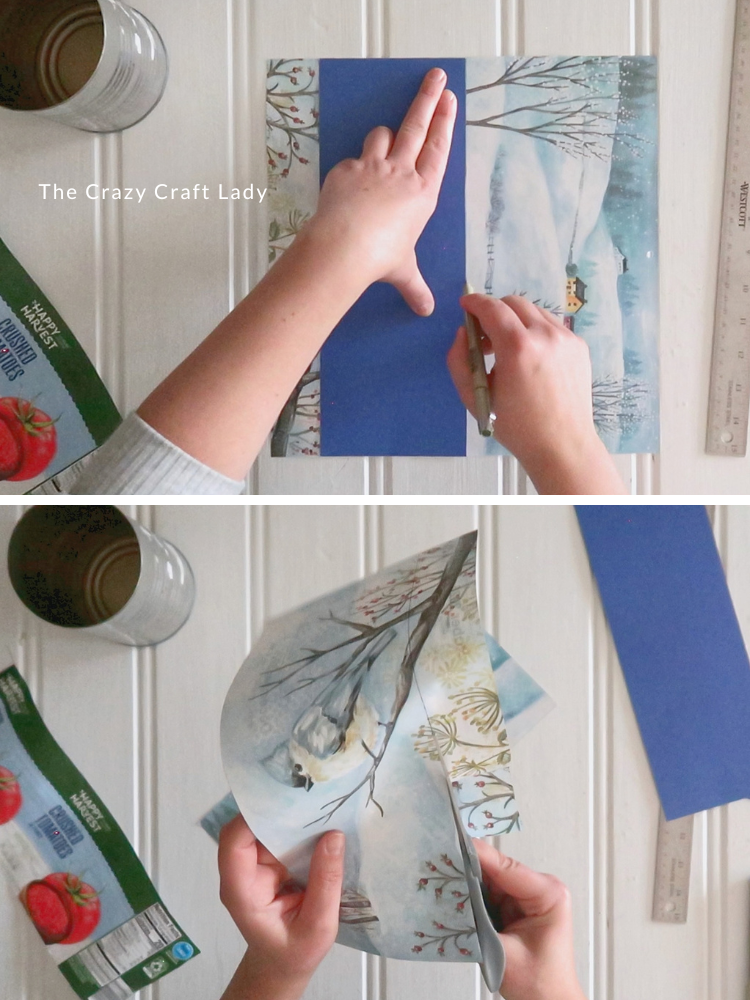
If your calendar page or cardstock is a little too short to wrap all the way around, that’s okay. Position any gaps at the back, where you’ll cover them with ribbon.
Step 4: Add Antique Gold to the Rims
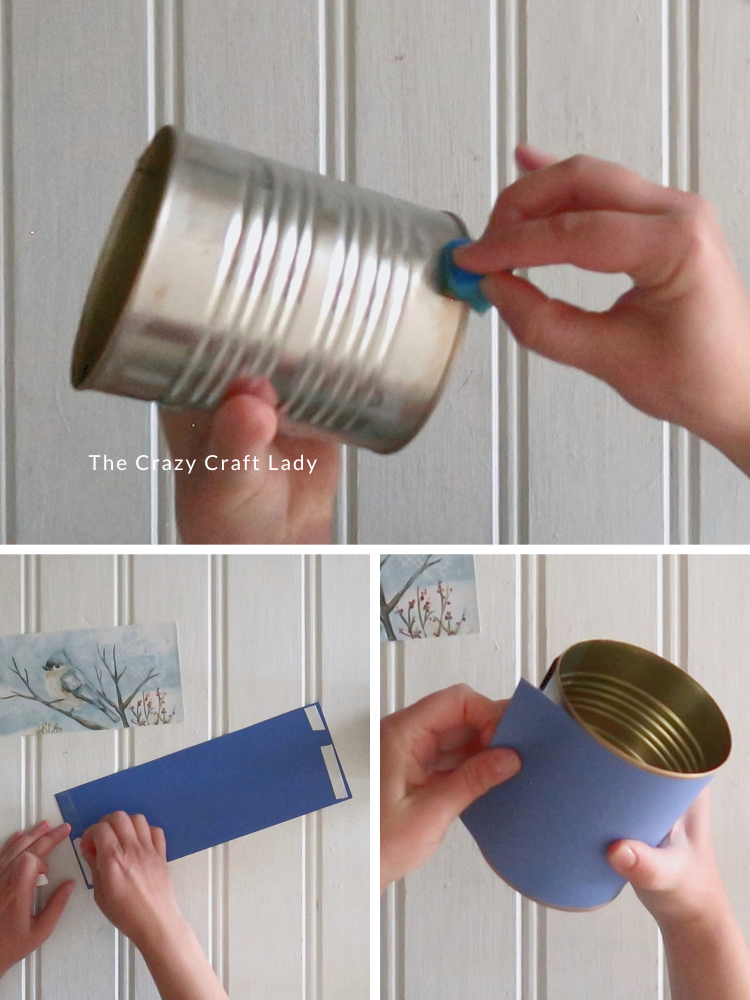
The top and bottom rims will still show after the paper goes on, so give them a little attention. Cut a small piece from a clean dish sponge and use it to apply a little Antique Gold Rub ’n Buff to the exposed outer rims. I liked how the warmer gold finish worked with the winter artwork and made the can feel a little more dressed up.
Allow the finish to dry according to the product directions before wrapping the can.
Step 5: Wrap the Can with Both Paper Layers
Apply double-sided tape along both short ends of the cardstock strip. Remove the paper liners, if your tape has them, and wrap the cardstock snugly around the can. Press the ends securely into place, keeping the seam or gap at the back.
Repeat with the calendar page: add tape to both short ends, peel away the liners, and smooth the artwork around the cardstock-covered can. Position your favorite part of the scene at the front.
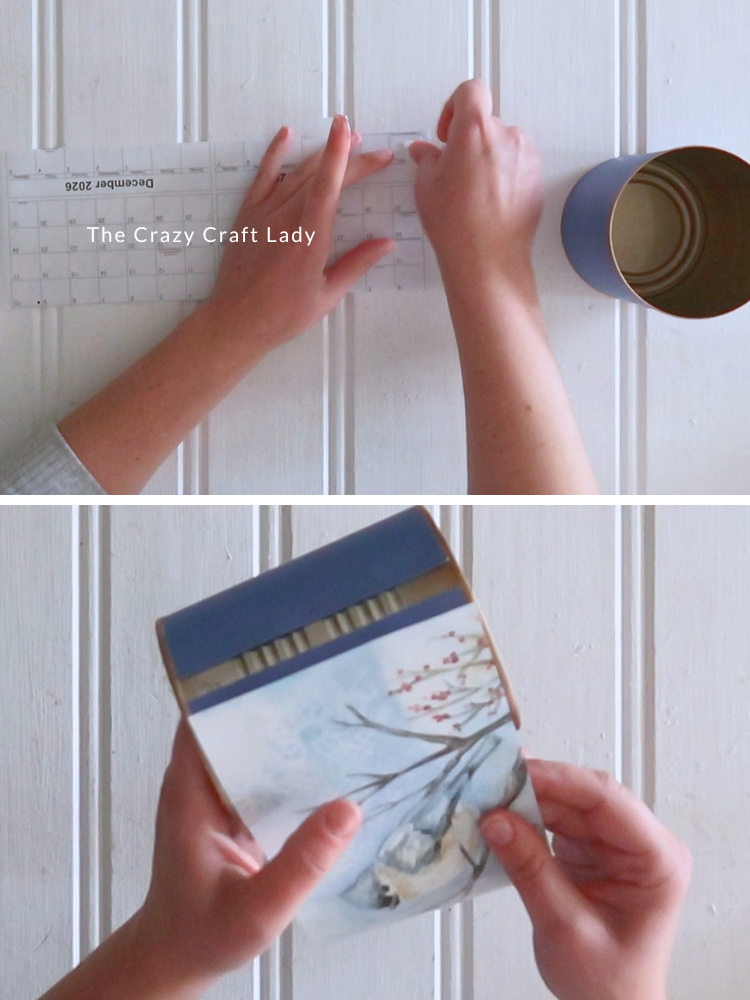
I used double-sided tape to attach both layers, so there’s no wet glue to brush over that thin calendar paper.
Step 6: Cover the Back Gap with Ribbon
If the calendar page doesn’t meet at the back, cut a strip of coordinating ribbon to match the height of the paper-covered section.
Choose ribbon wide enough to cover the entire gap with a little overlap on each side. I used natural jute ribbon, which looked pretty with the snowy scene.
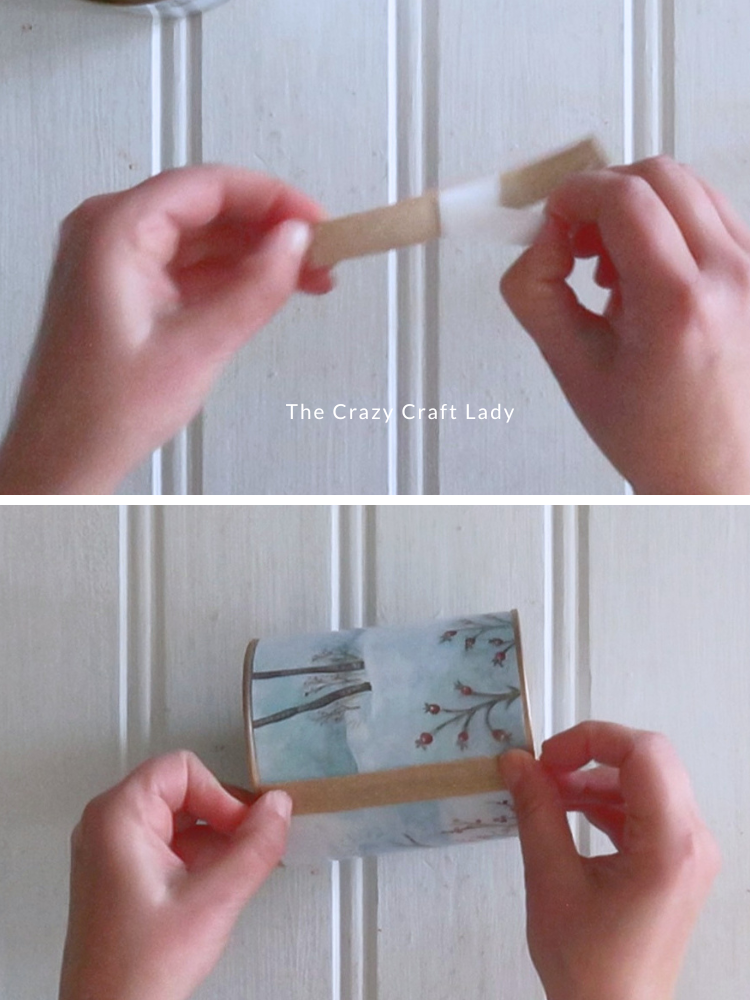
Apply double-sided tape to the back of the ribbon, remove the liner, and press it vertically over the gap. Just like that, the exposed can is covered, and the back looks finished, too.
Step 7: Add Your Greenery
Pop in a few faux evergreen sprigs, and your winter tin can vase is ready to display!
Keep the arrangement simple so the calendar artwork can shine. This little vase would look sweet on a shelf, an entry table, or tucked into a cozy winter vignette.

Make It Work with Other Calendar Pages
This idea doesn’t have to stop at winter! Choose a floral page for spring, autumn artwork for fall, or a Christmas scene for holiday decorating.
Match the cardstock and ribbon to your artwork, then swap out the stems. It’s an easy way to use more of those pretty calendar pages and give another empty can a second life.

Dollar Tree Calendar Tin Can Vase
Upcycle an empty tin can into a cozy winter vase with a Dollar Tree calendar page, a cardstock backing, antique gold rims, and a ribbon-covered seam.
Materials
- 1 clean, empty 28-ounce tin can with original paper label
- 1 Dollar Tree calendar page
- 1 sheet of 12-by-12-inch cardstock
- Antique Gold Rub ’n Buff
- Double-sided tape
- Coordinating ribbon wide enough to cover the back gap
- Faux evergreen sprigs
Tools
- Scissors
- Pen
- Ruler
- Small piece of a clean dish sponge
Instructions
1. Watch the video tutorial located above, right here in this blog post, before getting started.
2. Clean and dry the can, checking for sharp edges. Carefully remove the label in one piece to use as a cutting template.
3. Use the label to trace and cut the cardstock and calendar page to fit between the can's rims. Position the calendar template to preserve your favorite image details.
4. Apply Antique Gold Rub ’n Buff to the exposed outer top and bottom rims with a small sponge. Let dry according to the product directions.
5. Add double-sided tape to both short ends of the cardstock and wrap it around the can. Repeat with the calendar page, positioning the seams or gaps at the back.
6. Cut coordinating ribbon to match the paper's height. Attach it vertically over the back gap with double-sided tape, overlapping both paper edges.
7. Add faux evergreen sprigs and display your finished winter vase.
Notes
* The cardstock provides a backing beneath the thin calendar paper to help disguise the can's ridges.
* Check the artwork placement before cutting so important details stay inside the finished strip.
* If the paper doesn't wrap completely around the can, use ribbon wide enough to cover the entire gap.