
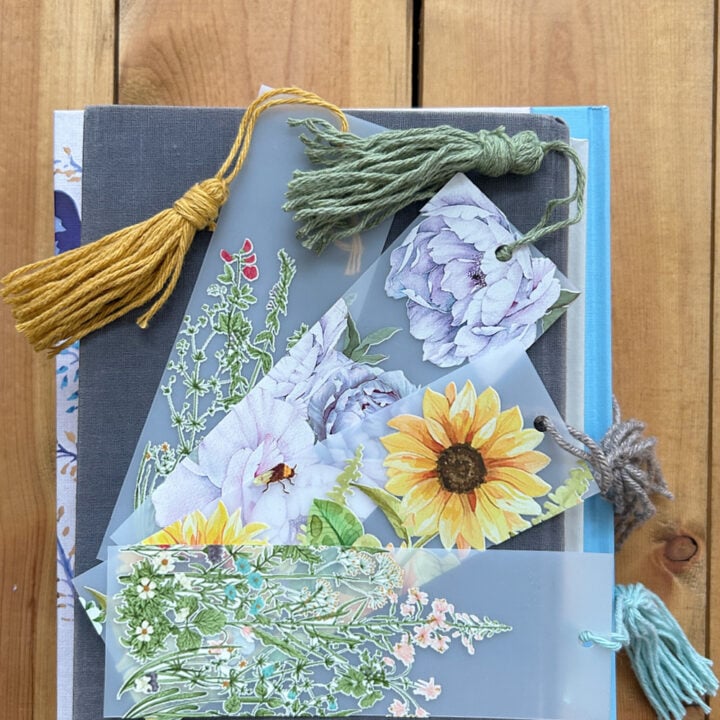
Make beautiful DIY floral bookmarks using Dollar Tree cutting mats and rub-on decals! This easy budget craft includes step-by-step instructions and tassel tutorial.

How to make a DIY bookmarks using dollar store chopping mats and decals.
This post contains some affiliate links for your convenience. Click here to read my full disclosure policy.
If you’ve been around here for a minute, you know I love using up random craft supplies that have been hanging out in my stash for way too long. And that’s exactly how these DIY floral bookmarks came to be.
I had a few leftover floral rub-on decals sitting in my craft room for literal years. Instead of letting them collect dust, I paired them with an unexpected base — Dollar Tree cutting mats — and turned them into the prettiest little custom bookmarks.
And honestly? No one would ever guess they started as a $1.25 kitchen supply. Actually, it’s half of that, because these cutting mats come in a pack of 2!
Why Use Dollar Tree Cutting Mats for Bookmarks?
The flexible plastic cutting mats from Dollar Tree are:
- Thin but durable
- Easy to cut with a paper trimmer
- Sturdy enough to hold their shape
- Super affordable – one cutting mat can make 10 bookmarks, if spaced right
Video Tutorial: Dollar Store Cutting Mat Bookmarks
Watch this quick video to see how this craft came together:

Dollar Store Cutting Mat Bookmarks
Learn how to create custom bookmarks from Dollar Tree cutting mats and floral rub-on transfers. A simple, affordable DIY gift idea with tassels!
Materials
- Dollar Tree flexible cutting mat
- Floral rub-on decal sheets
- Yarn (Dollar Tree works great!)
- Permanent marker
Tools
- Paper trimmer
- Small cutting mat (for trimming decals)
- Smoothing tool (or credit card)
- Scissors
- Hole punch
Instructions
- Watch the video. Follow along with the video tutorial for a step-by-step walkthrough of how to make your own DIY bookmarks.
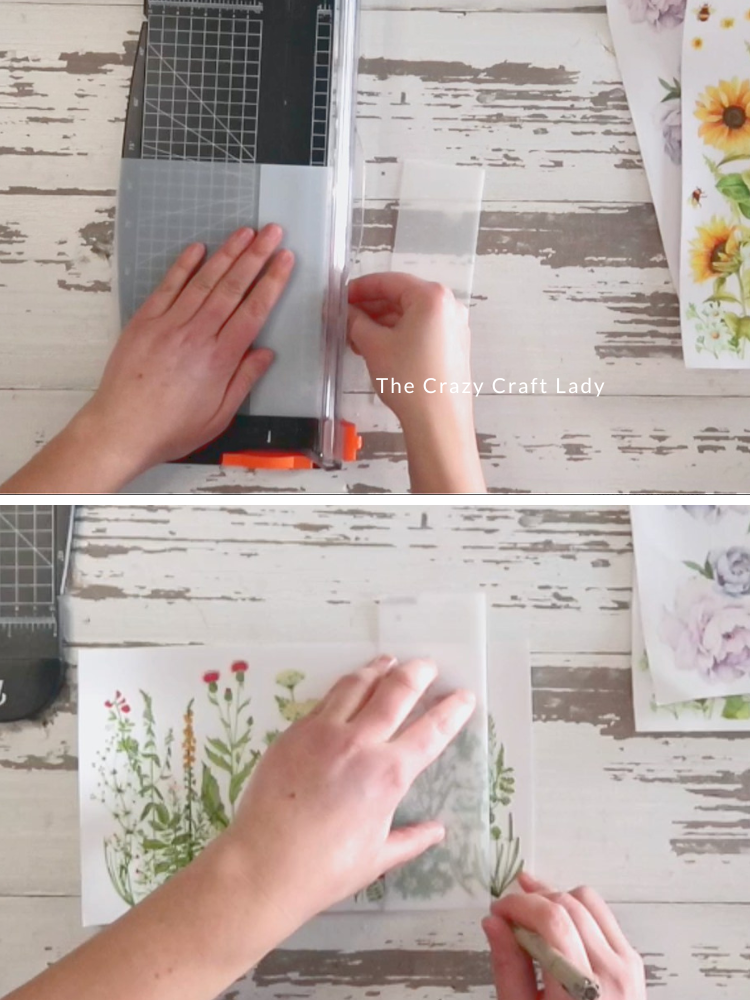
- Cut Your Bookmark Base. Using a paper trimmer, cut the Dollar Tree cutting mat into bookmark-sized strips. I eyeballed mine at approximately 8 inches tall and 2.5 inches wide. I made four total.
- Plan Your Floral Design. Lay your bookmark base over the rub-on decal sheet to choose your design. There are a few ways to do this: a full standalone image, a cropped “snapshot” look, or a split floral design with images “poking in” from the top and bottom. Trace the bookmark piece onto the rub-on decal piece.

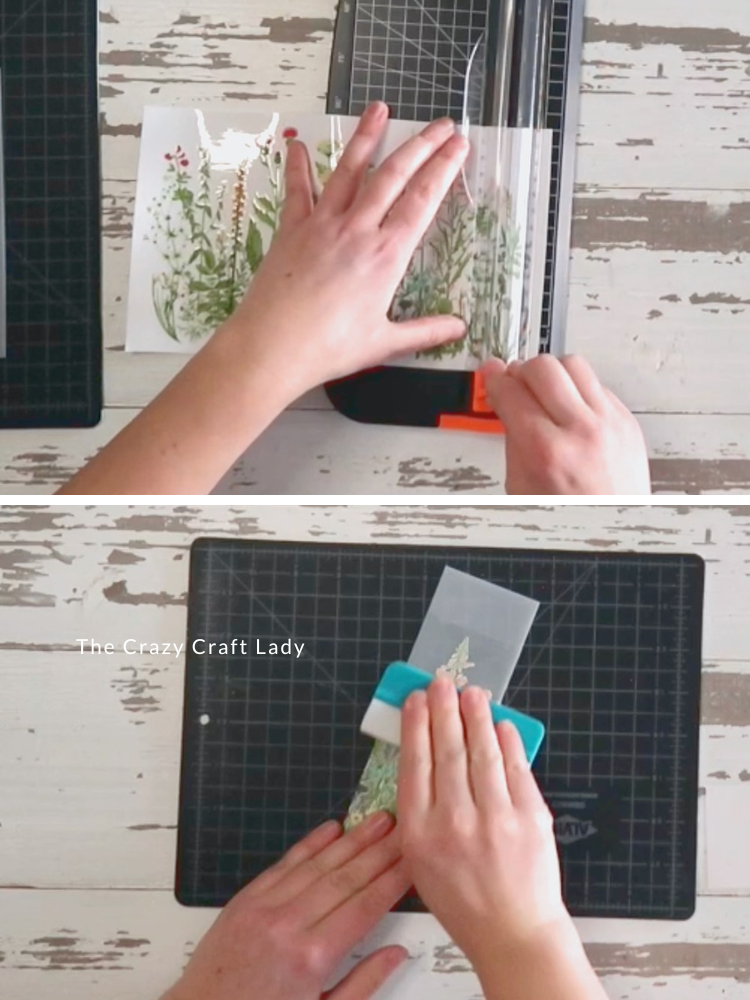
- Trim the Rub-On Decal. Using a paper trimmer, cut along your traced lines. You’ll be cutting through the top protective sheet AND the decal layer underneath.
- Apply the Rub-On Transfer. Peel away the protective backing. Place the decal onto the cutting mat bookmark. Use a smoothing tool or credit card to firmly rub over the surface. Slowly peel back the top plastic sheet. If needed, press down and rub again in any areas that didn’t stick fully.
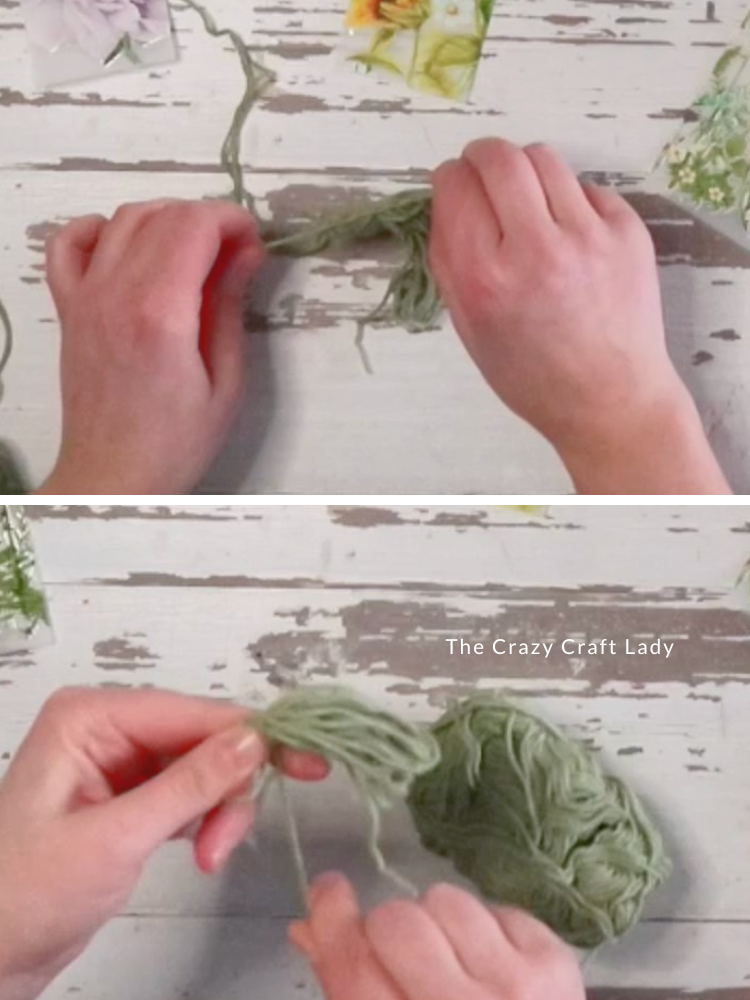
- Make the Yarn Tassels. Wrap yarn around your fingers about 15 times. Cut the tail. Take a separate piece of yarn and thread it through the loop. Tie a double knot at the top to secure.
Cut another piece of yarn. Wrap it around the top of the loop about 15 times to form the tassel neck. Tie off and trim excess. Cut through the looped ends at the bottom. Trim uneven strands. - Punch the Hole. Punch a hole at the top of your bookmark. Because the cutting mat is thicker than cardstock, rotate the hole punch while pressing to make it easier.
- Attach the Tassel. Thread that the long yarn piece through the hole in the bookmark and tie a simple knot.
The Finished Craft

Don’t forget to PIN this craft for later:
