
Make your own faux stained glass art using a Dollar Tree cutting mat! This step-by-step tutorial shows you how to trace, paint, and create a translucent sun catcher on a budget.

How to make a DIY Faux Stained Glass Window Sun Catcher
This post contains some affiliate links for your convenience. Click here to read my full disclosure policy.
If you’ve ever admired stained glass but weren’t quite ready to break out the soldering iron (same!), this project is for you. Today I’m recreating a faux stained glass window sun catcher using one of my favorite unexpected supplies, a Dollar Tree cutting mat. This flexible plastic mat becomes the perfect “glass” surface when paired with an oil-based paint marker and watered-down acrylic paint.
Video Tutorial: DIY Faux Stained Glass Window Sun Catcher
Watch this quick video to see how this craft came together:

DIY Faux Stained Glass Window Sun Catcher
Learn how to make a DIY faux stained glass sun catcher using a Dollar Tree cutting mat, acrylic paint, and an oil-based paint marker. An easy, budget-friendly craft for kids and adults!
Materials
- Dollar Tree flexible cutting mat
- Printed stained glass design template (from Canva or Google Image search)
- Thick black oil-based paint marker (Sharpie brand works great)
- Acrylic craft paint (assorted colors)
- Water (to slightly dilute paint)
- Rubbing alcohol (for cleanup if needed)
- Paper towels
Tools
- Scissors or paper trimmer
- Clear tape
- Fine-point paint brush
- Small paint palette or plate
- Printer
Instructions
- Watch the video. Follow along with the video tutorial for a step-by-step walkthrough of how to make your own DIY stained glass sun catcher.
- Choose Your Design. Download the free printable OR choose your own image. Start by searching for a simple stained glass outline design. I used Canva and searched “stained glass window,” but you can also do a Google Image search. Look for solid black outlines, simple sections, and clean, defined shapes
- Print Your Design. Print your design at the size you want your finished sun catcher to be.
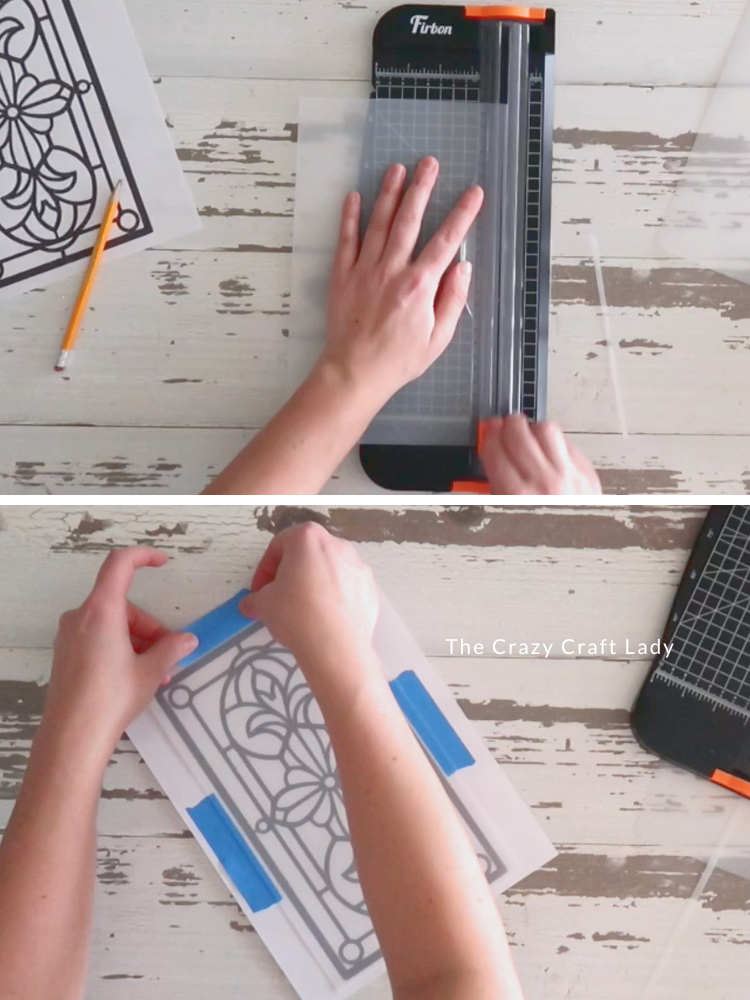
Trim the Cutting Mat to Size. Trim your Dollar Tree cutting mat to match the size of your printed template. Center the cutting mat directly over your printed design and secure it with tape so it doesn’t shift around while tracing.
- Trace with Paint Marker. Using a thick black oil-based paint marker, carefully trace over all the lines of your template. A few important tips: Work from top left to bottom right (especially if you’re right-handed). Try to go over each line only once. If you accidentally smudge, clean it up with a little rubbing alcohol. Let the traced design dry completely.
- Plan Your Colors. Before painting, take a minute to roughly plan your color placement. This helps avoid accidentally putting two similar colors side by side or making everything the same tone.
Flip It Over (Important!). Flip the cutting mat upside down. You do not want to paint on the side with the black marker lines. This is what creates the faux stained glass effect. When viewed from the front, the black lines stay crisp and clean. - Mix and Apply Paint. Using plain acrylic craft paint, slightly dilute it with water. You want it a bit more translucent, not fully opaque. Use a fine-point paint brush and carefully paint inside each section.
- Let It Dry and Display. Allow the paint to fully dry before hanging. I simply attached my sun catcher to a window with double-sided tape.

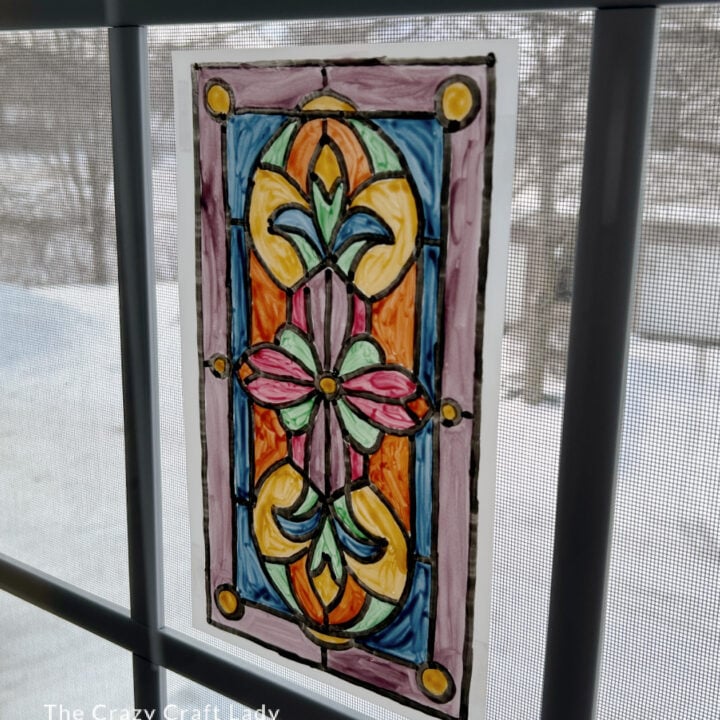
The Finished Craft

Don’t forget to PIN for later!
