
Learn how to make a beautiful decorative tray using a Dollar Tree burner cover and air-dry clay! This easy budget DIY is perfect for spring decor and styling.

How to make a DIY burner cover pedestal tray with Dollar Tree supplies.
This post contains some affiliate links for your convenience. Click here to read my full disclosure policy.
If you love budget-friendly crafts that look high-end, this Dollar Tree burner cover DIY is going to be right up your alley. With just a few inexpensive supplies, you can turn a plain metal burner cover into a decorative tray that looks like something you’d find in a boutique home decor shop.

Video Tutorial: DIY Burner Cover Pedestal Tray
Watch this quick video to see how this craft came together:

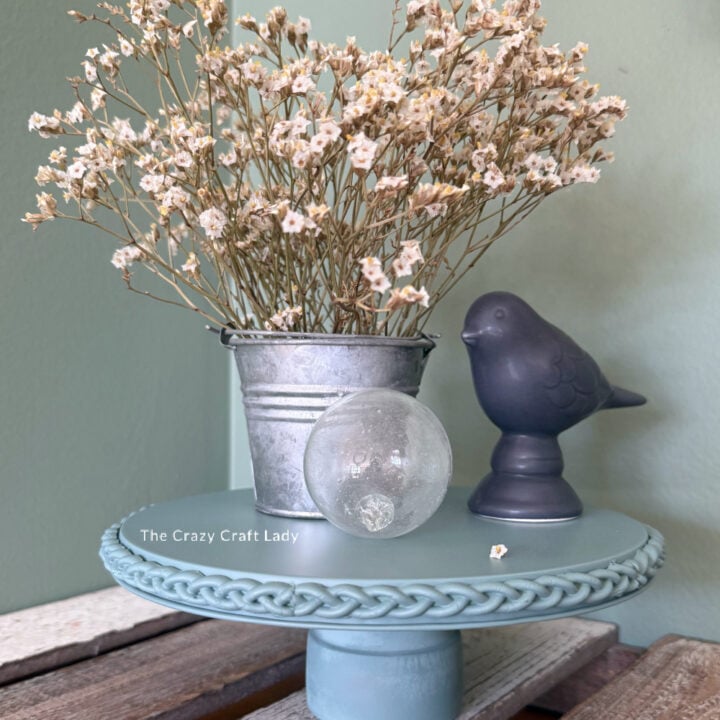
Burner Cover Pedestal Tray
Make a stylish DIY tray using a Dollar Tree burner cover, clay mold trim, and spray paint.
Materials
- Dollar Tree metal burner cover
- Air-dry clay (Dollar Tree) - like the Crayola model magic that is still flexible when dry
- Silicone mold with braided or rope pattern
- Small terracotta clay pot (Dollar Tree)
- Spray paint in any color you like
- E6000 glue
Tools
- Hot glue gun
- Scissors
Instructions
- Watch the video. Follow along with the video tutorial for a step-by-step walkthrough of how to make your own DIY pedestal tray.
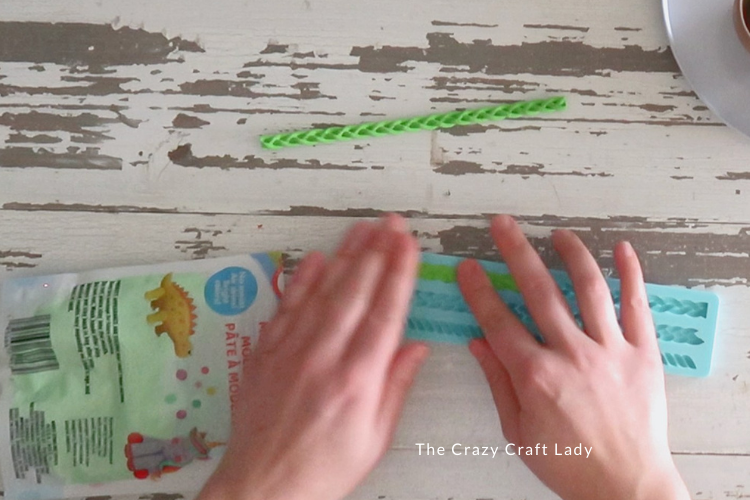
- Create the Clay Trim. Start by pressing air-dry clay into a silicone mold with a braided or rope-style pattern. Let the clay dry completely before removing it from the mold.Press the clay firmly so it fills all the details of the mold.Repeat this process until you have enough pieces to wrap around the entire rim of the burner cover.

- Attach the Decorative Edge. Begin attaching them around the outer edge of the burner cover. Use a combination of E6000 and hot glue. Continue attaching the molded clay pieces around the entire edge of the burner cover, and trim the last piece slightly if needed.

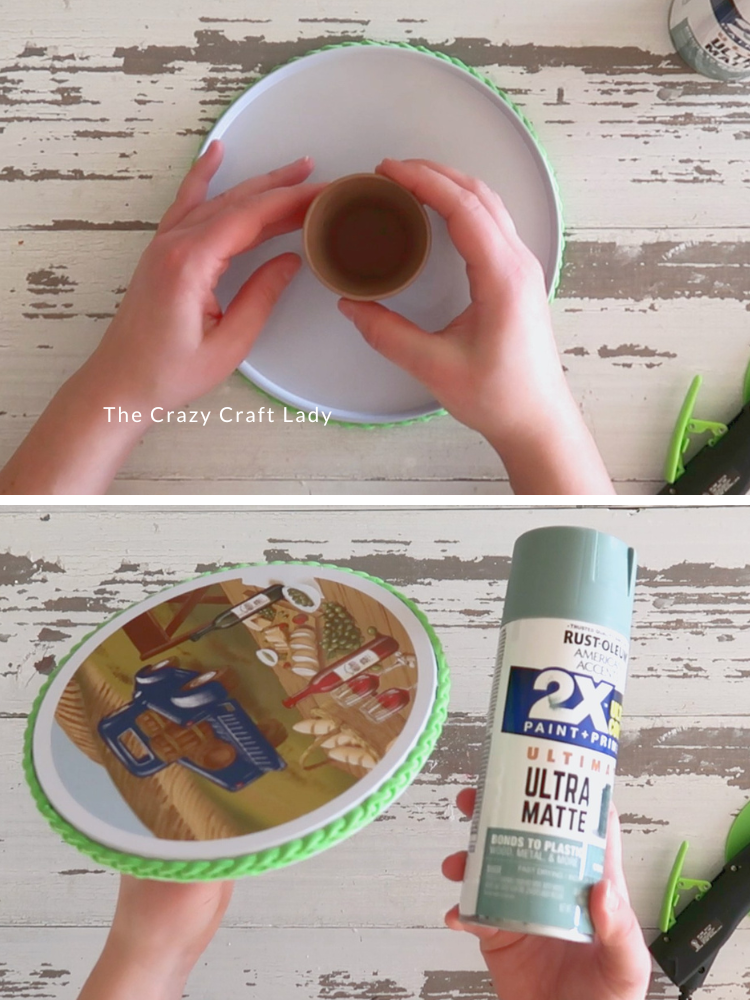
- Add the Tray Base. Use E600 to attach a small terracotta clay pot to the center of the bottom of the burner cover. Let the glue set.
- Paint the Tray. Apply a few coats of your favorite color spray paint to the entire project.

How to Style Your Decorative Tray:
This DIY tray works beautifully in so many places around the house:
- Tiered tray displays
- Coffee table decor
- Entryway catch-all tray
- Kitchen counter decor
- Seasonal centerpiece
You could also switch up the trim style by using different silicone molds or even wood half balls for completely different looks.
The finished craft

PIN this craft for later:

As always, you’ve inspired me again with another wonderful DIY project! I have to admit, I’ve never thought of using clay in a silicone mold, nor have I seen this type of mold for making trim. Do you mind saying where you bought the mold? I can’t wait to try this out. My mind is whirling with all the ways I could use the trims.