
Turn a Dollar Tree burner cover into a charming faux enamel tray! This easy DIY uses spray paint and chalk paint to create a farmhouse-style stand perfect for plants or decor.

How to make a DIY faux enamelware tray using a Dollar Tree burner cover and paint.
This post contains some affiliate links for your convenience. Click here to read my full disclosure policy.
Sometimes the simplest supplies turn into the cutest home decor pieces. This DIY faux enamel tray started with one of the larger Dollar Tree burner covers. With just a little paint and a few wooden embellishments, it becomes a charming farmhouse-style stand.
I love projects like this because they’re budget-friendly, beginner-friendly, and super versatile. You can use this little tray as a plant stand, a decorative riser for seasonal decor, or even as part of a tiered tray display.
The trick to getting that classic enamelware look is a simple painting technique using black chalk paint around the edges to mimic worn enamel. It’s quick, imperfect, and honestly pretty fun to do.
Let me show you how to make one!

Video Tutorial: DIY Faux Enamelware Tray
Watch this quick video to see how this craft came together:

DIY Faux Enamelware Tray
Learn how to make a faux enamel tray using a Dollar Tree burner cover and simple craft supplies. This budget-friendly DIY tray is perfect for farmhouse decor!
Materials
- Dollar Tree burner cover (large $2 size)
- 4 unfinished wooden beads, candle cups, small wooden pots, or other embellishments (for feet). Anything about 1–1½ inches tall works great.
- White spray paint
- Black chalk paint (I used Waverly Black Chalk Paint)
- E6000 adhesive
Tools
- Fine tip paintbrush
Instructions
- Watch the video. Follow along with the video tutorial for a step-by-step walkthrough of how to make your own decorative tray.
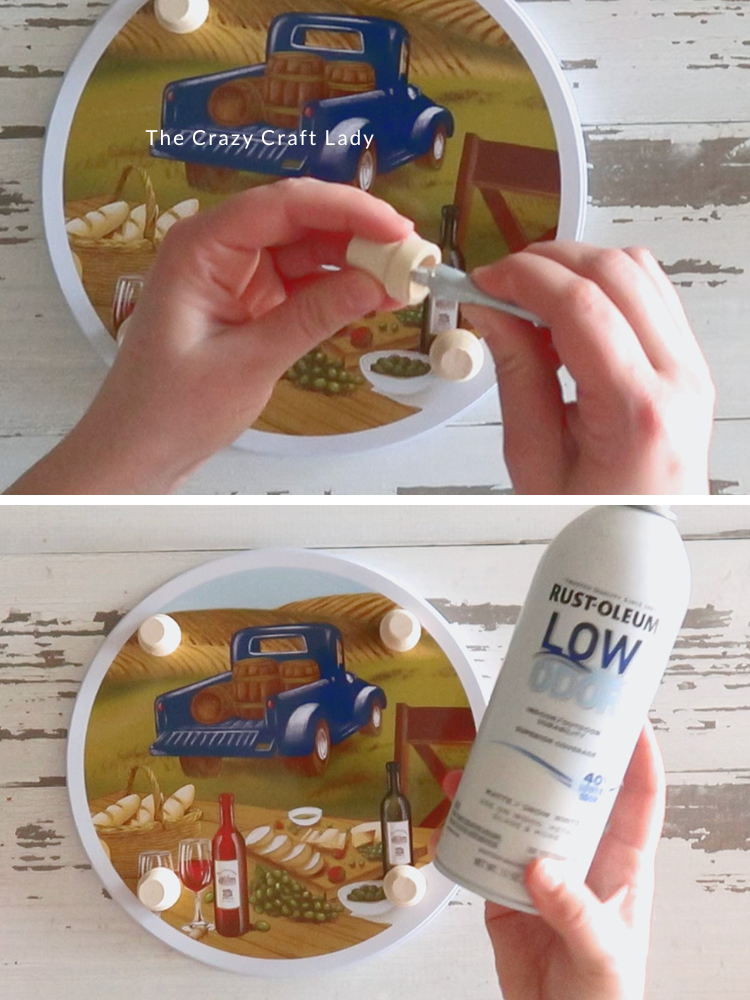
- Attach the Feet. Start by flipping your burner cover upside down. The back side will become the bottom of your tray. Evenly space four wooden embellishments around the burner cover. These will act as the feet and lift your tray up slightly. Use E6000 to glue each piece into place and allow the glue to dry completely.

- Spray Paint the Tray. Take the tray outside and spray paint the entire piece white. Be sure to cover all the surfaces, top and bottom. Let the paint dry.
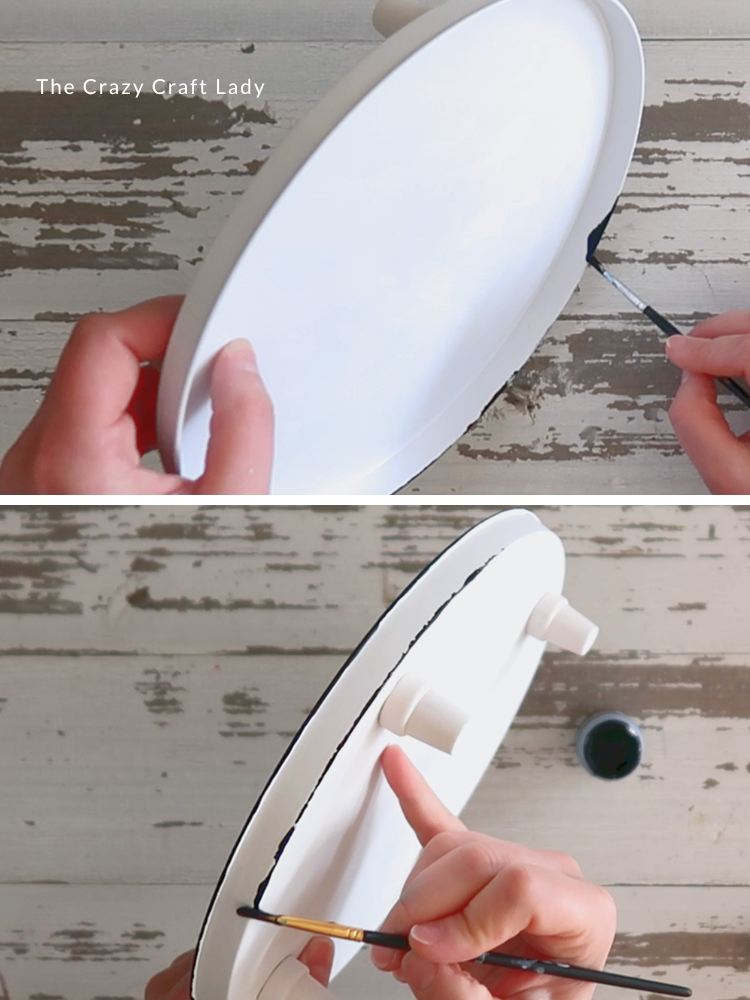
- Add the Faux Enamel Detail. Using a fine paintbrush and black chalk paint, lightly drag the paint along the edge of the burner cover. The goal is to mimic the worn rim of vintage enamelware, so don’t worry about making it perfect. Let the paint dry completely. And that’s it — your faux enamel tray is finished!
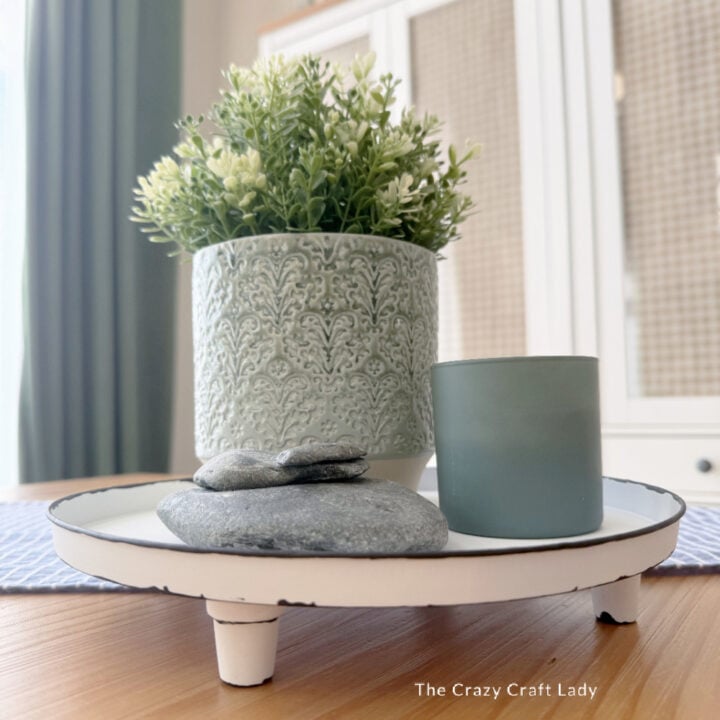
Ways to Use Your Faux Enamel Tray
This little stand is incredibly versatile. Try using it as:
- A plant stand for a small potted plant
- A decorative riser for seasonal decor
- A base for candles or small figurines
- A display stand for tiered tray decor
Because the colors are neutral, it works with farmhouse and cottagecore decor styles.
The Finished Craft

I love when a simple Dollar Tree item turns into something that looks like it came from a boutique home store. This faux enamel tray is a quick, inexpensive DIY that adds a charming handmade touch to your decor.
Plus, once you know the faux enamel technique, you can use it on all kinds of other projects — trays, signs, planters, and more.
PIN this craft for later:

I LOVE this burner cover decorative tray! I want to paint one to use on my bed. I want something pretty that will hold my book(s), my pen, my journal, and my phone and earbuds. All the store bought trays I’ve look at are too large and too heavy, not to mention too pricey:) Thanks for the inspiration:)