
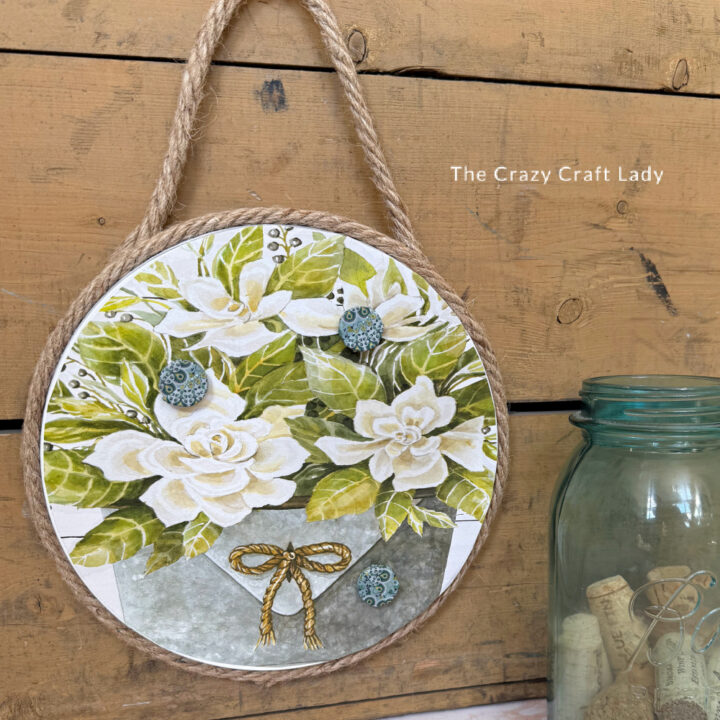
Turn a Dollar Tree burner cover and calendar page into a charming farmhouse magnetic board!

How to make a hanging magnetic board from a Dollar Tree burner cover.
This post contains some affiliate links for your convenience. Click here to read my full disclosure policy.
I absolutely love finding new ways to craft with Dollar Tree burner covers. They’re inexpensive, lightweight, and the perfect base for all kinds of DIY decor. For this project, we’re turning one into a cute little farmhouse magnetic board using a page from a Dollar Tree calendar.
Calendar pages are fantastic for decoupage because they usually have beautiful seasonal artwork. The only tricky part is avoiding bubbles—but don’t worry, I’ll show you my favorite trick for getting a perfectly smooth finish every time.
With a little spray paint, Mod Podge, and some Dollar Tree jute rope, you can create a decorative mini magnetic board that’s perfect for hanging in a craft room, office, or kitchen.

Video Tutorial: Burner Cover Magnetic Board
Watch this quick video to see how this craft came together:

Burner Cover Magnetic Board
Learn how to turn a Dollar Tree burner cover into a decorative magnetic board using Mod Podge, jute rope, and a calendar image.
Materials
- Dollar Tree burner cover (round metal stove burner cover)
- Calendar page or printed image
- Dollar Tree jute rope
- Mod Podge (matte or satin)
- Small magnets
- Spray paint (white or color of your choice)
- Masking tape
Tools
- Scissors
- Pencil
- Paintbrush or foam brush
- Heat press, mini heat press, or household iron (no steam)
- Hot glue gun and glue sticks
- Parchment paper
Instructions
- Watch the video. Follow along with the video tutorial for a step-by-step walkthrough of how to make your own magnetic board.
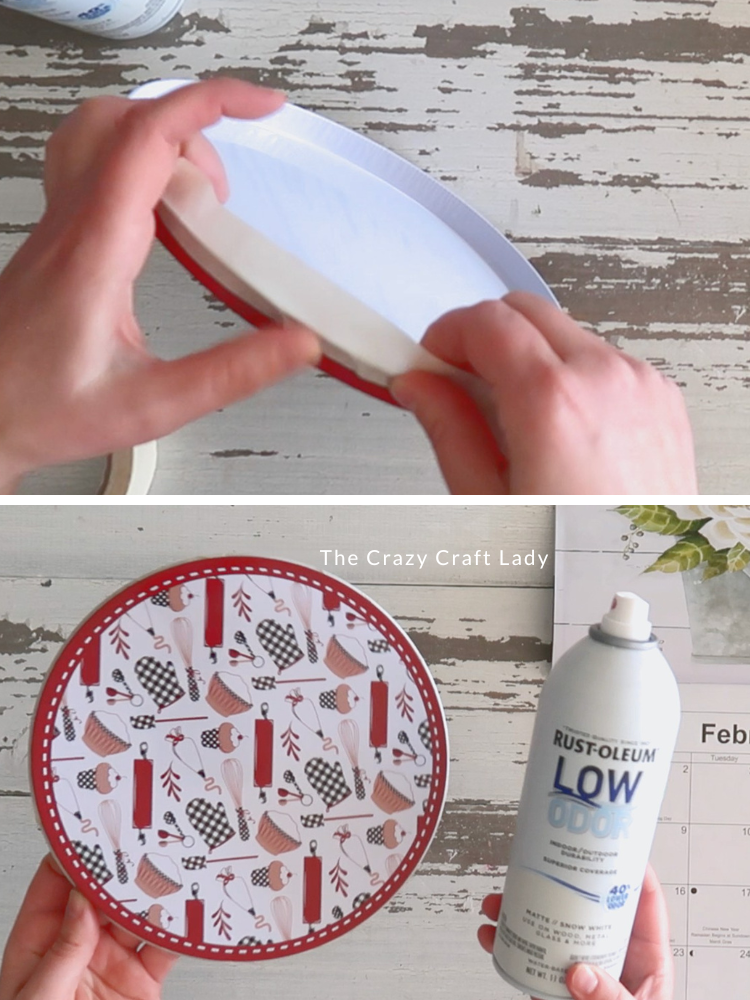
- Tape Off the Burner Cover Edge. Use masking tape to cover the raised lip around the outer edge of the burner cover. This step keeps paint off the edge so the jute rope will adhere better later.

- Spray Paint the Burner Cover. Spray paint the front of the burner cover white. The paint creates a solid base layer so the metal pattern from the burner cover doesn’t show through the calendar image when you decoupage it. Let the paint dry completely.
- Remove the Tape. Carefully peel off the masking tape from the outer lip.
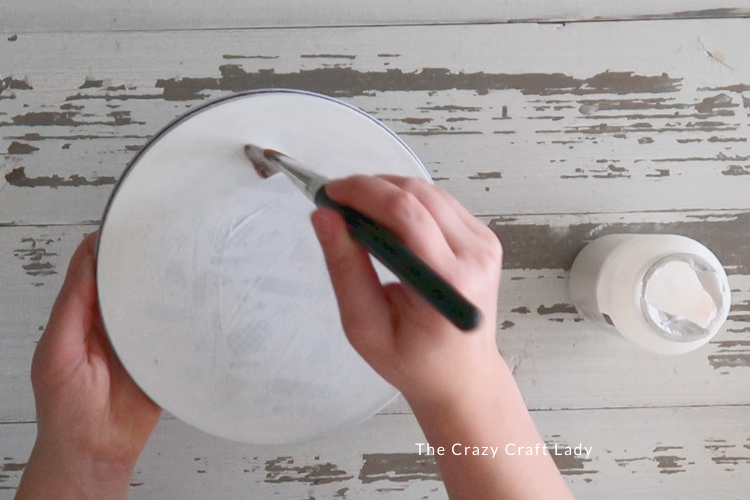
- Apply a Base Coat of Mod Podge. Brush a generous coat of Mod Podge over the painted surface of the burner cover. Allow it to dry completely before moving on.

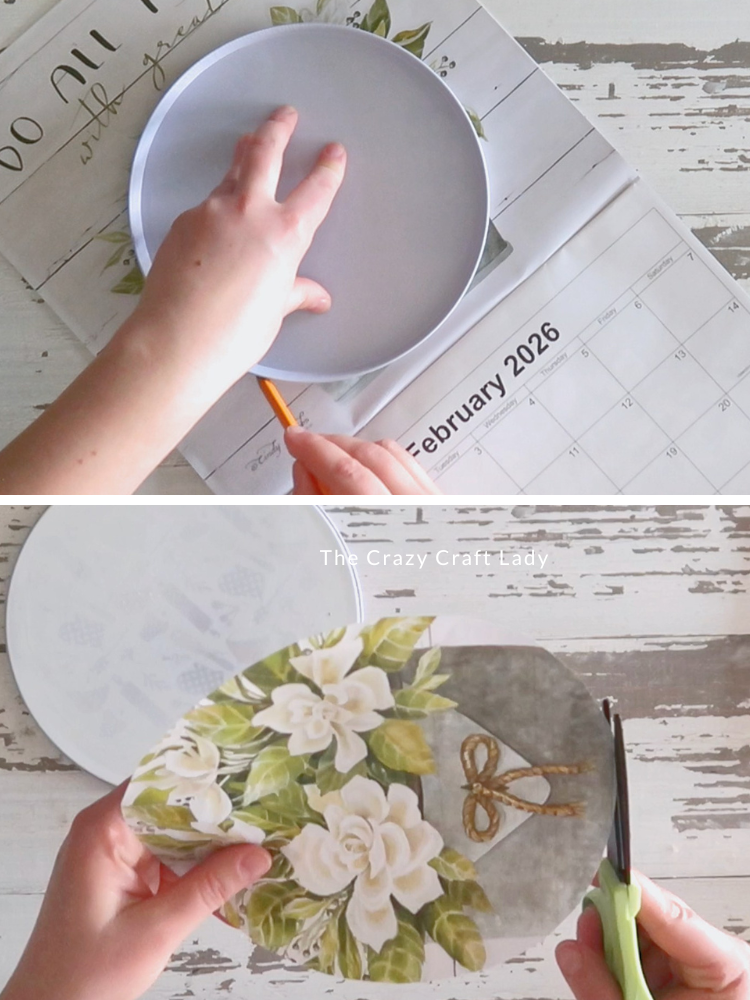
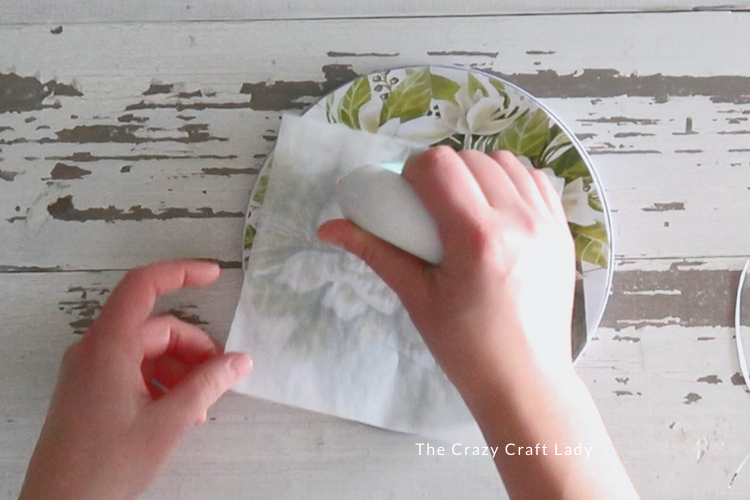
- Cut Your Calendar Image. Choose a calendar image you love. Place the burner cover on top of the image. Trace around it with a pencil. Cut the circle just inside the pencil line so it fits neatly inside the burner cover.
- Attach the Image. Place the calendar image onto the dried Mod Podge surface. Protect the calendar page with a piece parchment paper. Use a heat press to reactivates the Mod Podge and create a smooth finish. Calendar pages are notorious for bubbling, so this step really makes a difference.
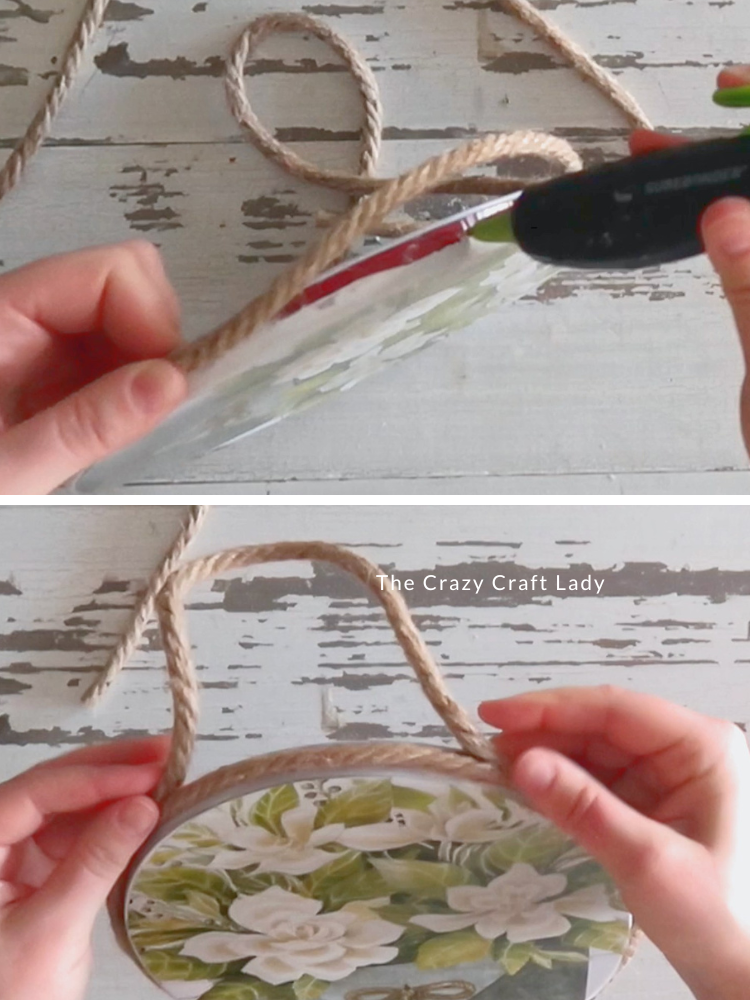
- Add the Jute Rope Border. Starting at the bottom of the burner cover, hot glue jute rope around the outer lip. Work around the edge, gluing as you go until the entire border is covered.
- Create the Rope Hanger. Cut a small length of rope and trim the ends at a 45° angle. Hot glue the ends to the back of the burner cover near the top to create a hanger. Make sure the rope is evenly spaced so your image hangs straight.
- Add Magnets. Attach a few small magnets to the surface of the burner cover. Now you have a mini magnetic board that can hold notes, reminders, or photos.
The Finished Craft
This Dollar Tree burner cover DIY is such a fun and simple project, and the possibilities are endless. By swapping out the calendar image, you can create different magnetic boards for every season or holiday.

Hang one above your desk, in your craft room, or even in the kitchen for quick notes and reminders. It’s a budget-friendly craft that looks surprisingly high-end—and those are always my favorite kinds of projects.
If you love Dollar Tree crafts as much as I do, burner covers are definitely one supply worth keeping in your craft stash!
PIN this craft for later:
