
Learn how to make egg carton flowers with string lights for a charming spring DIY. It’s easy, affordable, and beginner-friendly!

How to make an egg carton flower garland.
This post contains some affiliate links for your convenience. Click here to read my full disclosure policy.
Hey there, crafty friends! Today we’re turning something you’d normally toss in the trash into the cutest spring decor ever.
Grab an empty egg carton (the paper kind!) because we’re making adorable egg carton flower string lights. This is one of those crafts that’s inexpensive, beginner-friendly, and looks WAY more high-end than it has any right to.
Let’s get making!

Video Tutorial: Egg Carton Flower Garland
Watch this video to see how this craft came together:

Egg Carton Flower Garland
Learn how to make egg carton flowers with string lights for a charming spring DIY. It's easy, affordable, and beginner-friendly!
Materials
- Empty paper egg carton
- Acrylic or chalk paint (lavender, purple, yellow, green)
- Fairy string lights (battery-operated)
- Hot glue sticks
Tools
- Scissors
- Paintbrush (1-inch flat + small detail brush)
- Pouncer brush (optional for texture)
- Craft knife or X-Acto knife
- Paper or drop cloth (to protect work surface)
- Hot glue gun
Instructions
- Watch the video. Follow along with the video tutorial for a step-by-step walkthrough of how to make your own egg carton flowers.
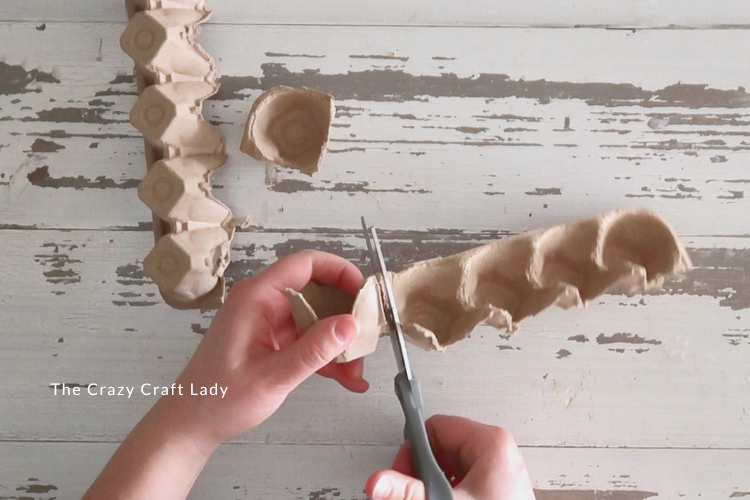
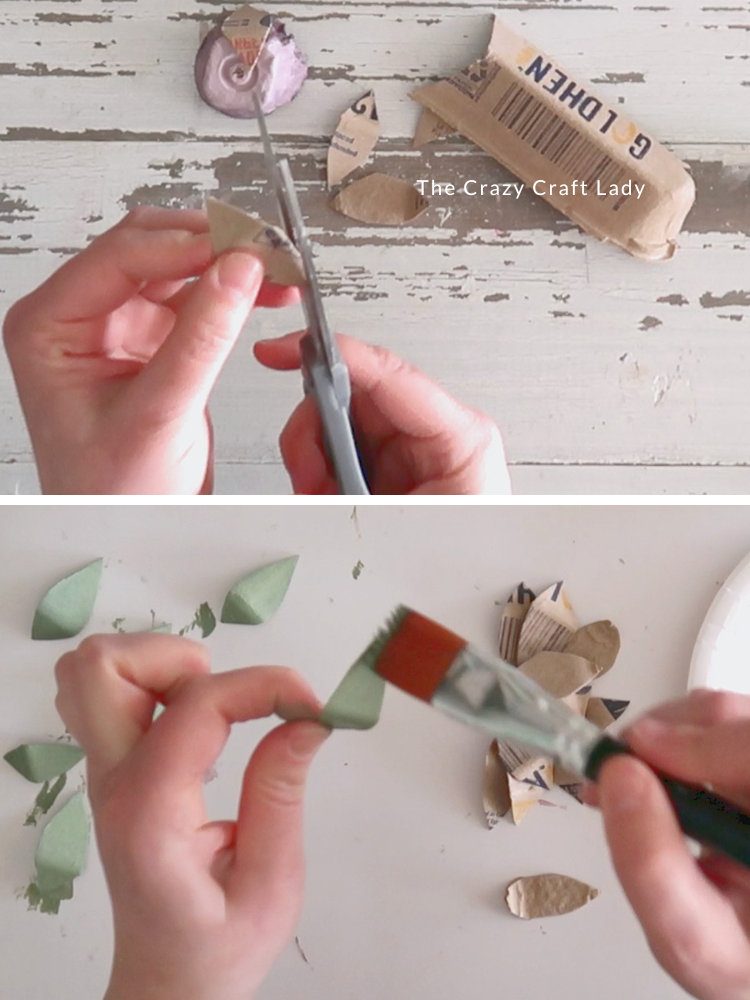
- Cut Apart the Egg Carton. Start by cutting the lid off your egg carton and removing any extra flaps. Then carefully cut out each individual egg cup. You’ll want about 10 cups if you’re using a 10-light string.

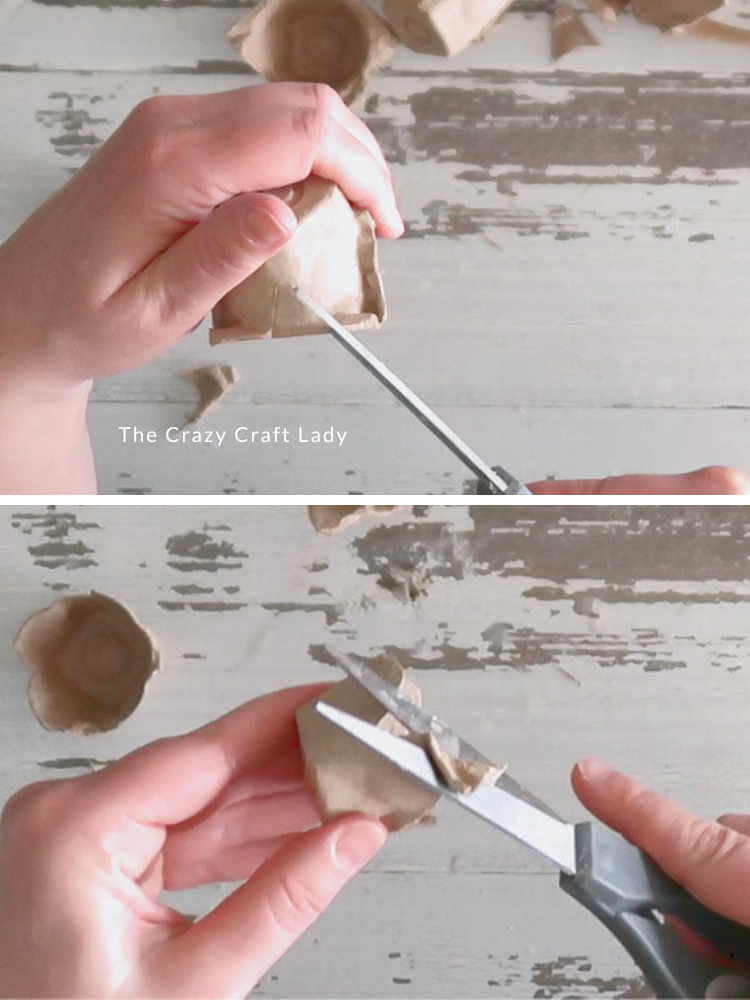
- Shape the Flowers. Trim each cup so it has four rounded “petals.” Cut away any pointy edges, add small V-shaped cuts where needed, and round everything out with scissors.

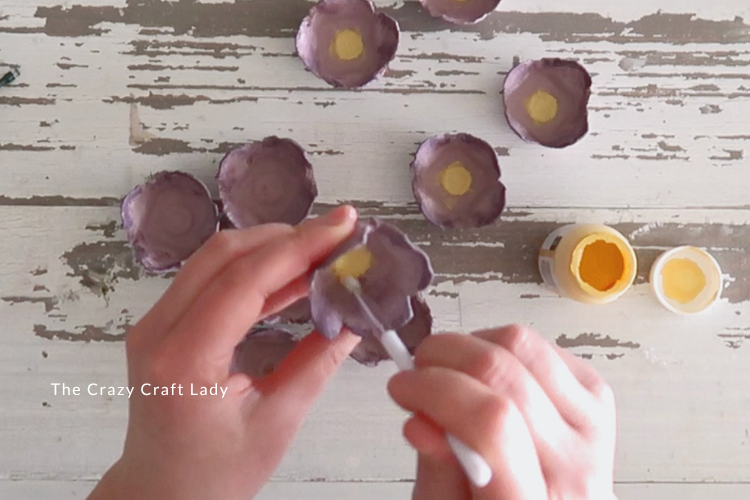
- Paint the Flowers. Paint the outside first, then flip and paint the inside. Tip: Egg cartons soak up paint, so expect to use a bit more than usual.
- Add Depth & Texture. Using a pouncer brush, add a darker shade to the edges of the petals. Blend slightly toward the center of the flower.
- Paint the Flower Centers. Lightly pounce in the middle, and use yellow paint to add a “pollen” center.
- Make the Leaves. Use the egg carton lid to cut out small leaf shapes (you’ll need 20 total). Don’t worry about perfect shapes, slight variation adds character. Paint them green (2 coats if needed to cover printing).
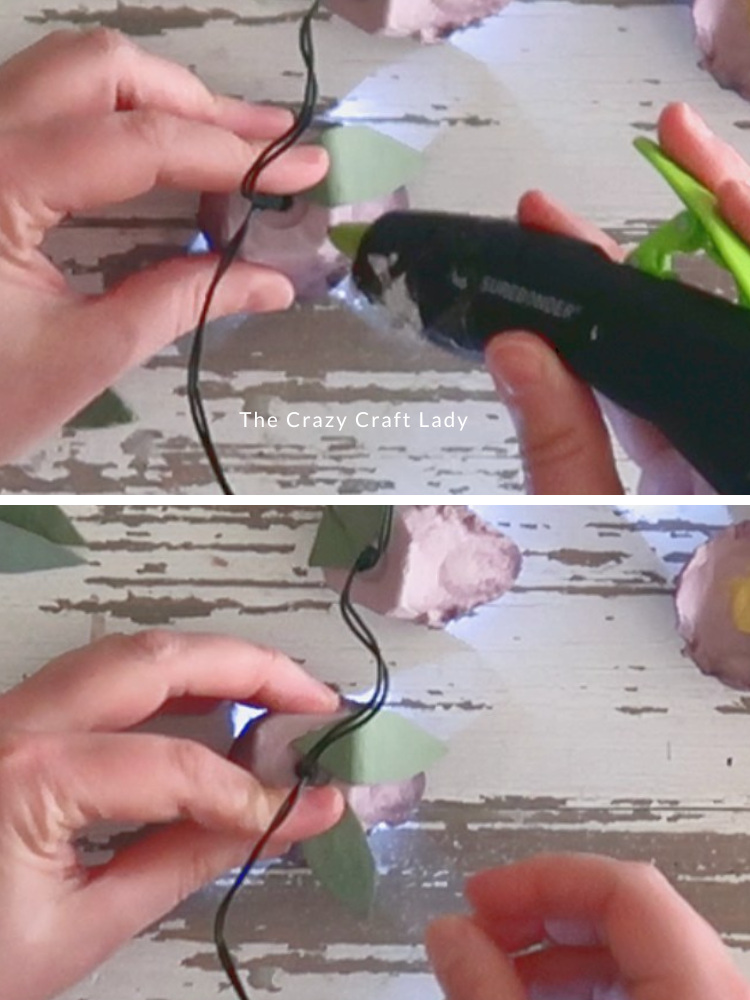
- Add Lights to Flowers. Carefully cut a small slit in the top of each flower, and push a fairy light through each one.
- Attach the Leaves. Hot glue two leaves at the top of each flower. Angle them slightly outward, and keep them close together for a natural look.


Notes
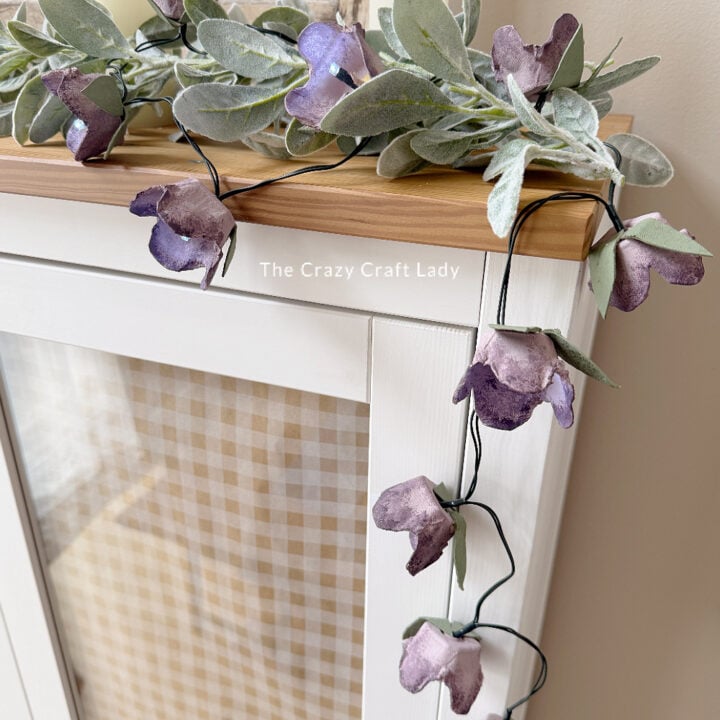
Display Your Garland
Once everything is assembled, your flower lights are ready to shine! ✨
Drape them:
- Over a mantel
- Along a shelf
- Around a window
- Layered with greenery garland (SO pretty!)
The finished craft

I am officially obsessed with egg carton flowers, and I already have about a million more ideas spinning in my head. This is the kind of craft that: costs almost nothing, uses recycled materials, and makes your home feel instantly like spring!
PIN this craft for later:

