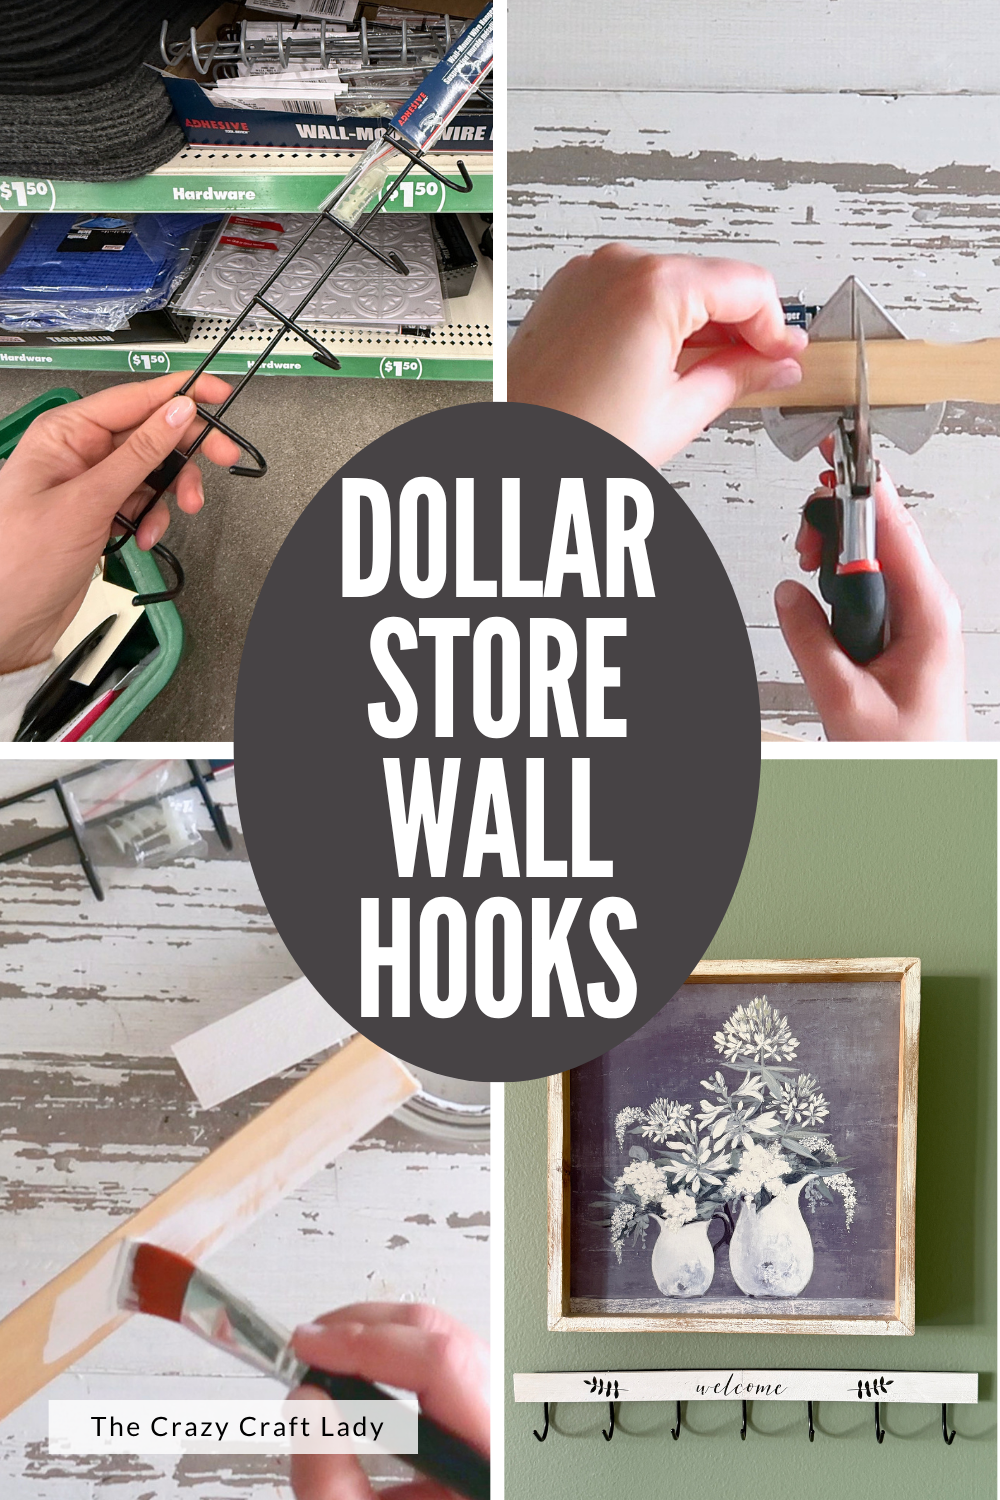
Turn a basic set of Dollar Tree wall hooks into charming farmhouse decor with paint stir sticks, chalk paint, and rub-on transfers. This easy budget-friendly DIY takes just minutes to make!
This post contains some affiliate links for your convenience. Click here to read my full disclosure policy.
How to make decorative wall hooks using dollar tree supplies and paint stir sticks.
If you’re anything like me, you love finding ways to take a basic Dollar Tree item and turn it into something that looks much more expensive than it actually is. Today’s project is a perfect example!
We’re starting with a simple set of Dollar Tree wall hooks and giving them a farmhouse-inspired makeover using paint stir sticks, chalk paint, and decorative rub-on transfers. The finished piece is both pretty and practical—perfect for hanging keys, dog leashes, lightweight bags, or other everyday essentials.
This is one of those quick and easy crafts that can be completed in an afternoon and customized to fit any decorating style.
Video Tutorial: Dollar Tree Decorative Hooks
Watch this quick video to see how this craft came together:
Dollar Tree Decorative Hooks
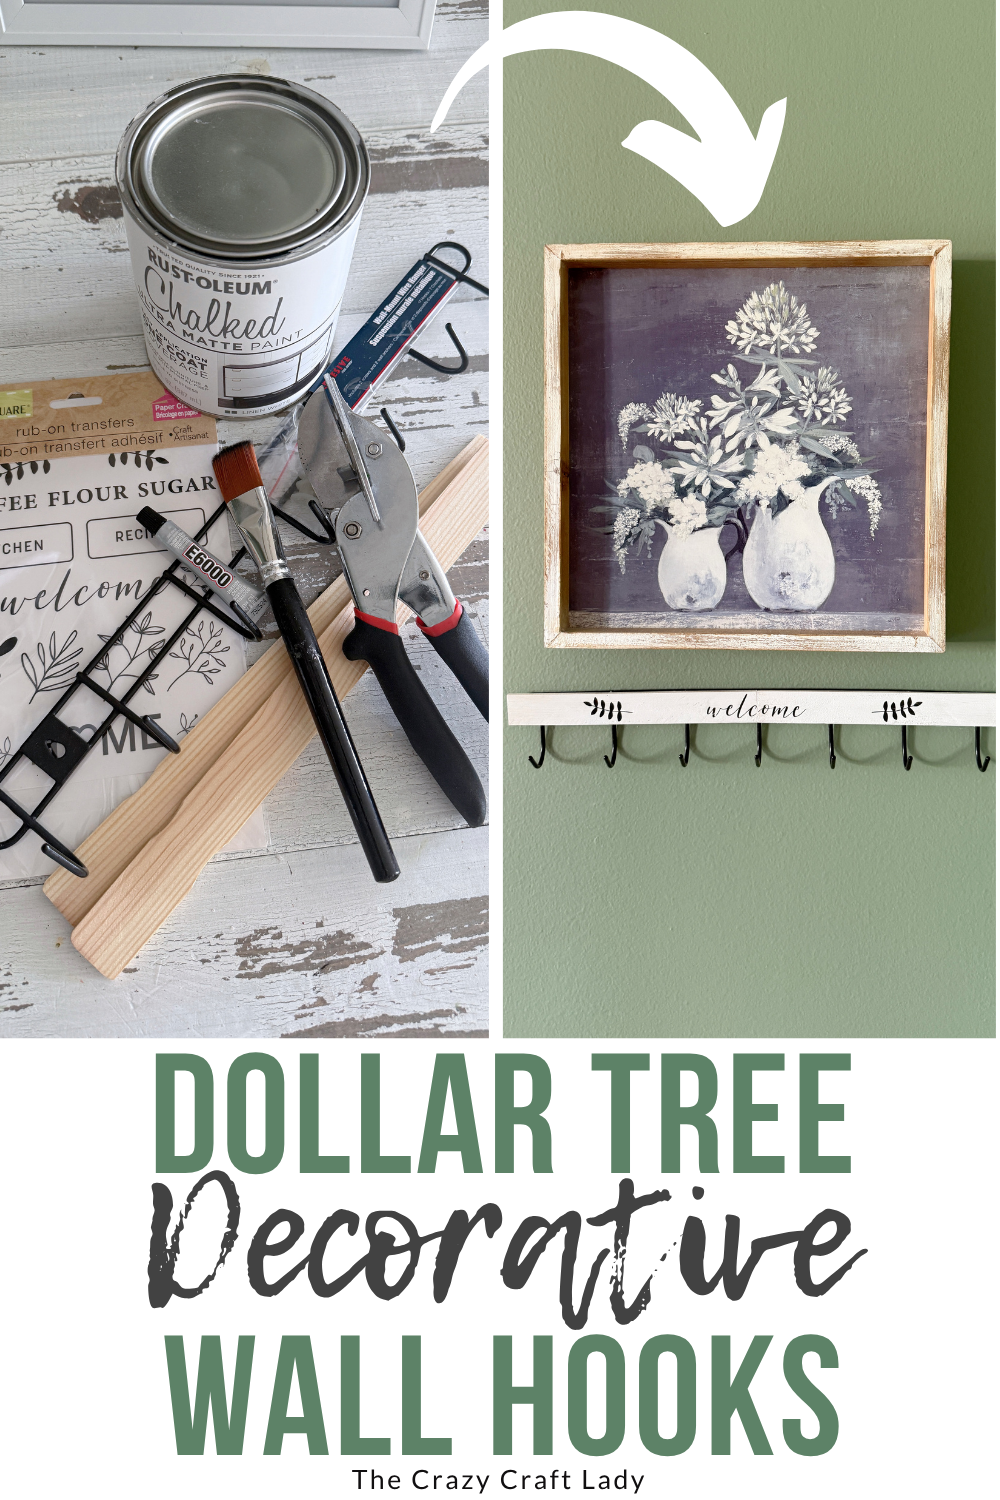
Learn how to transform inexpensive Dollar Tree wall hooks into decorative farmhouse organizers using paint stir sticks and botanical rub-on transfers. Perfect for keys, dog leashes, and small accessories.
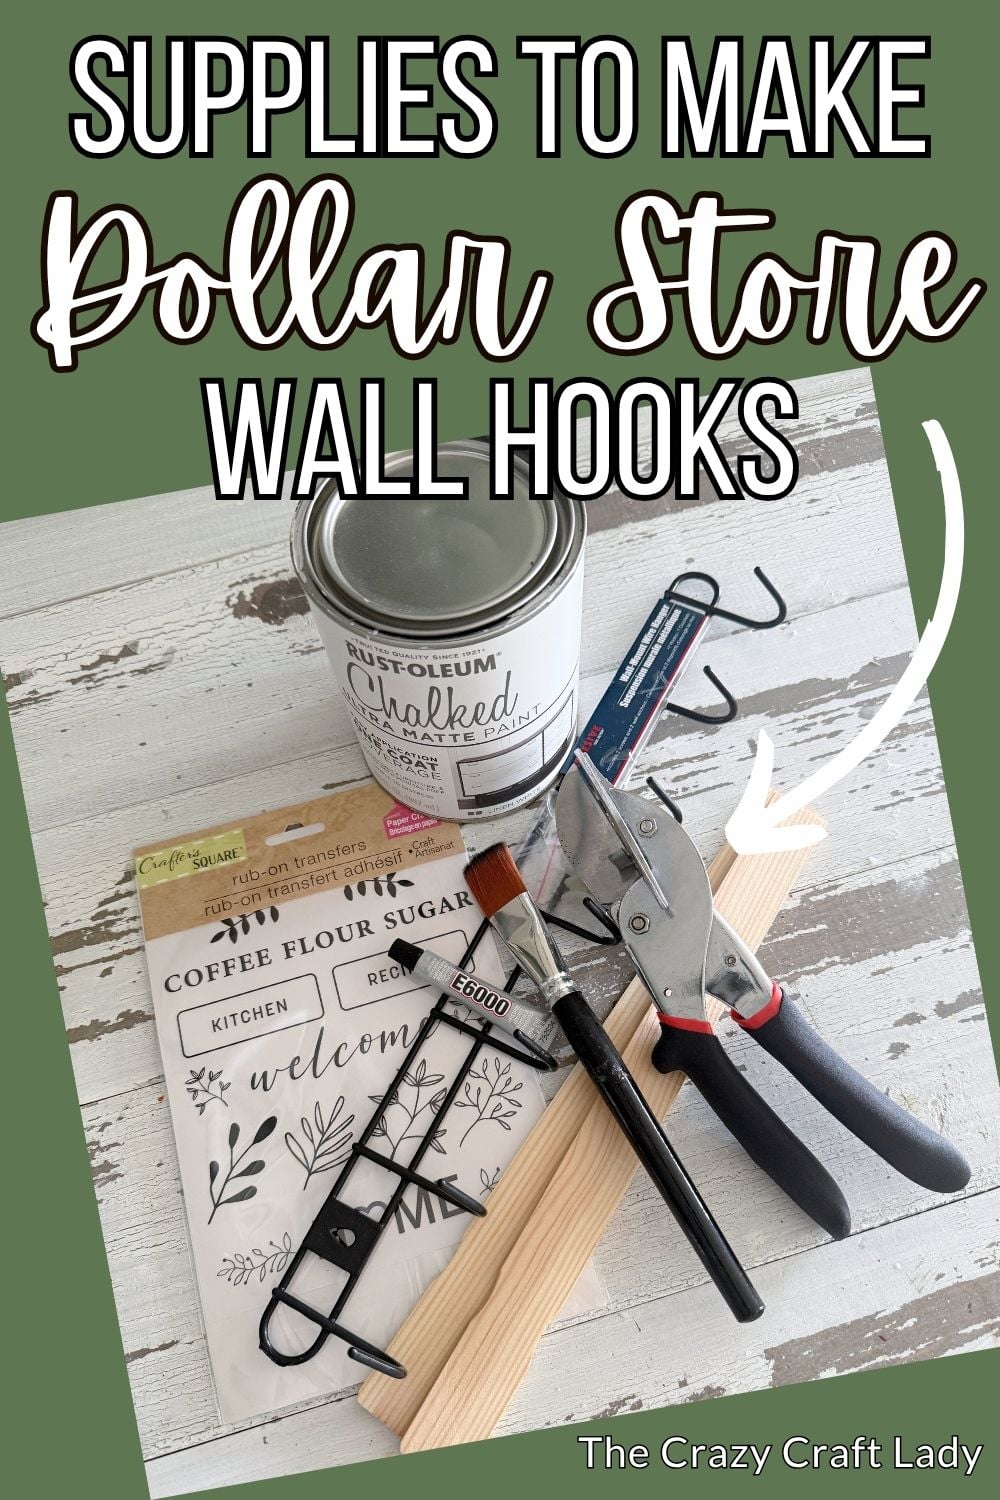
Materials
- set of Dollar Tree wall hooks
- 2 wooden paint stir sticks
- White chalk paint (I used Rust-Oleum Linen White Paint)
- Dollar Tree rub-on transfers
- Popsicle stick or craft stick
- E6000 adhesive
Tools
- Miter shears
- Paintbrush
Instructions
- Watch the video. Follow along with the video tutorial for a step-by-step walkthrough of how to make your own wall hooks.

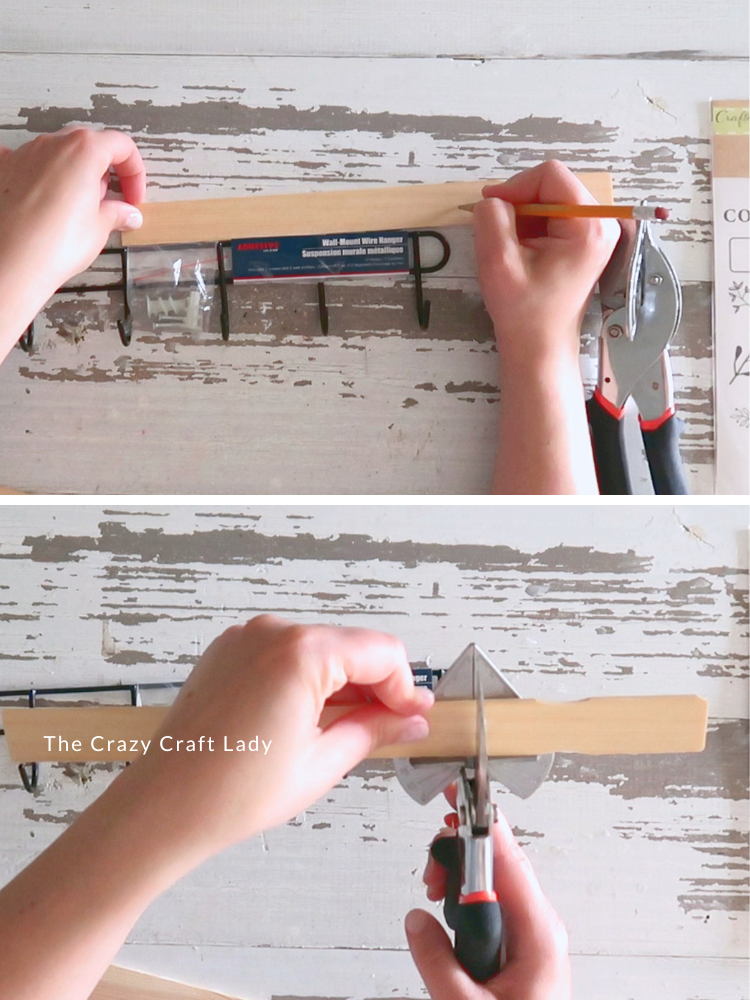
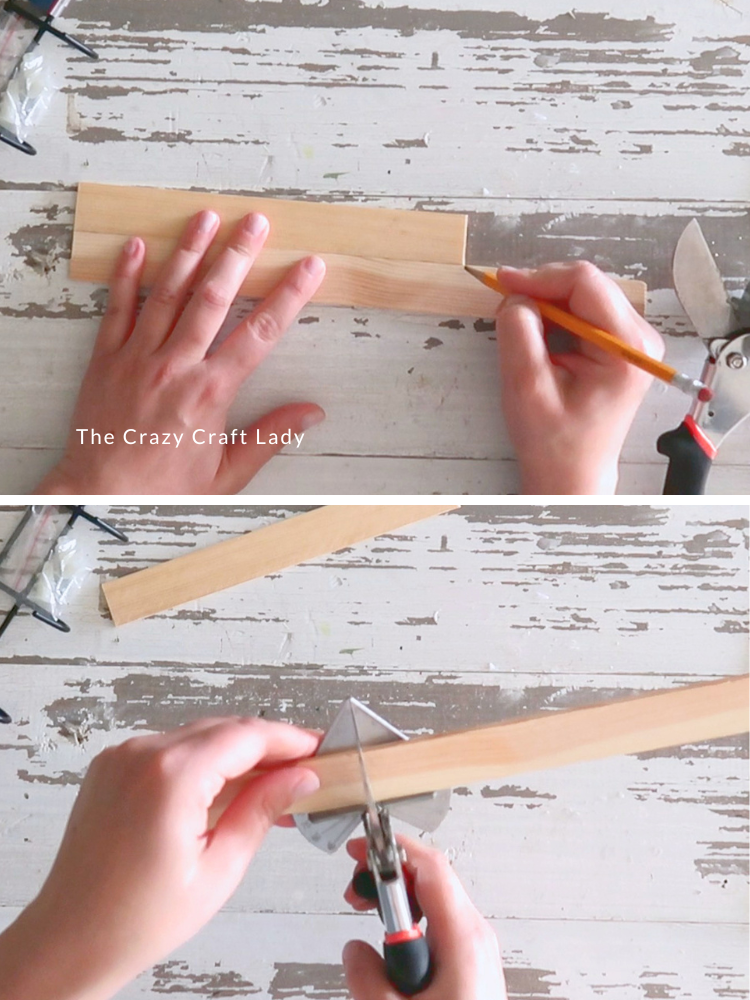
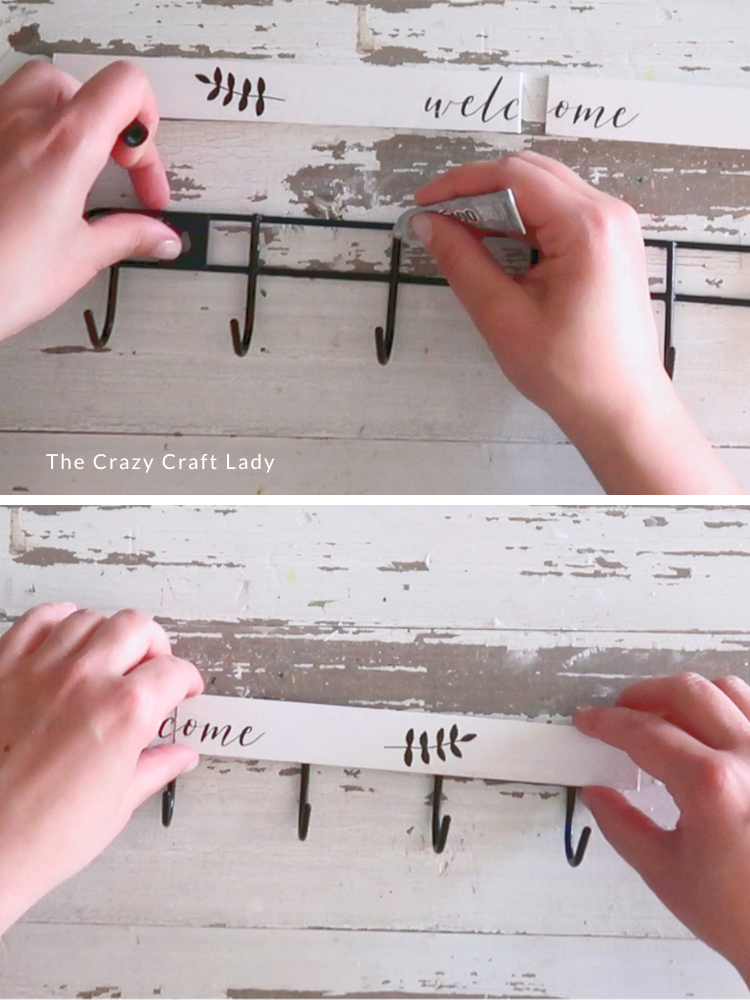
- Cut the Paint Stir Sticks. Start by measuring the metal section at the top of your Dollar Tree wall hooks. Using miter shears, cut the handles off two paint stir sticks. Test fit the pieces before moving on. They should be slightly longer than the metal area you're covering.
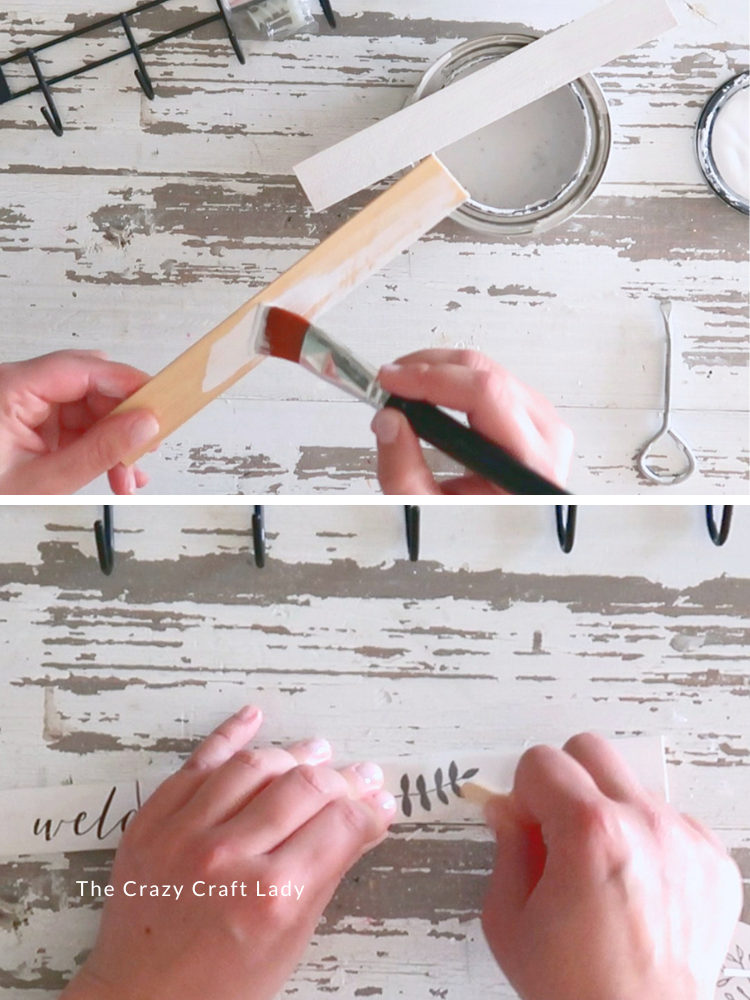
- Paint the Wood Pieces. Paint both paint stir stick pieces with your favorite white chalk paint. Be sure to paint the front surfaces, sides, and ends Allow the paint to dry completely before decorating.
- Apply the Rub-On Transfers. Place your transfer where you'd like it on the painted wood. Using a popsicle stick, firmly rub over the entire design. Slowly peel back the plastic sheet, checking to make sure every part of the transfer has adhered to the wood. Customization Ideas: If you don't have rub-on transfers, you could try Cricut vinyl decals, stencils and paint, decoupage paper, or hand-painted lettering.
- Attach the Decorative Panels. Apply E6000 adhesive to the vertical metal supports on the hook rack. Position the decorated paint stir stick pieces over the metal section and press them firmly into place. Make sure everything is centered before the glue begins to set. Allow the adhesive to dry completely before hanging or using your wall hooks.
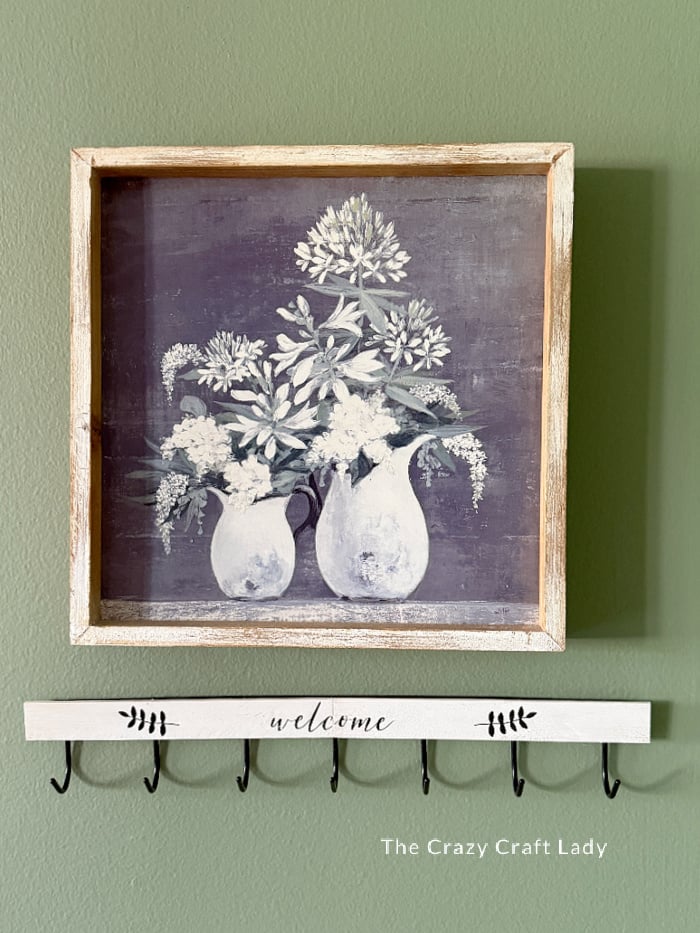
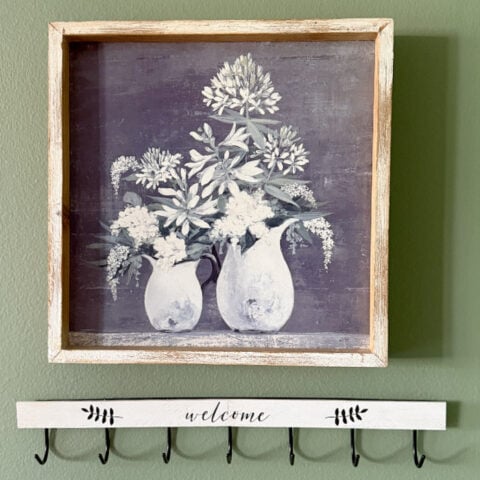
The Finished Craft
Once the glue is dry, you’ll have a decorative wall hook that looks far more expensive than the original Dollar Tree version.
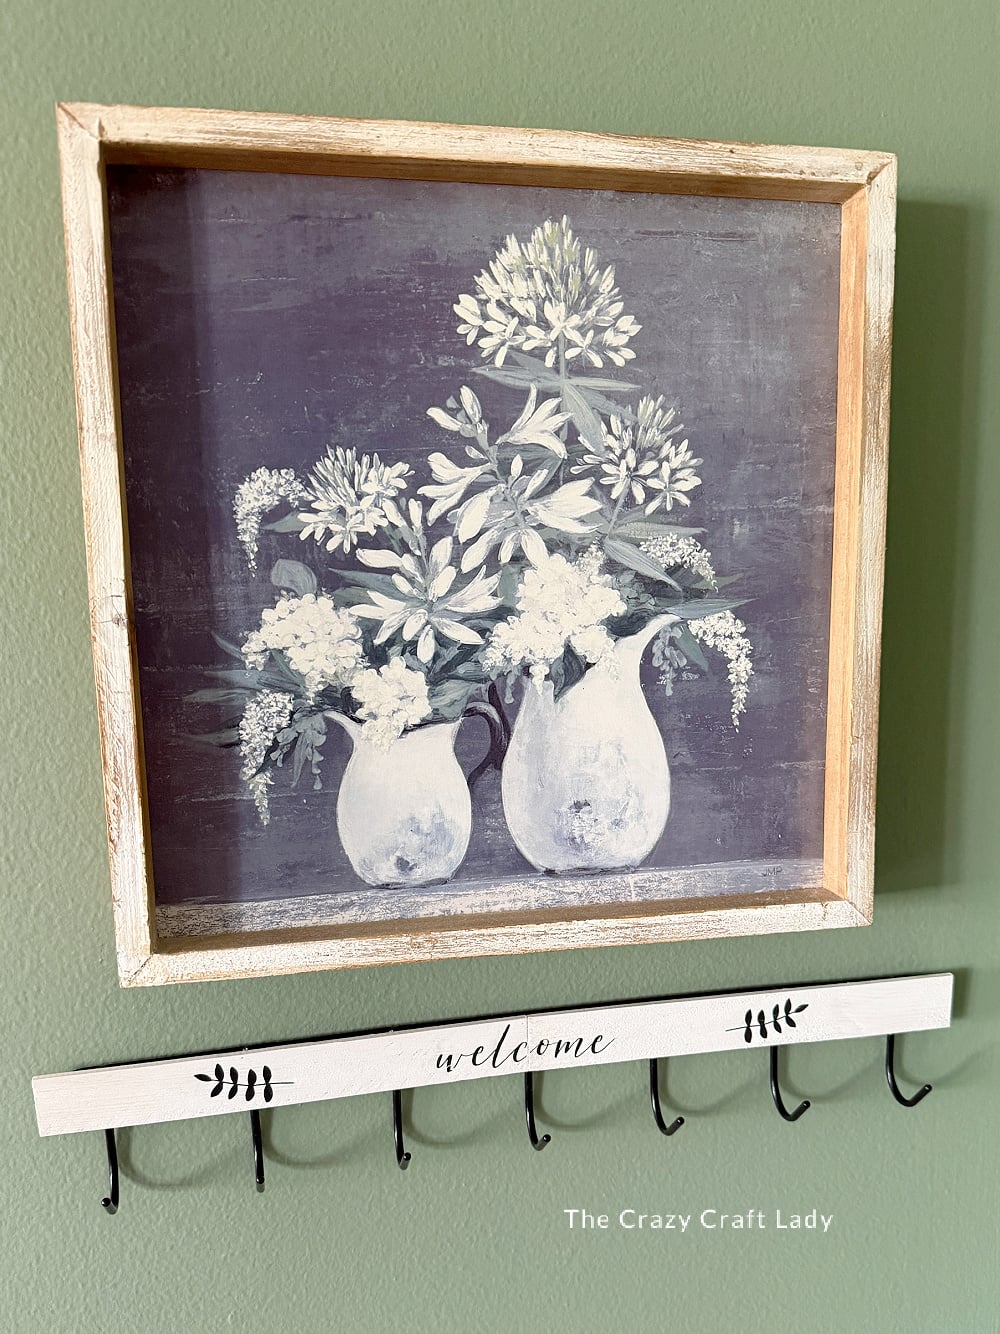
The painted wood and botanical transfers completely transform the utilitarian metal hooks into a charming piece of farmhouse decor that looks right at home in an entryway or mudroom.
I especially love using projects like this to organize everyday clutter while still keeping my home looking cute and welcoming.
PIN these wall hooks for later: