
Learn how to make a DIY Dollar Tree light box sign using a picture frame, fairy lights, and a dollar store cutting mat. This budget-friendly marquee sign is perfect for craft room decor!

How to make a DIY marquee light box.
This post contains some affiliate links for your convenience. Click here to read my full disclosure policy.
If you love a good Dollar Tree makeover, this one is going to make you so happy.
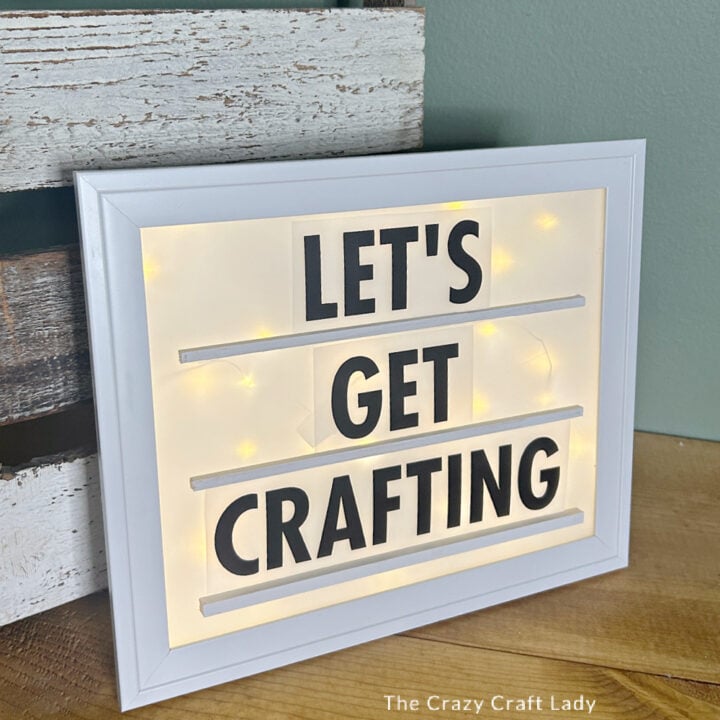
Today I’m sharing how to turn a simple 8×10 Dollar Tree picture frame, a cutting mat, and a shoebox lid into the cutest little DIY light box sign for your craft room. It looks like one of those trendy marquee light boxes… but it’s totally budget-friendly and made with supplies you probably already have.
This project is perfect for adding a cozy glow to your creative space—and you can customize the message to say anything you want. I went with “Let’s Get Crafting”, but you can do anything you like!
Video Tutorial: DIY Marquee Light Box
Watch this quick video to see how these crafts came together:

DIY Marquee Light Box
Make your own DIY marquee-style light box with a Dollar Tree picture frame and battery fairy lights. Step-by-step tutorial for affordable craft room wall decor.
Materials
- 8x10 Dollar Tree picture frame
- Dollar Tree cutting mat
- Shoebox lid (or sturdy cardboard)
- White duct tape
- White peel-and-stick wallpaper (or contact paper)
- Battery-operated fairy lights
- Black peel-and-stick vinyl (or pre-cut letters/wood letters)
- Square wooden dowels (3 pieces)
- White chalk paint (I used Rust-Oleum chalk paint)
- Hot glue sticks
- Rubbing alcohol (for cleaning Sharpie lines)
Tools
- Hot glue gun
- Sharpie marker
- Ruler
- Pliers
- Scissors (non-stick recommended for tape/wallpaper)
- Smoothing tool (for wallpaper)
- Miter shears (or small saw)
- Cricut machine (optional)
- Transfer tape (if using vinyl)
Instructions
- Watch the video. Follow along with the video tutorial for a step-by-step walkthrough of how to make your own light box craft.
- Prep the Picture Frame. Start with your 8x10 picture frame and remove the backer, paper insert, and glass. Use pliers to carefully remove the small metal tabs that hold the backer in place. They pop out pretty easily once you grab them.
- Add the Cutting Mat Insert. Place the original frame backer on top of the Dollar Tree cutting mat and trace around it with a Sharpie. Cut just inside the Sharpie line so your piece fits snugly inside the frame. Run a thin line of hot glue around the inside edge of the frame and quickly press the cutting mat into place before the glue dries.

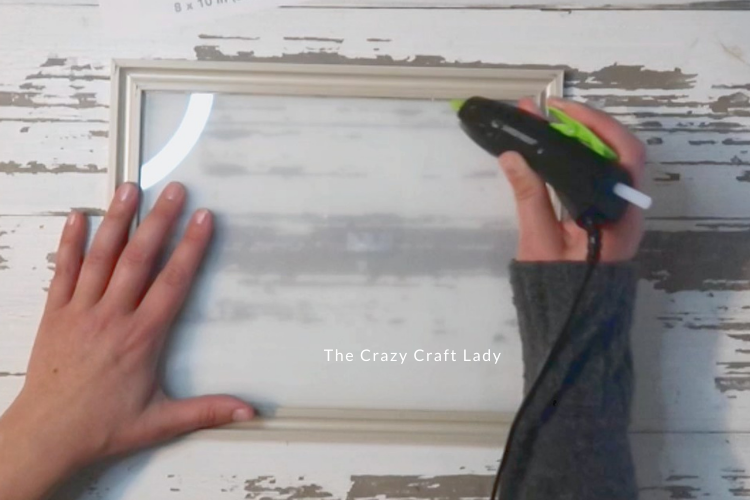
- Secure the Glass. Make sure the glass is clean (a quick wipe with your sleeve or microfiber cloth works!). Place the glass back into the frame and secure it with a thin line of hot glue around the inside edge so it doesn’t fall out. Now the front of your light box is ready.
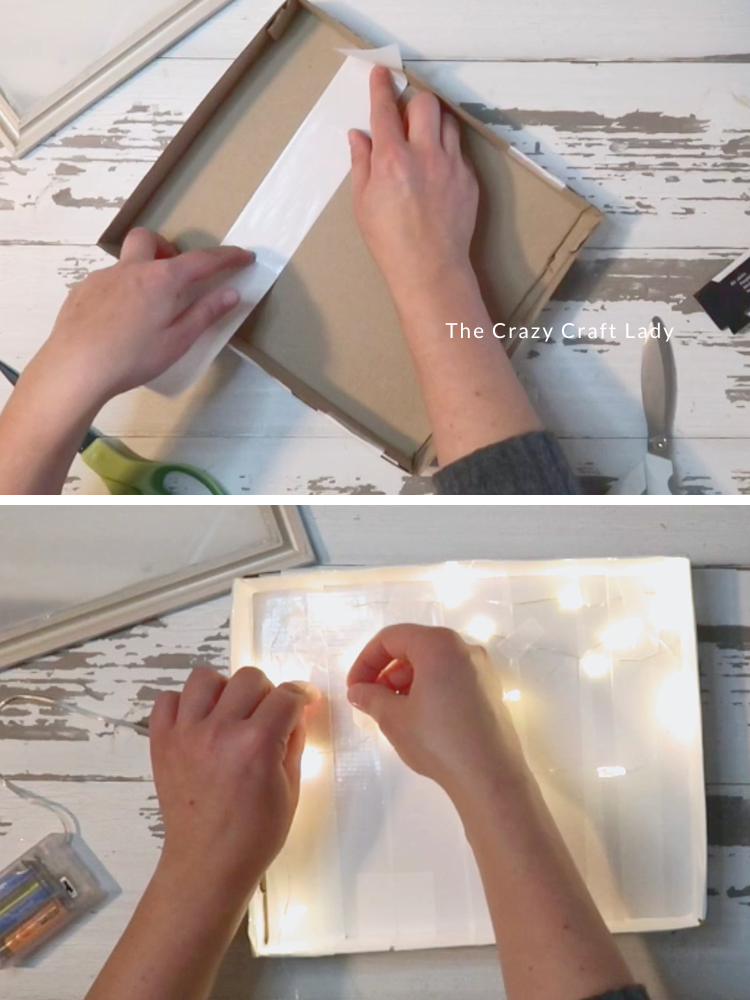
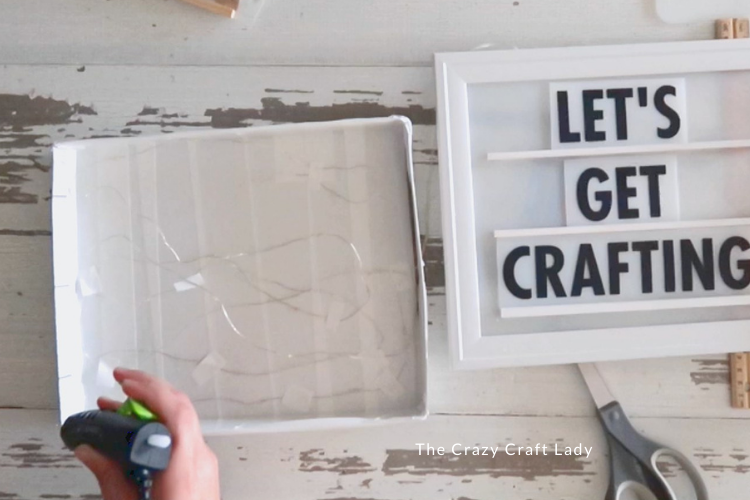
- Create the Backer Box. Grab a shoebox lid. Trim it so it matches the dimensions of your 8x10 frame. If the lid is too long: cut it down, overlap the pieces, and reinforce with white duct tape Cover the entire inside of the lid with white duct tape. It doesn’t need to be perfect—just fully white. This will reflect the light and give your sign that clean glow. (Tip: You could also use white cardstock inside and tape the edges.).

- Add the Fairy Lights. String the battery-operated fairy lights inside the shoebox lid in an “S” pattern. Secure them with tiny pieces of white duct tape as you go. Be sure to: leave enough room for the battery pack and position the pack so it can hide behind the frame later. Flip the box over once lights are secured.
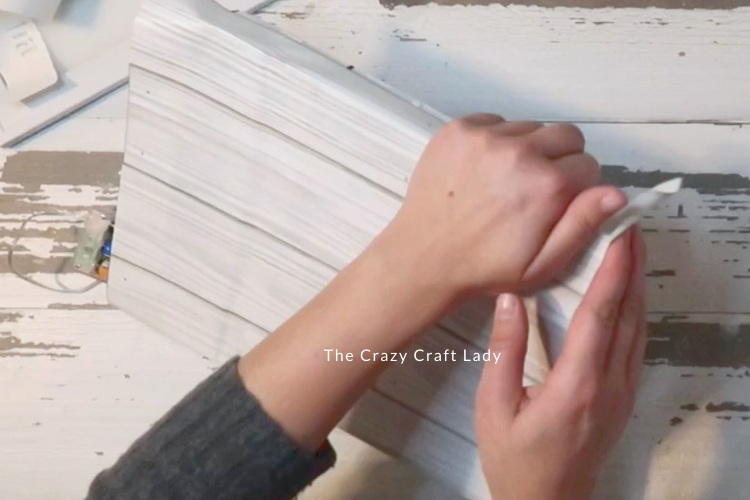
- Cover the Back. Cover the outside of the shoebox lid with white peel-and-stick wallpaper (or contact paper). Smooth it down carefully and trim corners neatly. Reinforce edges with white duct tape if needed.
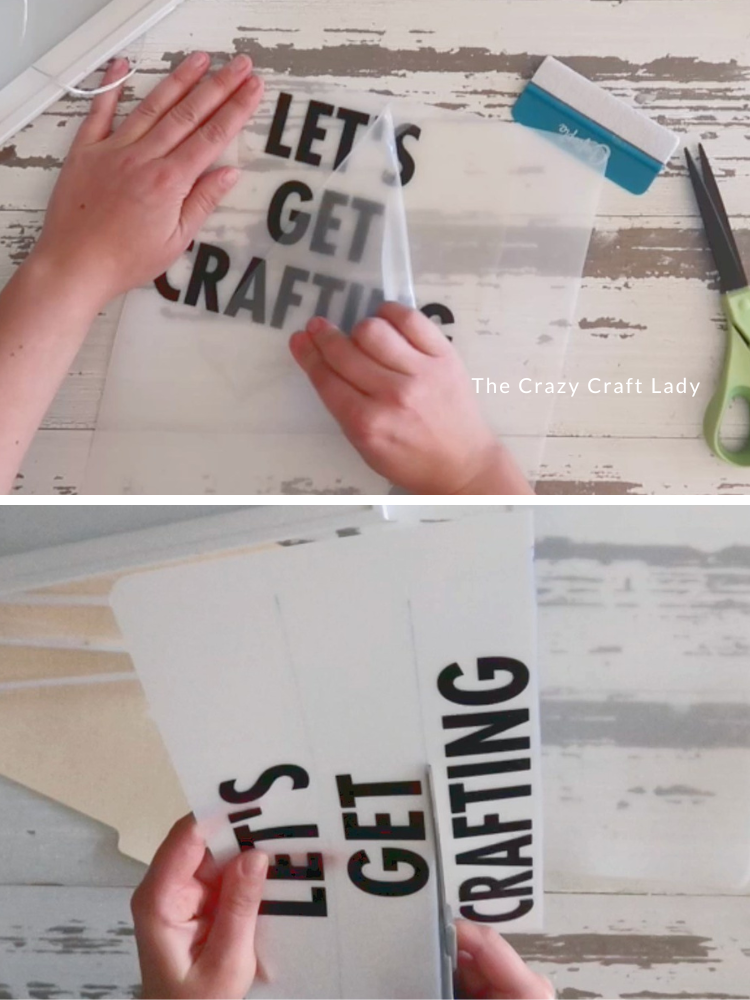
- Create Your Words. Cut your phrase from black peel-and-stick vinyl using a Cricut (or use pre-made letters). Apply the vinyl to another piece of Dollar Tree cutting mat using transfer tape. You can cut full word strips (easier) OR cut individual letters (scrabble-style look). Use a ruler and Sharpie to draw cutting guides if needed. Clean off extra marker with rubbing alcohol.
- Make the Letter Ledges. Cut three square wooden dowels to equal lengths using miter shears. Paint them white with chalk paint and let dry completely. These will act as little ledges for your words to rest on.
- Attach the Ledges. Place your word strips inside the frame to determine spacing.Once you’re happy with placement, run a thin line of hot glue along the bottom edge of each dowel and secure them in place.
- Final Assembly. Run a line of hot glue around the top edge of the shoebox lid. Work quickly and place the picture frame directly on top, pressing firmly into place. Hide the battery pack behind the frame. Turn on your lights… and admire your DIY marquee-style light box!

The Finished Craft
How to Display It:
- This looks adorable:
- Sitting on a shelf in your craft room
- Leaning on a desk
- Mounted on the wall (add sawtooth hangers or Command strips!)
- You could even make seasonal inserts and swap them out throughout the year—hello Christmas countdown, Valentine’s quotes, or fall sayings!

Don’t Forget to PIN this Craft for Later!

