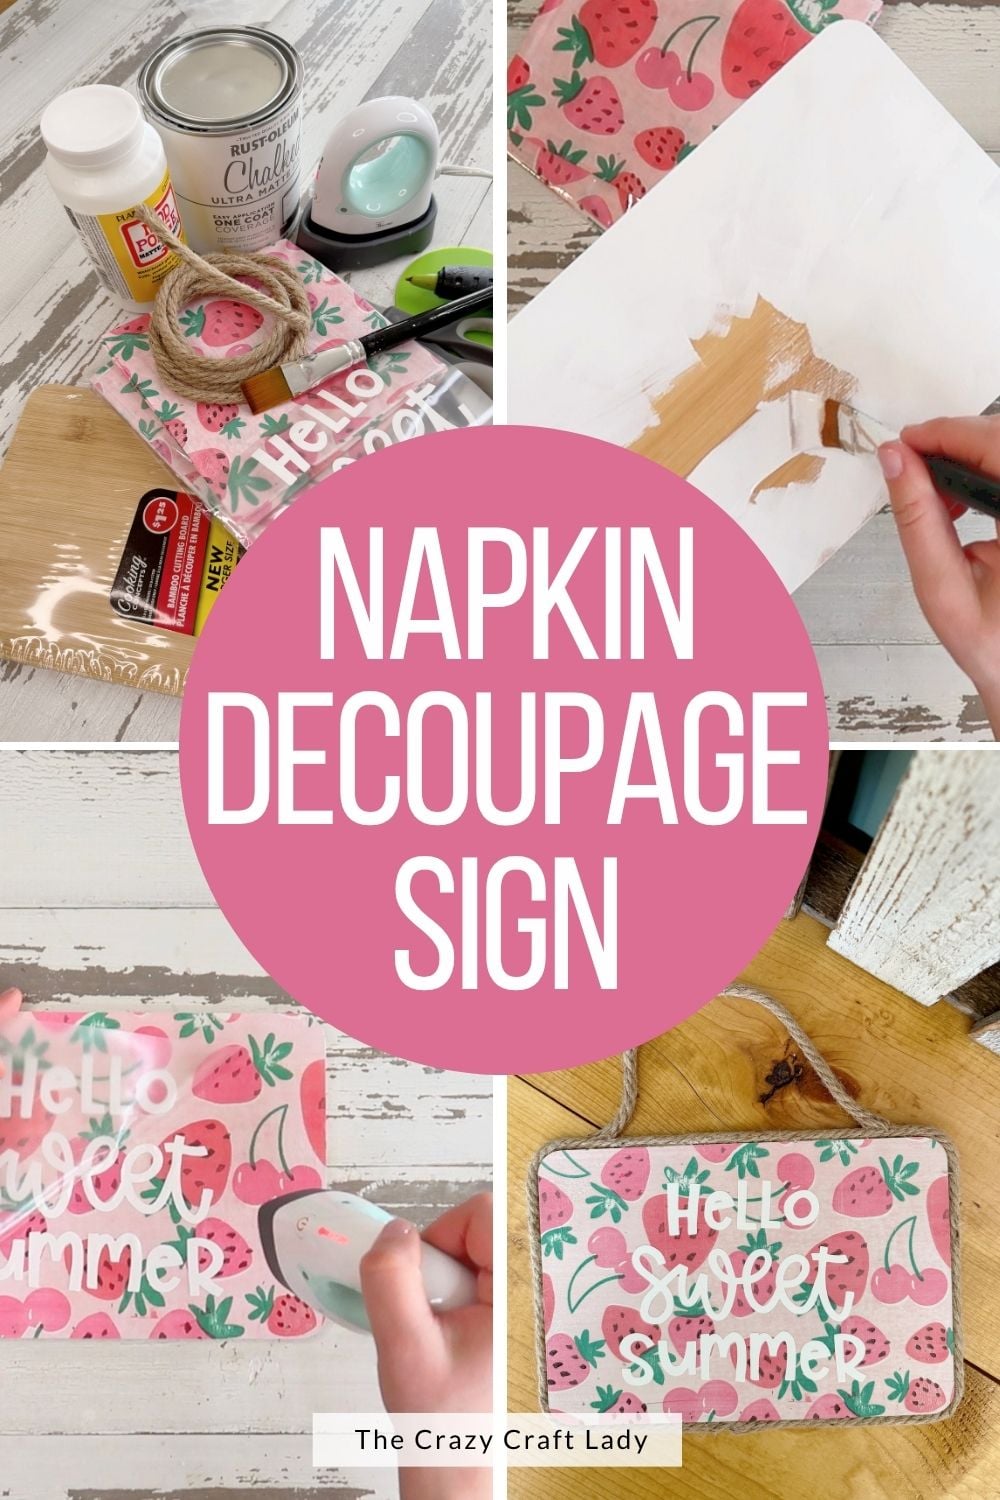
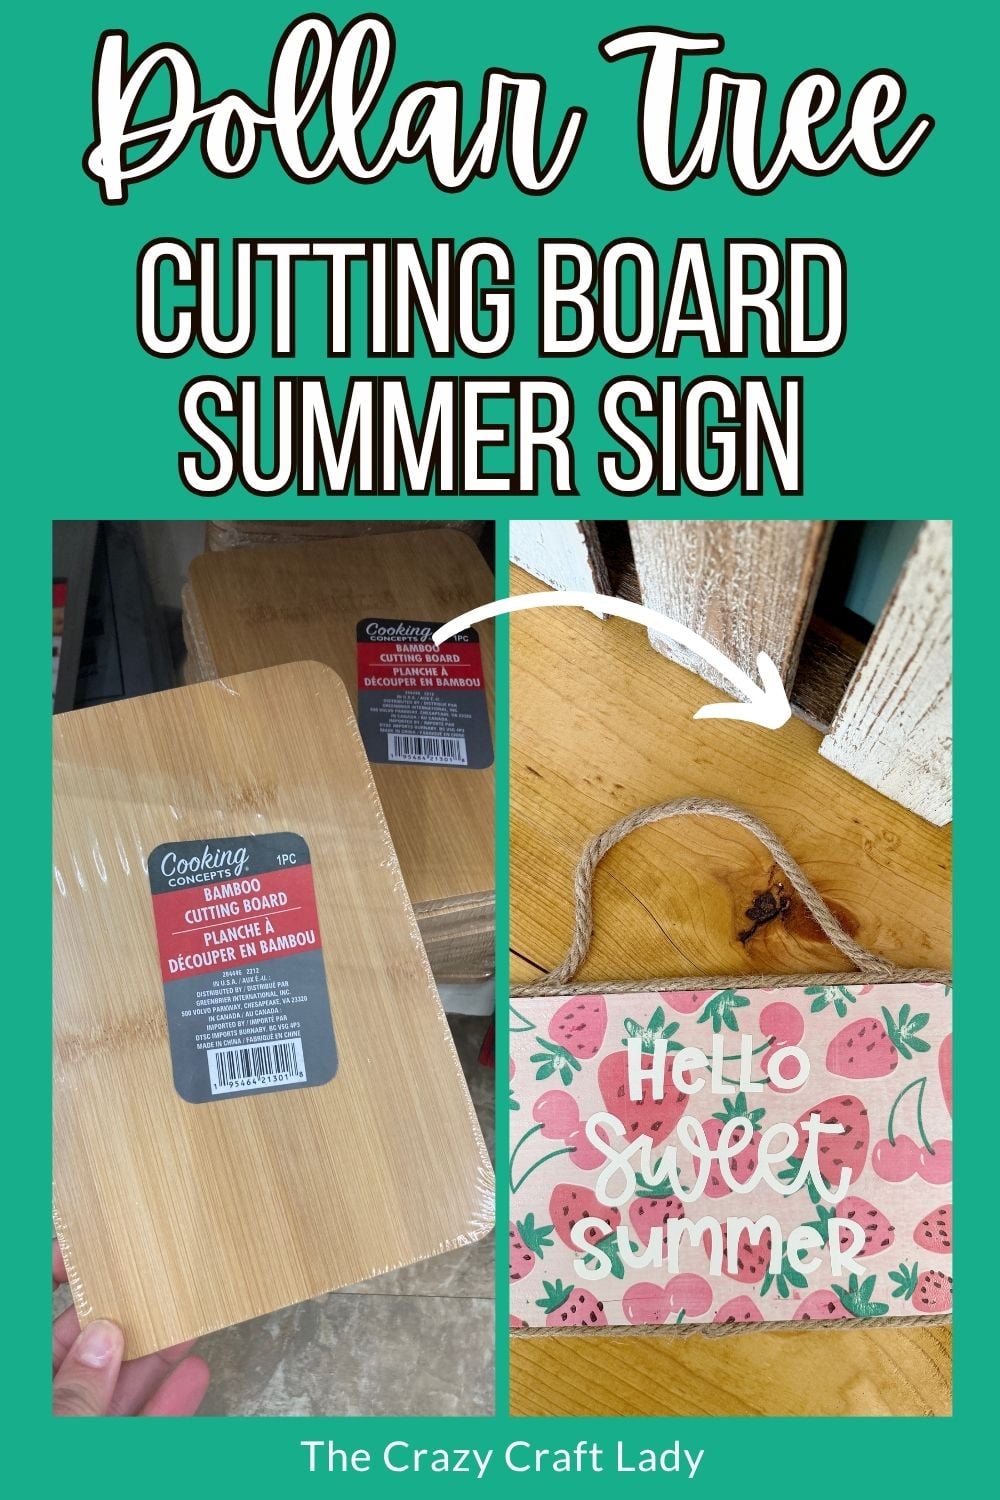
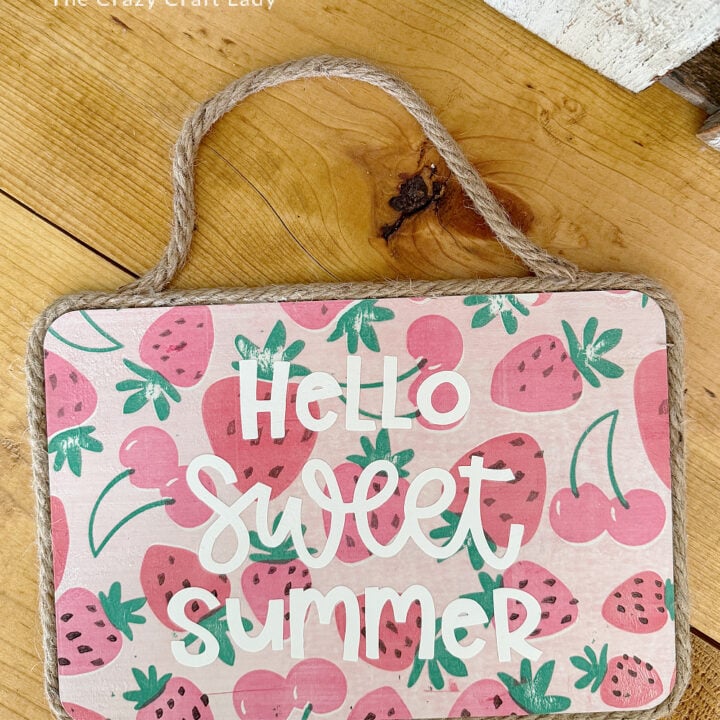
Turn a $1.25 Dollar Tree cutting board into an adorable summer hanging sign using paper napkins, Mod Podge, and Cricut vinyl.
How to make a summer sign with decoupage paper napkins
This post contains some affiliate links for your convenience. Click here to read my full disclosure policy.
If you love budget-friendly summer crafts with a high-end look, this easy DIY is for you. I transformed a simple Dollar Tree bamboo cutting board into the cutest strawberry-themed summer sign using a paper napkin and the heat press napkin method for a smooth, wrinkle-free finish.
This project is perfect for adding a fun pop of summer decor to your kitchen, entryway, patio, or gallery wall, and it only costs a few dollars to make!
Video Tutorial: DIY Strawberry Summer Sign
Watch this quick video to see how this craft came together:
DIY Strawberry Summer Sign
Turn a $1.25 Dollar Tree cutting board into an adorable summer hanging sign using paper napkins, Mod Podge, and Cricut vinyl.
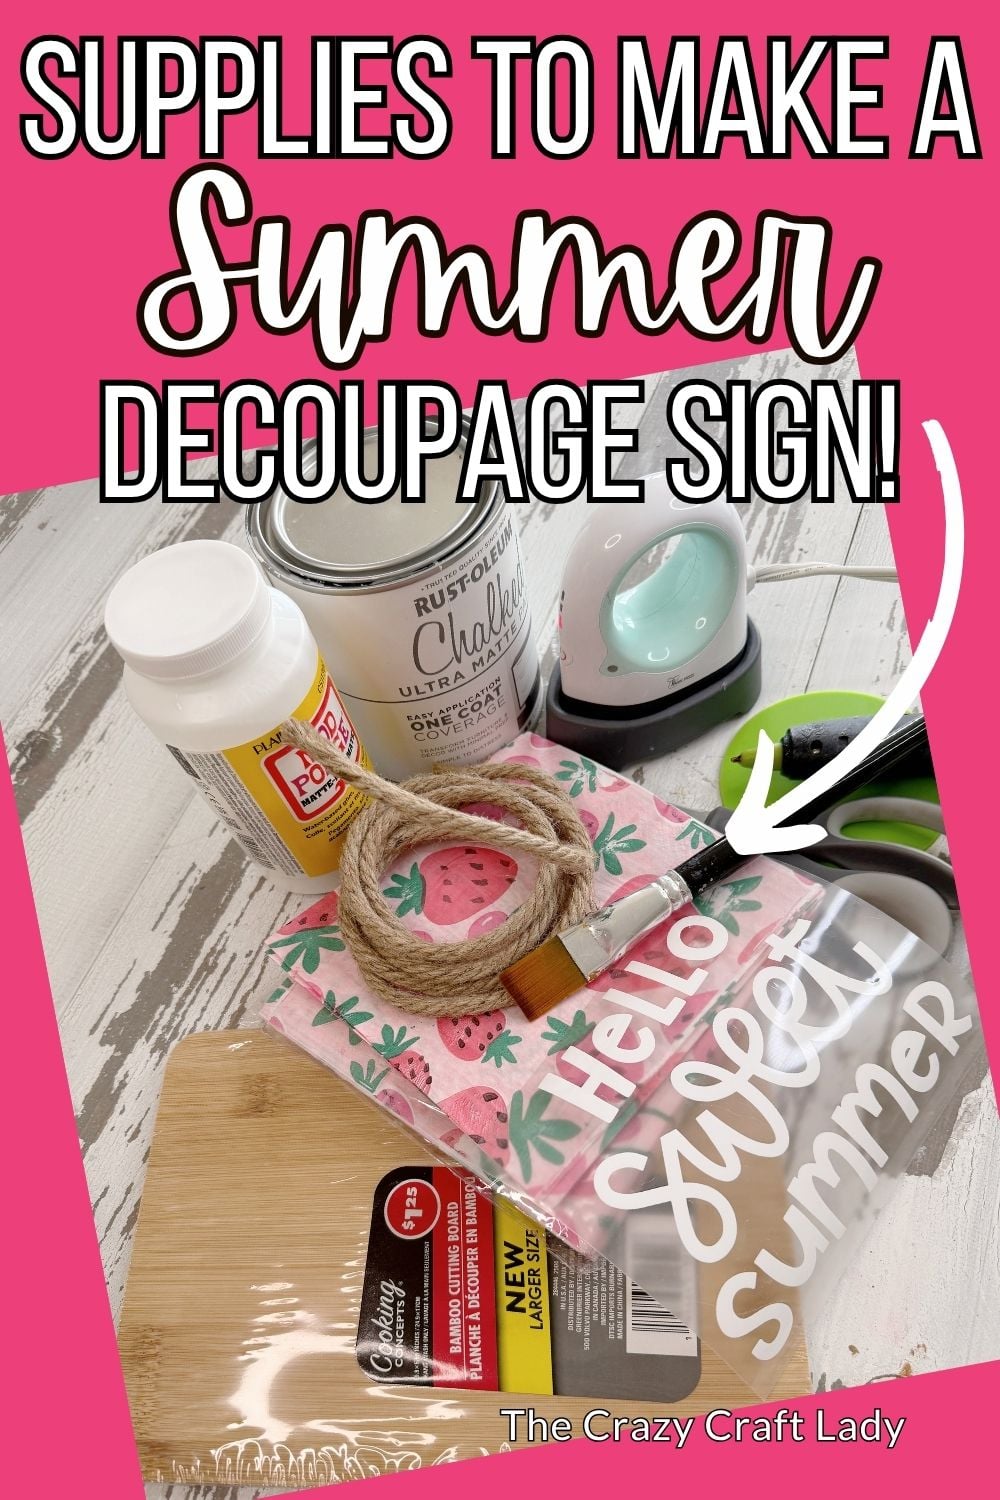
Materials
- Dollar Tree bamboo cutting board - or any small unfinished wood sign
- White paint (chalk paint or acrylic paint both work)
- Matte Mod Podge
- Strawberry paper napkins from Dollar Tree
- Parchment paper
- White heat transfer vinyl
- Jute rope
- Hot glue sticks
Tools
- Mini heat press or household iron (no steam)
- Cricut machine
- Nail file or sanding block
- Scissors
- Hot glue gun
Instructions
- Watch the video. Follow along with the video tutorial for a step-by-step walkthrough of how to make your own summer decoupage sign.
- Paint the Cutting Board. Start by painting the entire front surface of your bamboo cutting board with white paint. Let the paint dry completely before moving to the next step.

- Apply Mod Podge. Once your paint is dry, apply a generous coat of Mod Podge over the entire front surface of the cutting board. Let the Mod Podge dry completely before adding your napkin.
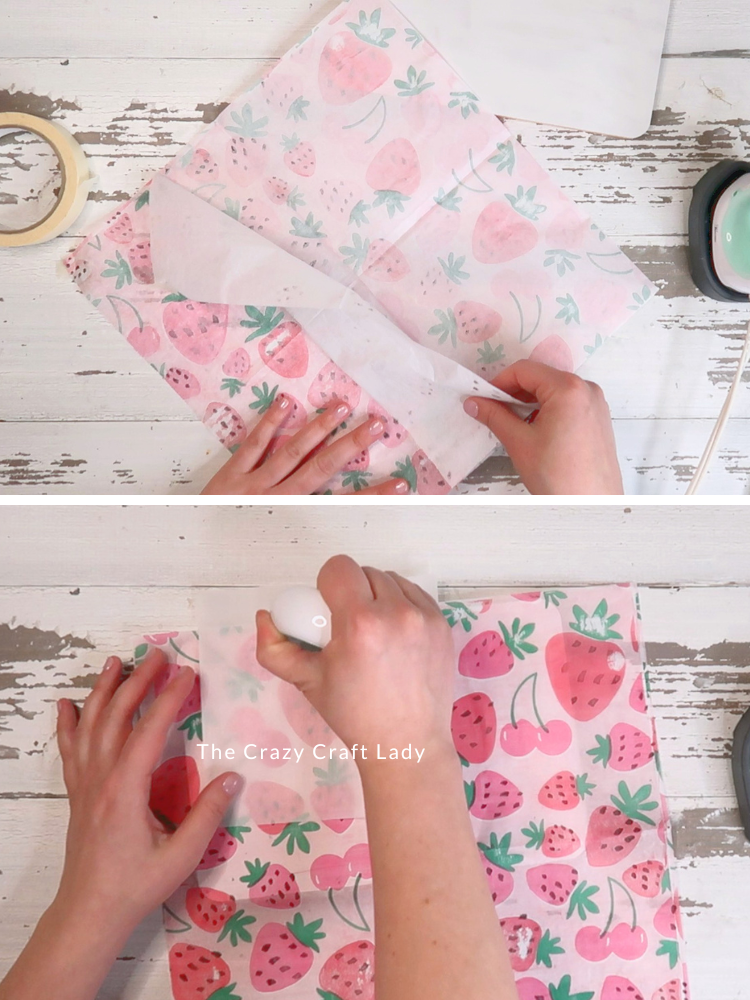
- Prep the Strawberry Napkin. Grab your Dollar Tree strawberry napkins and separate the layers until you're left with only the top printed layer. A quick trick that works well: Place a small piece of masking tape on the front and back of the napkin and gently pull the layers apart.
- Heat Press the Napkin Onto the Sign. Lay the printed napkin on top of the dried Mod Podge surface. Place parchment paper over the napkin to protect it, then use: A mini heat press or A household iron with NO steam. Slowly press over the entire surface. The heat reactivates the dried Mod Podge underneath and creates a smooth, wrinkle-free finish without the bubbles you sometimes get with traditional wet decoupage methods.
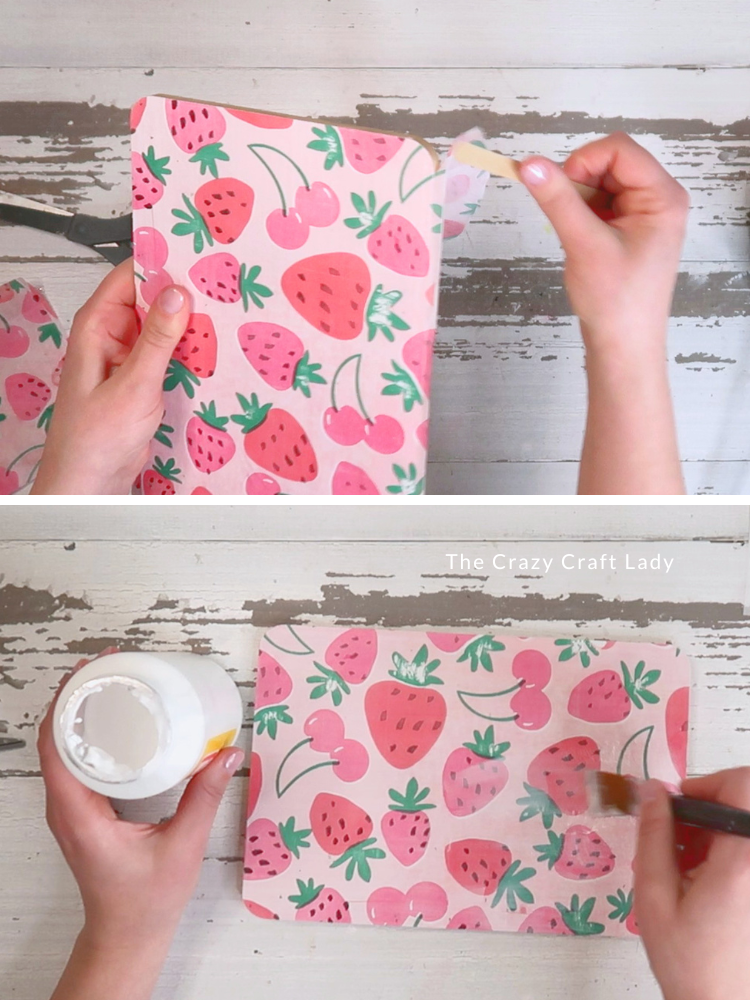
- Remove Excess Napkin. Once your napkin is fully adhered, remove the excess around the edges.
Use a Dollar Tree nail file, sandpaper, or a sanding block. Important: Always file in a downward motion. Do not file upward, or you may accidentally lift the napkin from the edges. If any corners start lifting, simply place parchment paper back on top and reheat press those areas. - Seal the Napkin. Before adding your lettering, brush on one thin coat of Mod Podge over the top of the napkin. This helps protect the napkin and gives your heat transfer vinyl a better surface to adhere to. Use as few brush strokes as possible to avoid wrinkles. Let everything dry completely.
- Add Your Vinyl Design. I cut the phrase: "Hello Sweet Summer" using white heat transfer vinyl on my Cricut. Apply the vinyl slowly using your heat press. A little warning: heat transfer vinyl on top of napkins can be a little tricky. Work in small sections: Heat press a little, Peel a little, and Repeat. Go slowly and watch carefully to make sure the vinyl stays adhered as you remove the plastic backing. Once the backing is removed, do one final press with parchment paper on top for a smooth finish.
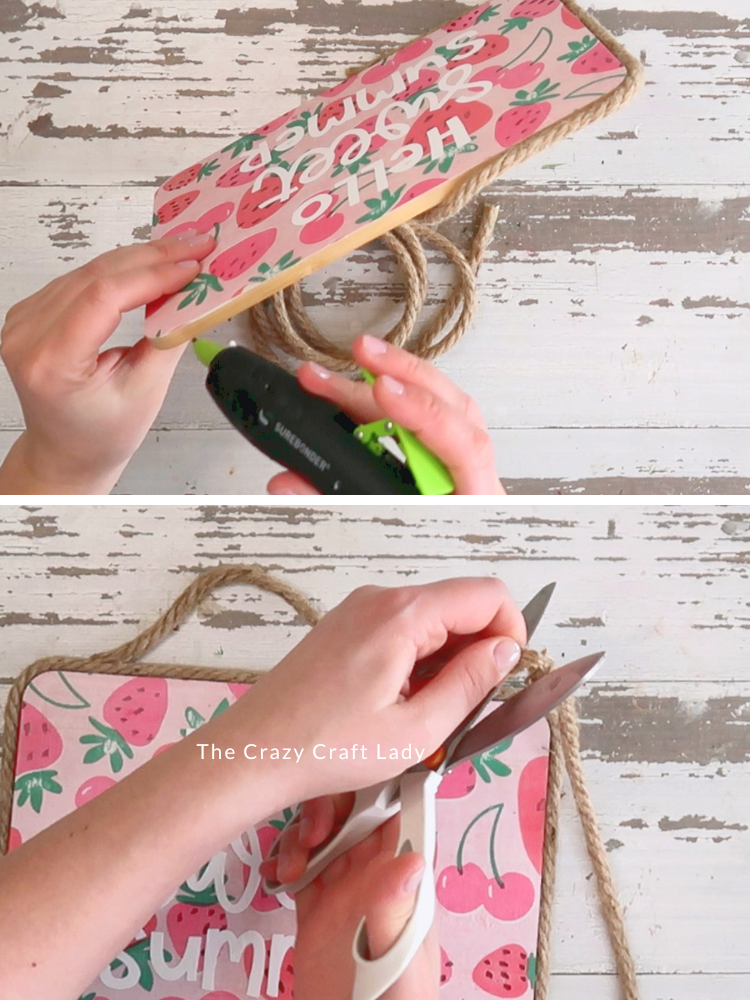
- Create a Jute Rope Border. Hot glue jute rope around the outer edge of the cutting board. Start at the bottom and work your way around the entire sign. Add hot glue in small sections as you go.
Once you reach the starting point, cut the rope and match the ends neatly. - Add a Hanging Loop. Cut another piece of jute rope to create a hanger. Glue one end about 1½ inches from the top left corner. Glue the other end about 1½ inches from the top right corner. Leave enough slack in the middle to create a hanging loop.

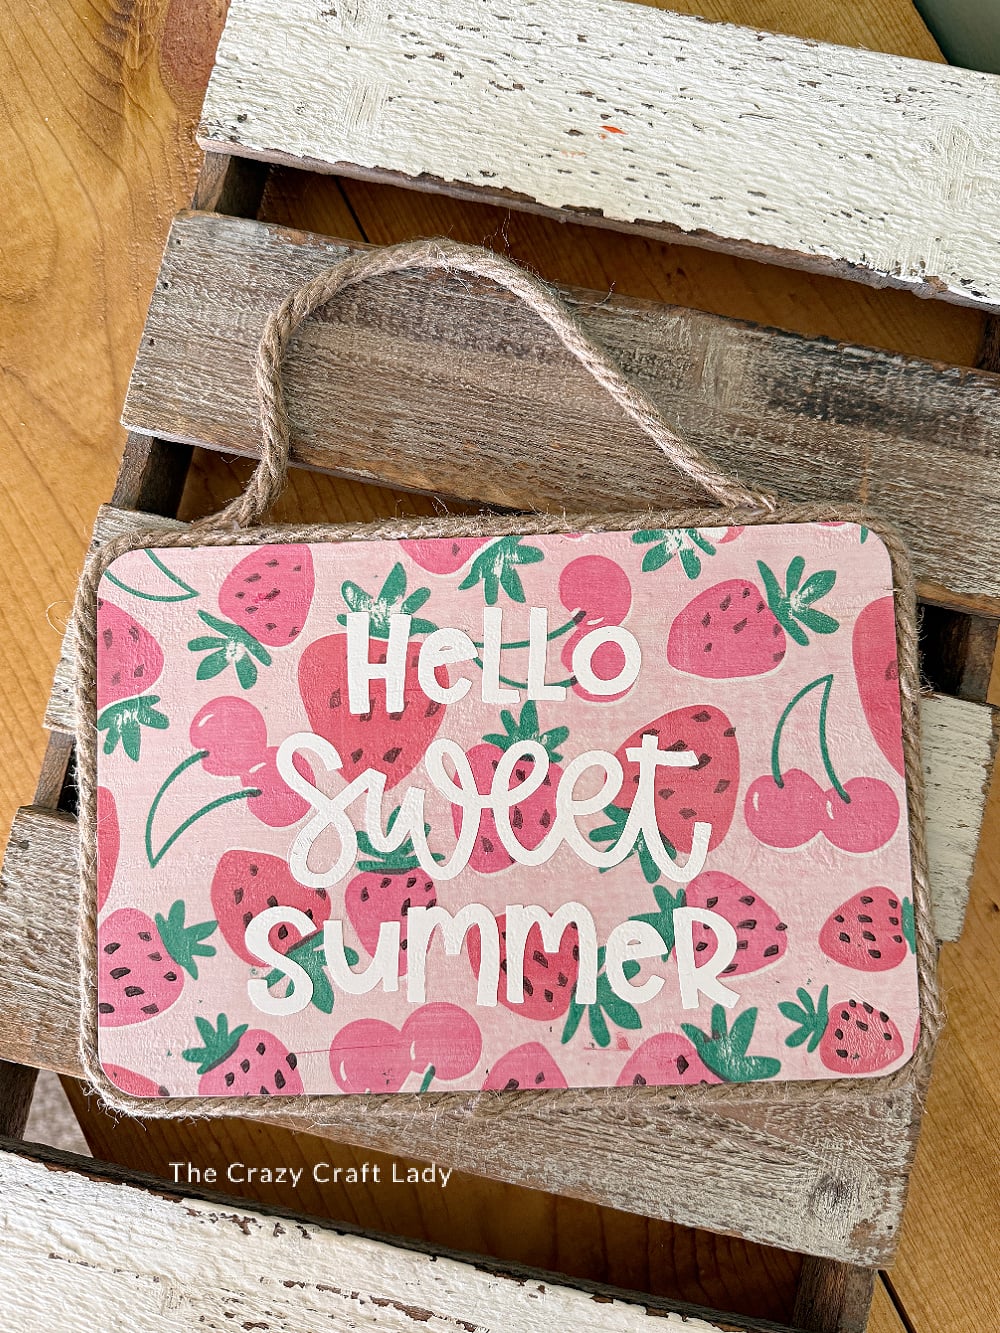
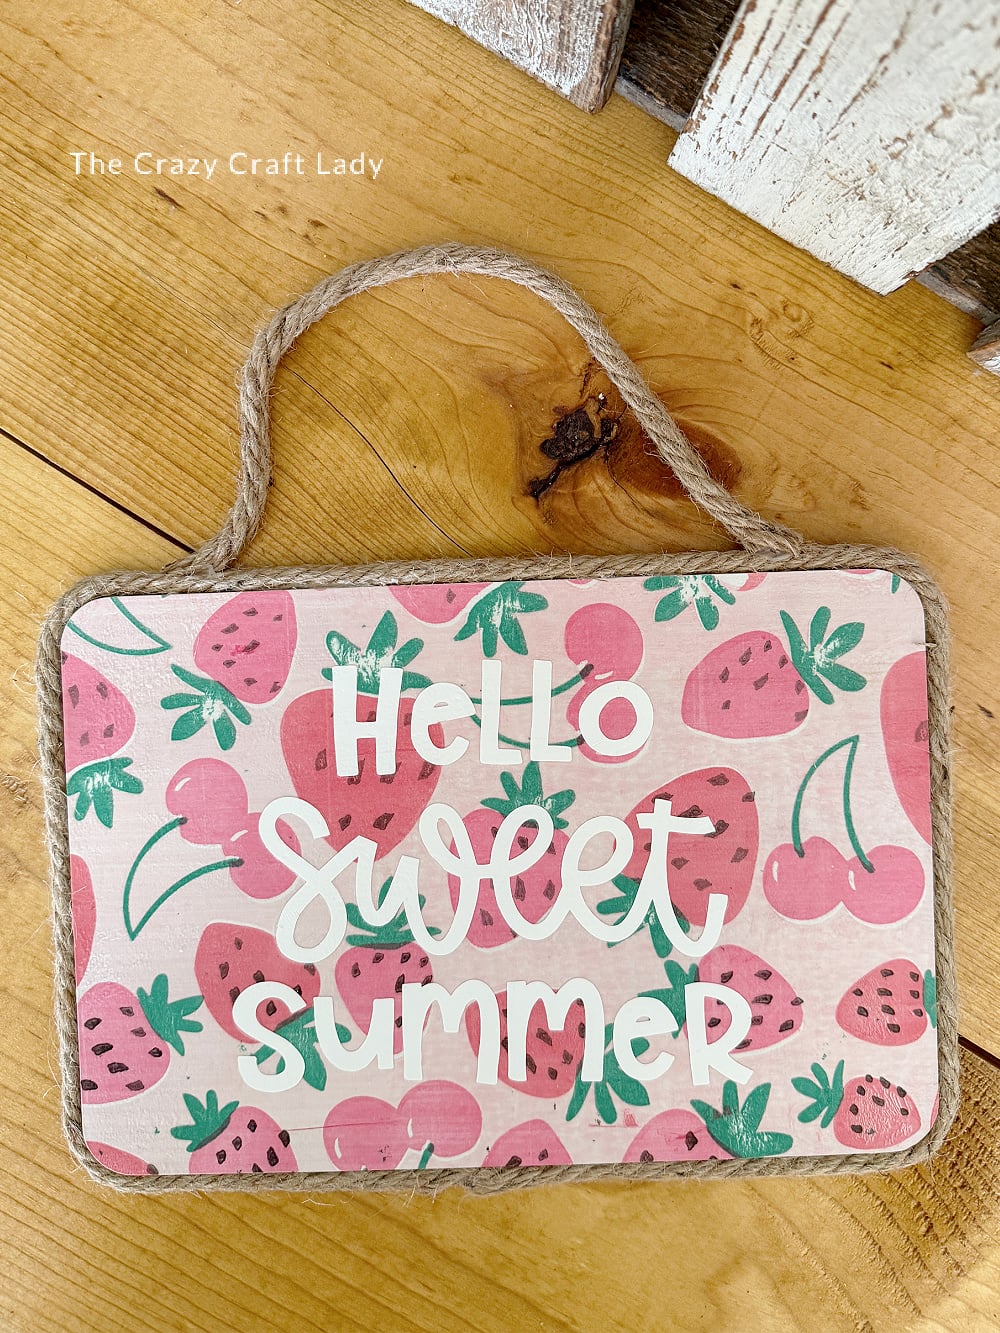
The finished craft
This DIY strawberry summer sign is such a fun way to turn inexpensive Dollar Tree supplies into custom seasonal decor.
I love how bright and cheerful the strawberry napkin feels for summer, and the jute border gives it a cute farmhouse-inspired finish.
If you’re obsessed with Dollar Tree cutting board crafts like I am, this one definitely deserves a spot on your summer crafting list!
Don’t forget to PIN this craft for later: