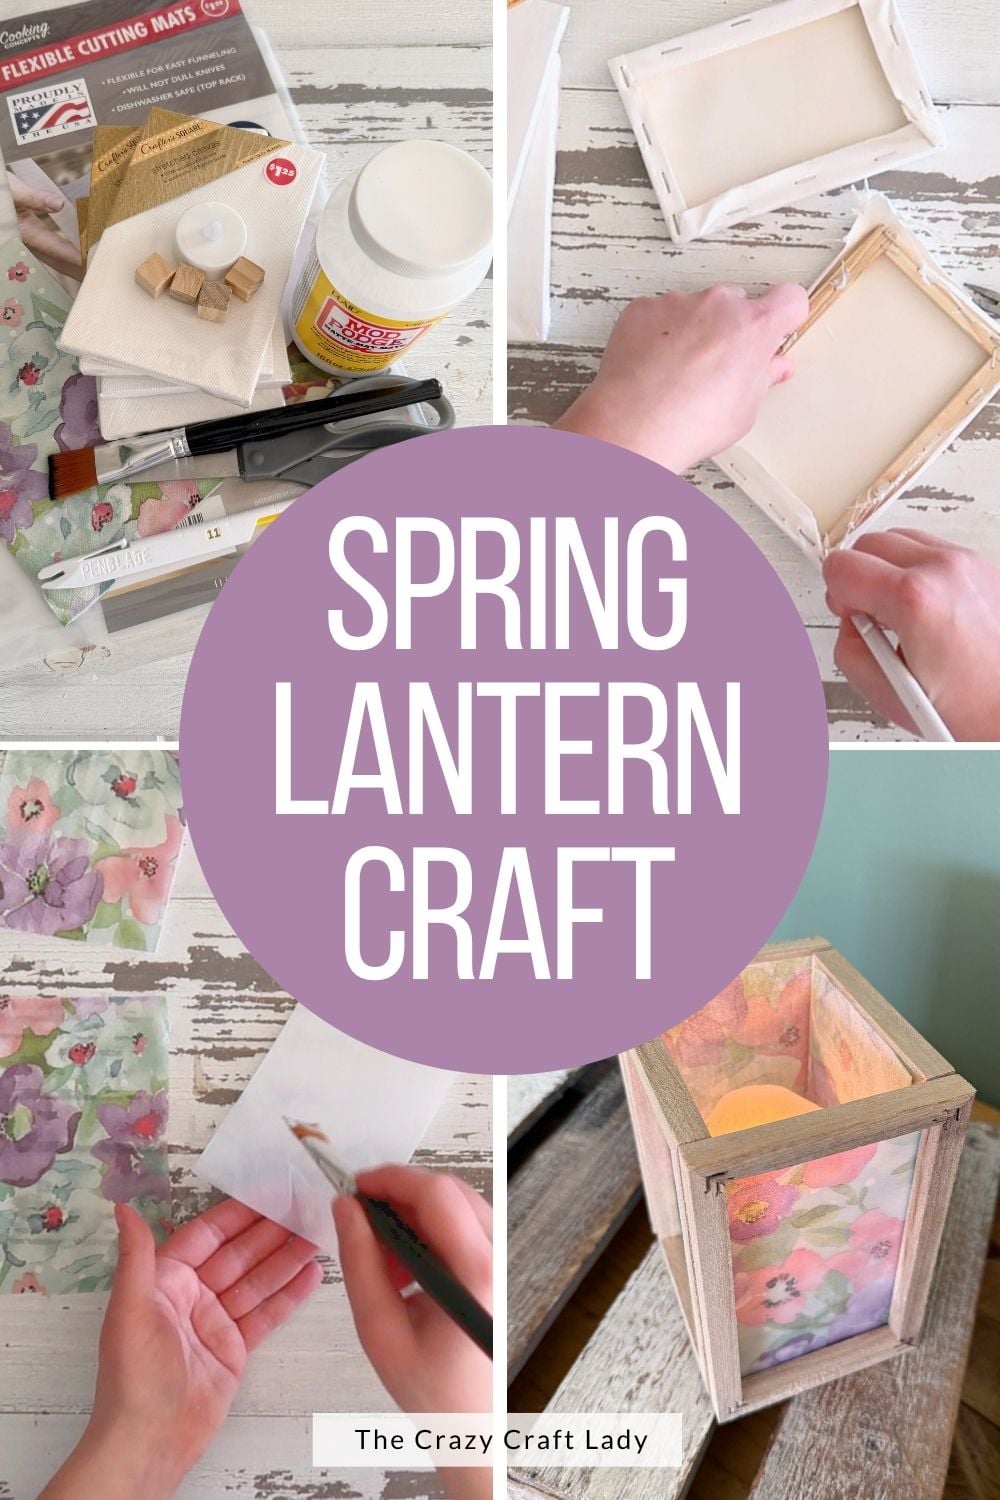
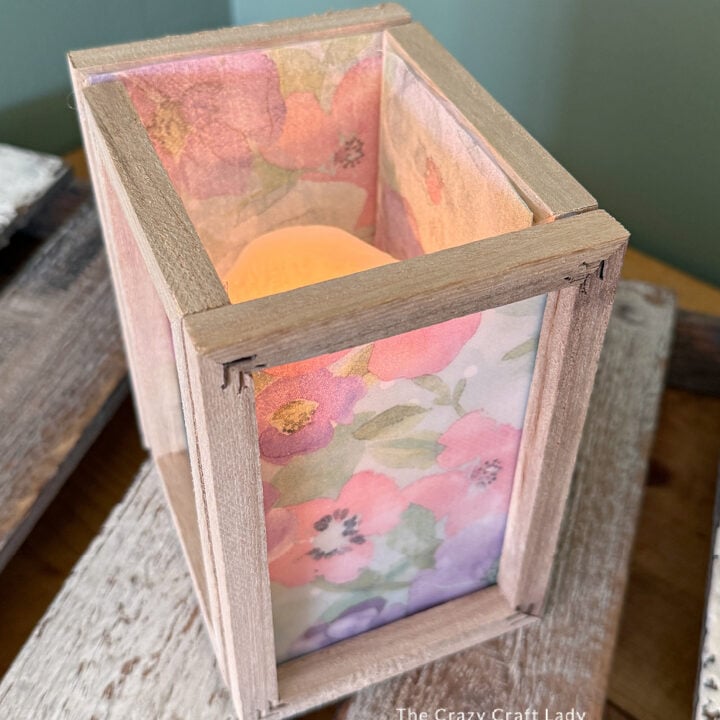
Turn mini canvases into a cute little DIY lantern with this easy Dollar Tree craft using floral napkins and a chopping mat.
How to make a DIY Spring Frosted Glass Lantern using Dollar Tree supplies
This post contains some affiliate links for your convenience. Click here to read my full disclosure policy.
If there are two craft trends I’ll never get tired of, it’s reverse canvas projects and decoupaging napkins. There’s just something so satisfying about turning a basic Dollar Tree canvas into something completely different. And napkins? I’m obsessed with the variety of patterns and colors you can choose from. This project brings both together to create a soft, frosted-glass look that glows beautifully.
Video Tutorial: DIY Spring Frosted Glass Lantern
Watch this quick video to see how this craft came together:
DIY Spring Frosted Glass Lantern
Create a soft glowing spring lantern with this budget-friendly Dollar Tree craft—perfect for seasonal home decor.
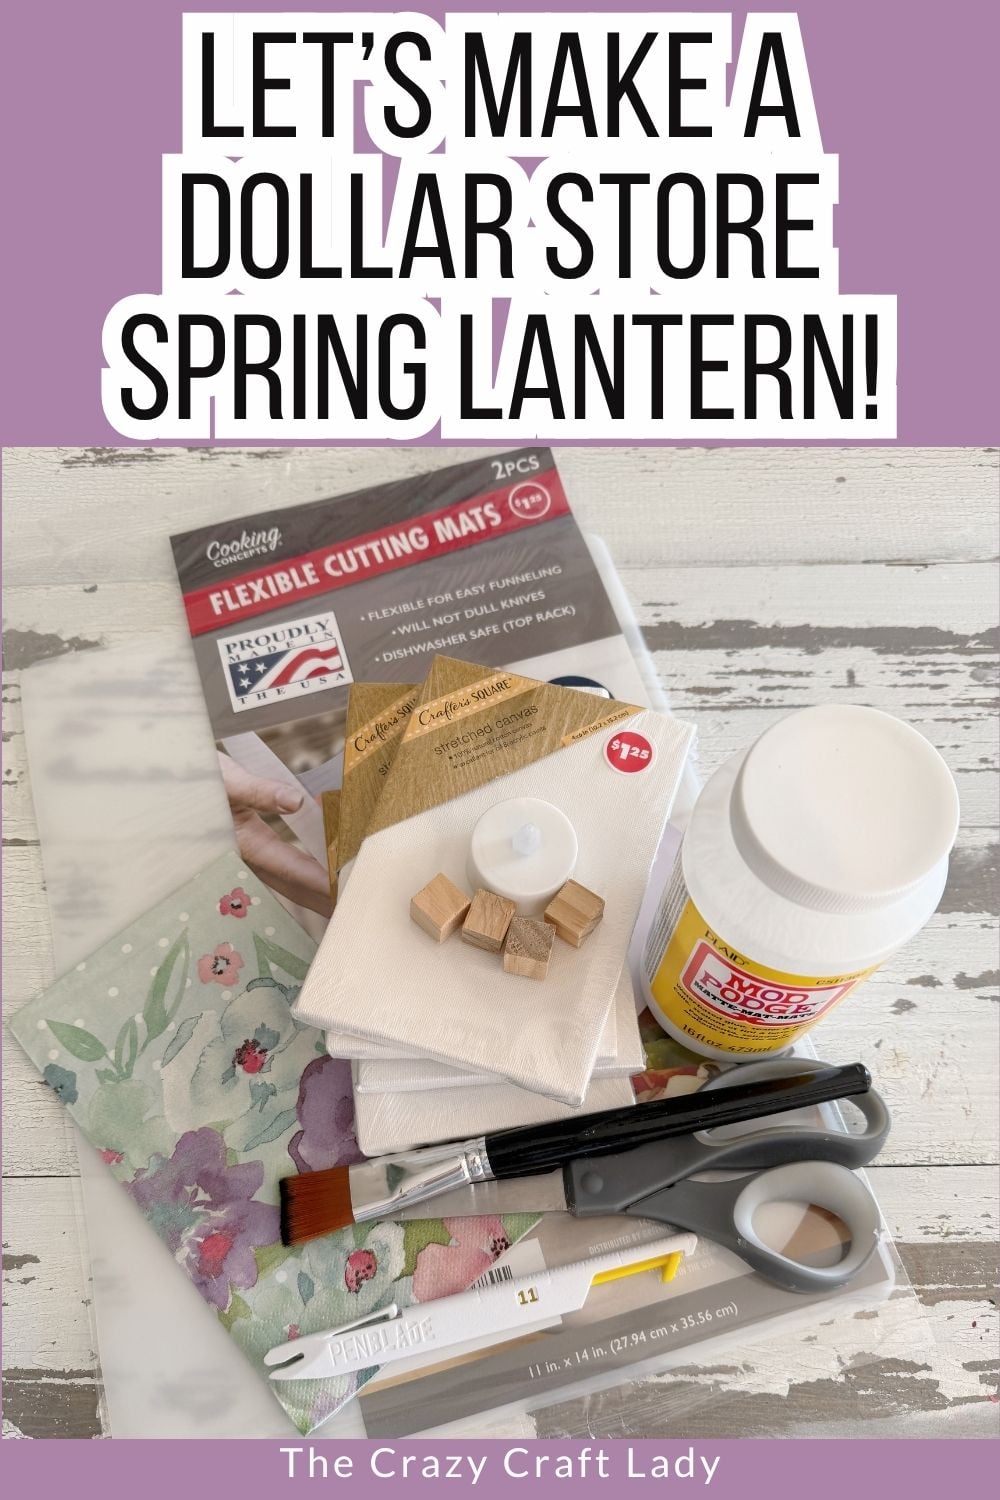
Materials
- 4 mini stretched canvases (4x6 size)
- Dollar Tree chopping mat
- Decorative paper napkins (spring floral or your choice)
- Mod Podge (matte or satin)
- Hot glue sticks
- Battery operated candle
Tools
- Craft knife (or pen blade)
- Scissors
- Paintbrush (1-inch flat works great)
- Sharpie marker
- Hot glue gun
Instructions
- Watch the video. Follow along with the video tutorial for a step-by-step walkthrough of how to make your own spring lantern craft.
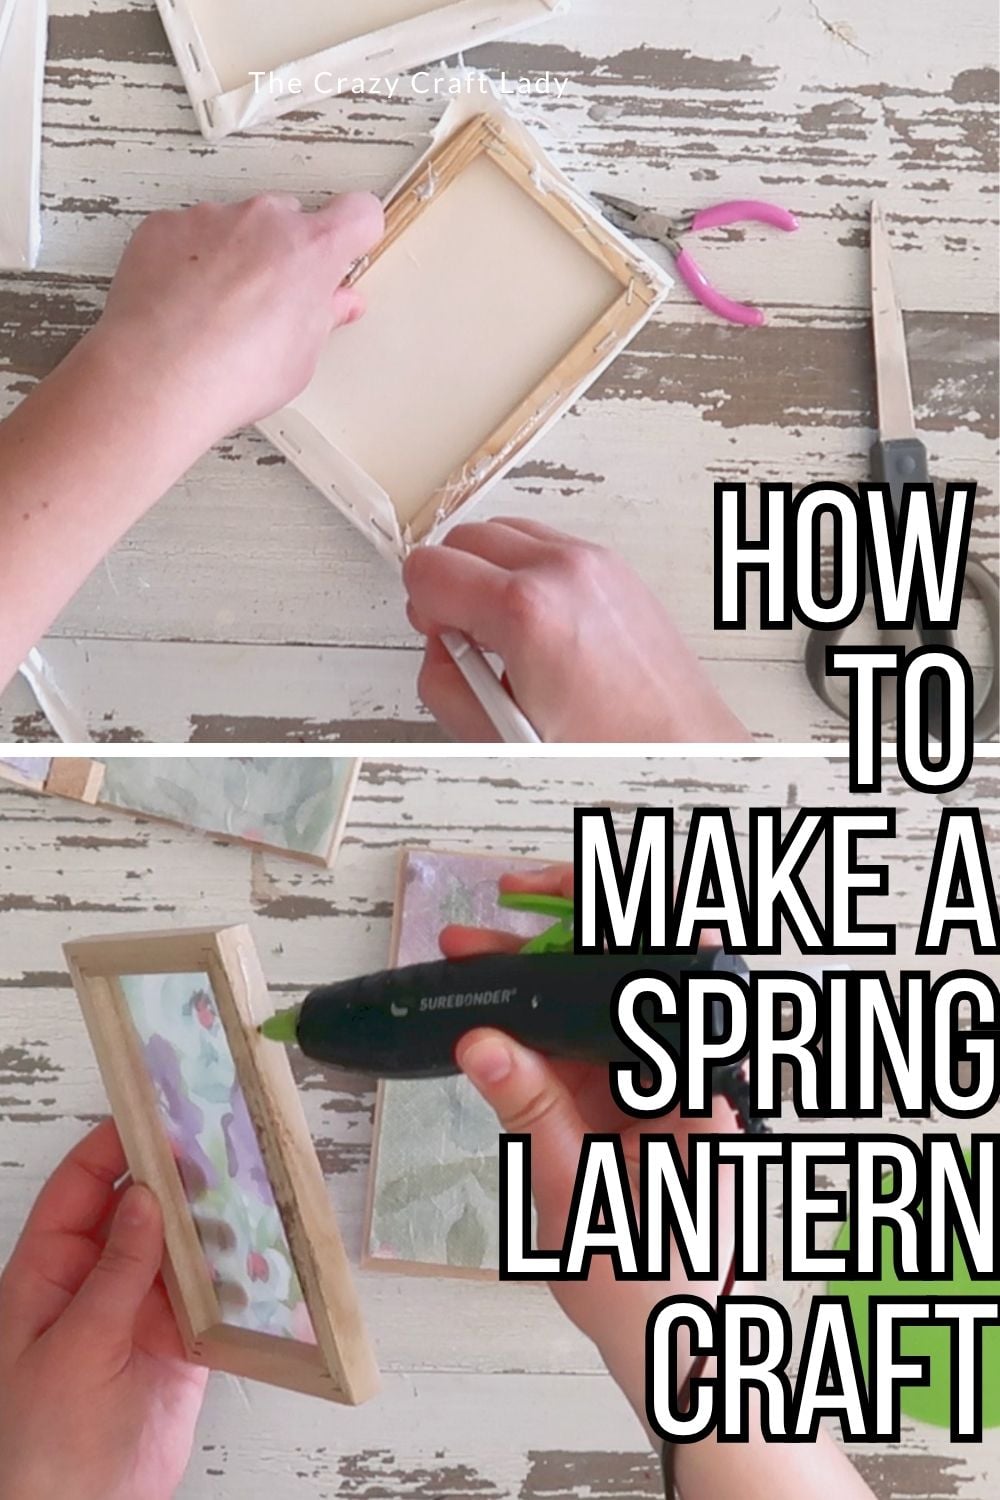
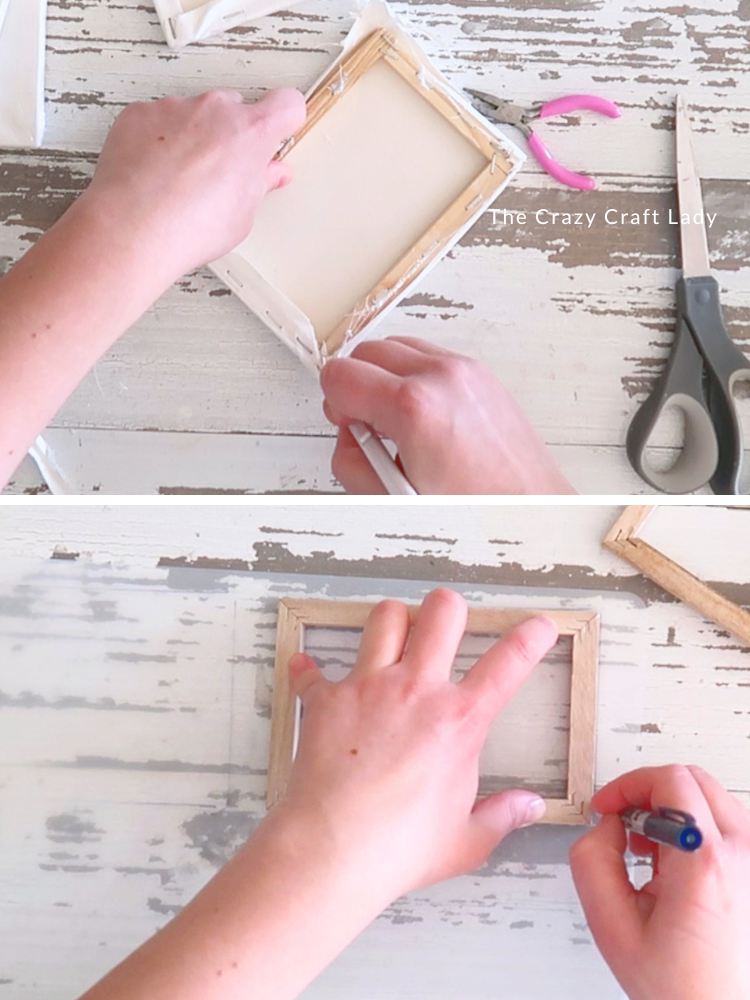
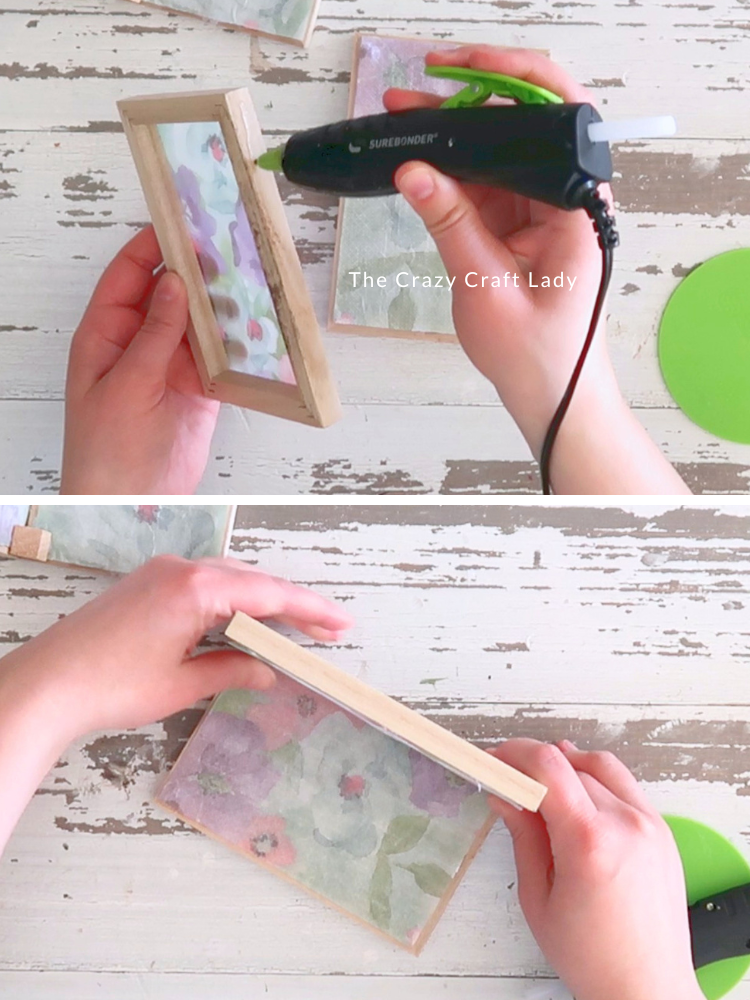
- Disassemble the Canvases. Start by removing the plastic wrapping from your mini canvases. Then carefully cut and peel away all the canvas fabric.. Take your time here, and use a craft knife or scissors to trim around the edges until you’re left with just the bare wooden frames.

- Trace and Cut the “Glass” Panels. Take your Dollar Tree chopping mat and trace each frame onto it using a Sharpie. Cut out four rectangles, making sure each piece is slightly smaller than the frame opening so it fits nicely on the back.
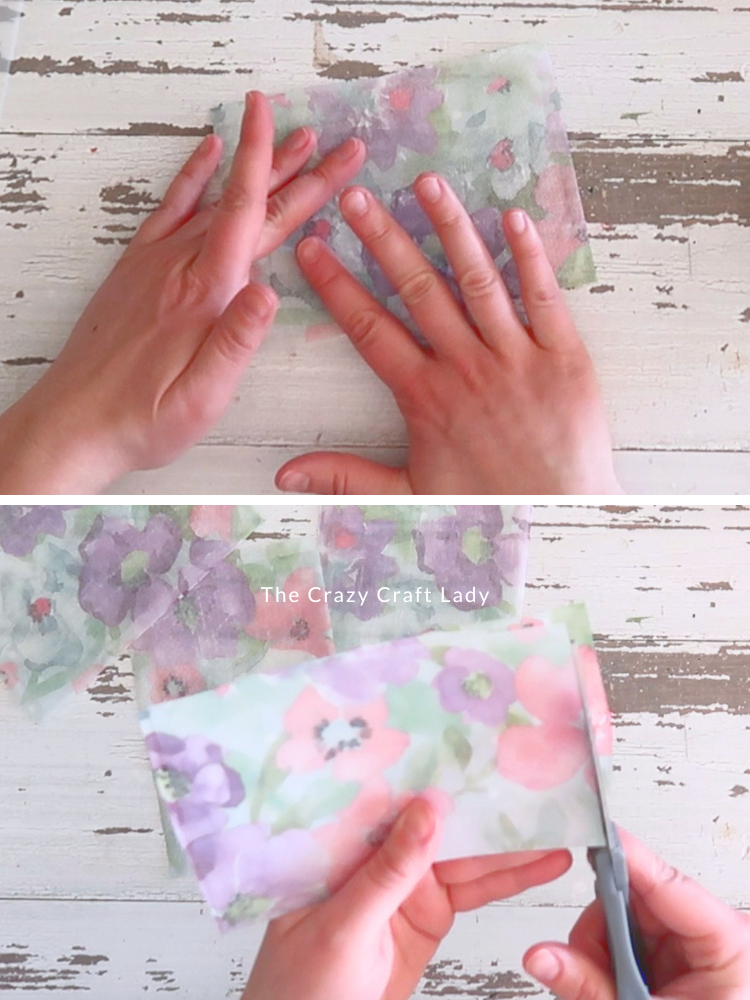
- Prep the Napkin Design. Separate your paper napkin layers. You only want the top printed layer. Cut four pieces of napkin slightly larger than your plastic rectangles.
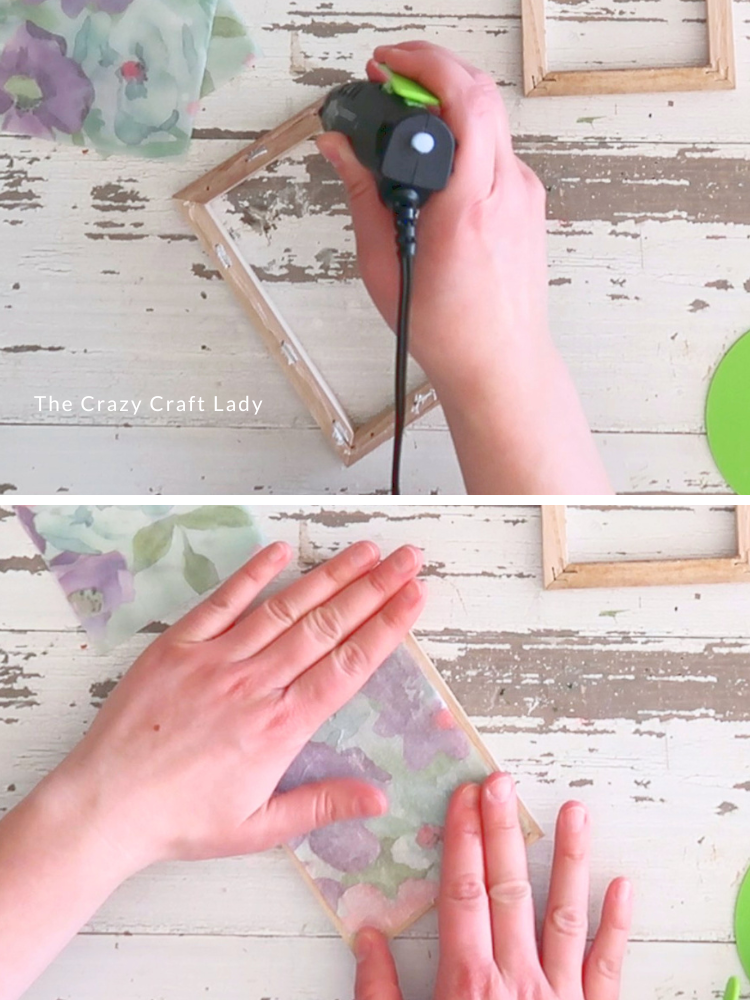
- Apply the Napkin (Frosted Glass Effect!) Brush a thin, even coat of Mod Podge onto one plastic rectangle. Place the napkin printed side down onto the Mod Podge. Gently smooth it with your fingers using a light tapping motion to remove bubbles. Repeat for all four panels, then let them dry completely. Once dry, trim off any excess napkin edges.
- Attach Panels to Frames. Flip each wooden frame over (staple side up). Apply hot glue around the edges, then press your plastic panel into place: Plastic side faces outward, napkin side faces inward. Work quickly so the glue doesn’t harden before placement. Repeat for all four frames.
- Assemble the Lantern. Run hot glue along the edge of one frame. Attach a second frame at a 90-degree angle. Reinforce the corner with a small wood cube or tumbling tower block. Continue attaching all four sides. You can create: A square lantern (if staggered correctly) OR a rectangle lantern (like I accidentally did… and honestly still love!)
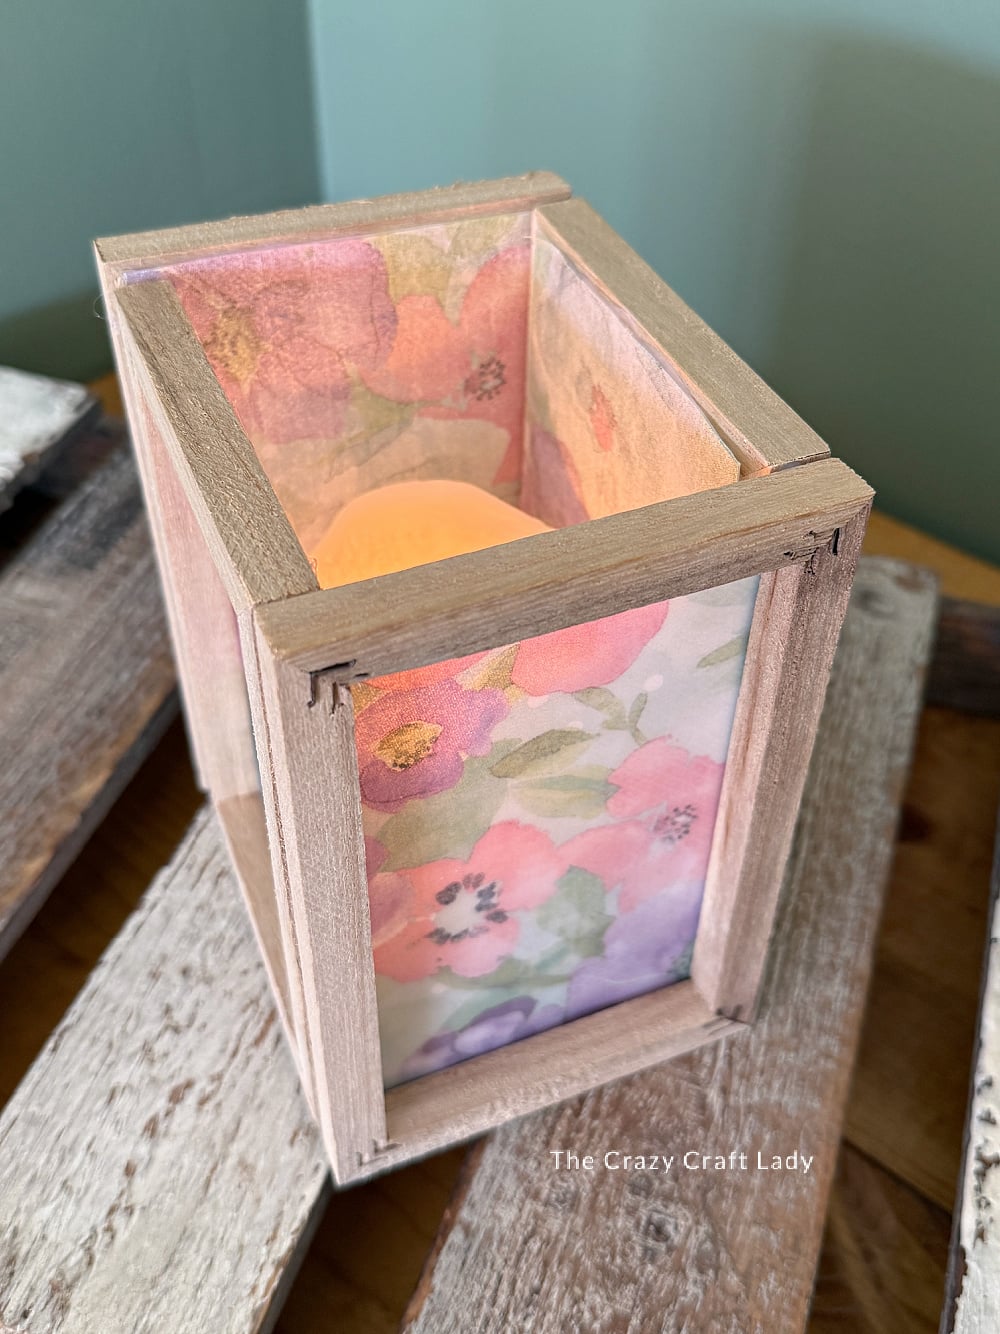
- Add the Candle. Place a battery-operated candle inside the lantern. The light will glow through the napkin panels, creating a soft, diffused effect that’s SO pretty, especially at night.


Notes
Tip: If your frames feel flimsy or poorly made, swap them out. Some batches are better than others!
The Finished Lantern Craft

I think my favorite part about this craft is that it’s so incredibly customizable. Switch out the napkins and you’ve got: Spring florals, Christmas patterns, Fall leaves, Valentine’s designs…. Thee sky is the limit. I’m already planning a Christmas version because the glow-through calling to be used on a cozy winter craft.
PIN This Craft for Later